- Insert WordArt Article
- Add a hyperlink to a slide Article
- Create a PowerPoint presentation from an outline Article
- Check spelling in your presentation Article
- Create and format a table Article
- Insert a linked Excel chart in PowerPoint Article
- Add slide numbers, page numbers, or the date and time Article
- Set text direction and position in a shape or text box Article


Create a PowerPoint presentation from an outline
If you've already jotted down an outline of your presentation in Word and now need a quick way to add it to your slides, you can import a Word outline into PowerPoint.

Create an outline in Word
Select View > Outline . This automatically generates an outline and opens the Outlining tools:
If your document has headings (any heading levels from H1-H9), you’ll see those headings organized by level.
If your document doesn’t have headings and subheadings yet, the outline will appear as a bulleted list with a separate bullet for each paragraph or body text. To assign or edit headings, heading levels, and set up your document structure:
Select a bulleted item. Or press the Ctrl key to select several lines.
In the Outline Level box, select a heading Level 1 for slide titles, Level 2 for bullet points on that slide.
When finished or to edit your document, select Close Outline View .
If you need help creating an outline, see Create an outline in Word .
Save an outline in Word
To save your document, select Save , name your file, and then select Save once more. Select Close to close your document.
Note: Your Word document must be closed to insert it into a PowerPoint presentation.
Import a Word outline into PowerPoint
Open PowerPoint and select New Slide > Slides from Outline .
In the Insert Outline dialog box, find and select your Word outline and select Insert .
Note: If your Word document contains no Heading 1 or Heading 2 styles, PowerPoint will create a slide for each paragraph in your content.
Guidelines for importing an outline
PowerPoint can import an outline in .docx, .rtf, or .txt format.
If your outline is a Word document Apply a heading format to any text you want to include in a slide. For example, if you apply the Normal style to a block of text, Word won't send that text to PowerPoint.
If your outline is a .txt file Use indentation to indicate heading levels. Any unindented lines of text will become titles of new slides.
For PowerPoint to successfully convert your outline to slides, you must follow these guidelines:
If your outline is a Word document:
Apply a heading format to any text you want to include in a slide. For example, if you apply the Normal style to a block of text, Word won't send that text to PowerPoint
Save the Word document as an .rtf file. In PowerPoint for macOS, you can only import Word documents that are saved in Rich Text Format. Click File > Save As , and in the File Format box, select Rich Text Format (.rft) ).
If your outline is a .txt file: Use indents to indicate heading levels. Remember that any un indented lines of text will become titles of new slides.
Insert outline text into a PowerPoint presentation
In a new PowerPoint presentation file, click the first slide. Or, in an existing presentation file, click the slide that you want the outline to appear after.
On the Home tab, click the arrow next to New Slide , and then click Outline .

Locate the outline file (.rtf or .txt) that you want to insert, and then double-click it or click Insert .
New slides are inserted in the presentation based on the text in the outline file you selected. You are now ready to edit the slides and the presentation as you see fit.
Creating a presentation from an outline isn't support in PowerPoint for the web. It requires a desktop version of PowerPoint.

Need more help?
Want more options.
Explore subscription benefits, browse training courses, learn how to secure your device, and more.

Microsoft 365 subscription benefits

Microsoft 365 training

Microsoft security

Accessibility center
Communities help you ask and answer questions, give feedback, and hear from experts with rich knowledge.

Ask the Microsoft Community

Microsoft Tech Community

Windows Insiders
Microsoft 365 Insiders
Was this information helpful?
Thank you for your feedback.
How-To Geek
How to make a powerpoint presentation from an outline.
This is great if you like to start projects with an outline!
Quick Links
Compose your outline, create the powerpoint presentation.
When you plan out your slideshow ahead of time, you might use an outline. This helps determine the content for each slide. In Microsoft PowerPoint, you can pull that outline right into the application and transform it into a presentation.
If you already have an outline, you're one step ahead. If not, you can use an application like Microsoft Word or Notepad for your outline.
Related: How to Create and Work with Multilevel Lists in Microsoft Word
Each line in the outline displays on a separate slide even if you have a multilevel outline .
If you use numbering or bullets in an application like Word , those normally won't carry over to the slides. But with software like Notepad, they may. So, depending on the application you use for the outline, this is something to keep in mind.
You can add the outline to an existing presentation, new blank slideshow, or one with a template . Open PowerPoint and choose the slideshow or make a new one.
Related: How to Create a Custom Template in PowerPoint
On either the Home or Insert tab, select the New Slide drop-down menu. Pick "Slides From Outline."
Browse for the outline file on your computer, select it, and click "Insert."
After a moment, you'll see your outline load into PowerPoint. As mentioned, each line of the outline is its own slide.
From there, you can add text, include images, insert animated charts , and use videos as you normally would.
Creating a PowerPoint slideshow from an outline gives you a good jump-start on your presentation.
- Learn center
- Strategy & planning
How to make a presentation outline: a step-by-step guide

Georgina Guthrie
April 07, 2021
Whether you’re building a house, baking a cake, or writing an essay — having all the necessary pieces in place before you begin will make the task much easier.
It may seem counterproductive to spend time sorting things out when you’re in a rush… After all, why spend time organizing when you could dive straight in? But the fact is, the opposite is true: Planning saves time, and the same goes for creating a business presentation. Start with a presentation outline.
A presentation outline is a bare-bones version of your talk. It should take the general direction of your pitch, plus summaries of your key points. Its purpose is to help you shape your thinking, organize your thoughts, and make sure your material is presented logically.
In this article, we’re going to take a closer look at what a presentation outline is, how storytelling can help engage your audience, and how to create a flawless outline of your own. Let’s get stuck in.
What’s the purpose of your presentation?
This is the foundation on which you will build your whole presentation — so make sure you know the answer to this question. A good starting point is to think about the overall purpose. There are six possible purposes your presentation might have:
- Inspire action
- Inspire or motivate
In a business setting, it’ll usually be ‘to inform,’ along with one or two others. If you’re there to talk about quarterly results, then you’ll want to inform and motivate. If you’re a business coach, your goals will likely be to inspire, motivate, and entertain.
Once you’ve worked this out, you’ll be one step closer to working out the purpose of your pitch. Here are some questions to help you find an answer to this question:
- What do I want people to take away from my presentation?
- How will what I talk about help others in the room?
- What do I want people to do after my meeting?
Note down your ideas and start creating a topline summary of your presentation purpose. Summarize it into one or two sentences, then put that on your first slide. You can change it later, but this is a good starting point.
Create a story arc for your presentation
As humans, we love a good story. We’ve been doing it since, well, forever. The earliest cave paintings helped the painters and those who saw the paintings make sense of the world.
Interesting things happen when you start telling a story. Your brain’s auditory cortex (aka the bit that helps you listen) switches on. This helps you imagine the activities being described. Meanwhile, the frontal and parietal cortices are fired up, which helps us emotionally engage with what’s being said.

Stories have been, and will always be, a powerful tool for bringing people together. Great stories persuade and inform; the best stories inspire and stay with us. But we don’t often see this happening in the boardroom, where graphs and quarterly results preside.
Stats and numbers suck the life out of a presentation. We think these details will speak for themselves. But… they don’t because, well… they’re boring, and they make us switch off. If you want to inspire your audience, you need to weave those stats into a story . But where do you begin, and how do you start?
Storytelling isn’t something only a few select people are good at. Anyone can master the art with a little practice. It doesn’t even require heaps of creativity because the truth is, stories are formulaic, and once you’ve got the formula down, the rest runs on autopilot.
Let’s look at how to build your notes and ideas into a compelling story using one of the formulas below.
1.Fact and Story
Mixing storytelling with facts works in a kind of mutually supportive cycle. Facts add substance to the story; the story adds interest to the facts.
In this structure, you weave the two together and move back and forth between the two.
- Start with a ‘what if’ question. For example, if you were pitching a vacuum cleaner, your initial sales pitch might be ‘what if you didn’t have to lose suction?’
- From here, work in facts that illustrate the way things currently are. To continue with our example, it might be current stats on traditional vacuums losing suction. Keep alternating facts with fiction throughout the body of your presentation.
- End on a high note that makes the listeners feel like they learned something and want to move to action because of it. For example, to invest in your new product, or to sponsor your new app .
2. The hero’s journey
From Odysseus to Chihiro , adventure stories typically feature a hero who goes on a journey fraught with peril and learns a vital lesson at the end of it. It’s a formula employed by thousands of writers — and you can draw from it to add some drama to your presentation.
This structure works really well for inspirational personal stories, or tales about a company from its humble beginnings to the success it is today.
- Begin somewhere neutral. The situation is neither ideal nor unbearable.
- Introduce a challenge — one that needs to be solved.
- Present a worsening situation. The problem is being addressed, but things are still getting worse.
- Talk about rock bottom. The situation seems impossible; there is apparently no way forward and all seems lost. Until…
- Talk about a new discovery that offers hope.
- Armed with your new abilities, you can tackle the issue head-on.
- Talk about resolving the problem, but instead of returning to the way things were before, the hero (you) discovers an even better way of living.
- Finish with a lesson, which you can share to inspire your audience.
3. The Pitch
The ‘pitch’ style of presentation is commonly used by salespeople. The goal is to show how a product or idea can help an individual overcome a hurdle toward a positive outcome. The story should be relatable, so the audience can picture themselves in the situation and, therefore, benefitting from the solution.
- Start with a summary of the way things are in a way that’s easy to relate to.
- Introduce the problem or hurdle that you need to solve. Make it relatable to further help your audience put themselves in the situation.
- The solution: give your audience a glimpse into a possible solution.
- The fork in the road: Give your audience a couple of options for solving the problem. Offer an average option first, then follow up with a better one.
- Close: Choose the better option and explain why that’s the best one (and only real suitable choice).
- Finish up by telling the audience exactly how to solve the problem, step by step.
- But that’s not all: Before you finish, talk about extra benefits that extend beyond simply solving the problem. Finish on an uplifting high.
4. The explanation
This presentation format is for when you want to teach your audience something — whether that’s a process, a new skill, or a way to overcome a problem. It has similarities with the fact and story structure, insomuch as facts should weave into the story.
- Explain how things are at the moment, what the goal looks like, and how you plan to get there. You can even start with a story to add emotional interest from the get-go.
- Take your first step on the journey toward the final destination.
- Add more steps that build on this.
- Take a moment to recap on the points you’ve covered so far while tying them into the main point. This will help your audience visualize the ground you’ve covered and see where you’re heading.
- Add the finishing pieces to the puzzle and lead your audience to the end.
- By the end of your journey, your audience should feel as though they’ve learned something new.
5. The Opportunity
A close relative of the pitch, this three-part structure swaps a hurdle for an opportunity. Here, you want to show your audience that a problem they thought they had actually has an easy fix.
- Start with the situation as it is now.
- Next, add a ‘but’ — this could be a small hiccup that stops things from being as good as they could be. For example, our chocolate pudding company is doing really well. But we could be doing better if we changed supplier.
- Talk about the opportunity, with as many facts and stats as possible to make it feel achievable and real.
- Add a conclusion.
- Explain why the product or service meets the challenges raised. Add more stats and facts to support your point.
How to plan your presentation
Now you’ve worked out your structure, it’s time to start building your presentation, pulling in all your points and forming them into a story.
Storyboarding is the best way to do this. Directors use storyboards to map out their films scene-by-scene — you’re going to use it to map out your presentation, slide-by-slide.

(Don’t worry, you can do stick people and squiggles if drawing isn’t your strong point.) Image Source
The trick here is to use broad strokes without adding too much detail. Make it too wordy and you’ll lose your top-level view, which is important for assessing the arc of your story. Ideally, have one or two sentences on each slide summarizing what each one will address.
You can do this with pen and paper, but when it comes to final drafts and editing, it’s a good idea to move your drawings over to a digital format. It looks far neater, and it means that if you need to change something, it’s as simple as deleting or editing a cell or slide rather than you having to start over.
Once you’ve got your rough storyboard more or less ready, it’s time to start building your presentation.
Your presentation outline
Using a presentation template will be a big help here. First, choose your template — then start adding pre-made slides according to your storyboard. For those who didn’t plan, this can be a bit of a nightmare that usually ends up with you shuffling slides around indefinitely. For those who planned, it’s simply a matter of putting all your hard work in place, then spicing it up with pictures, video, and audio.
Top Tip : If your slides are there to support your spoken words, try not to make them too wordy. Talking too much will distract your audience, whose attention will be split between what’s on screen and your voice. Instead, opt for images and video. If you’re sharing your presentation slides without presenting them, keep your communication simple and succinct. A wall of text is never engaging.
Finally, rehearse your presentation. According to experts, 10 is the magic number when it comes to practicing speeches . The more you practice, the better it’ll flow, the easier it’ll be for your listeners to get sucked into your story. And when it comes to persuading, inspiring, informing, or selling — having a captive and engaged audience is half the battle.

5 ways to use diagrams to visualize your ideas

Using a SWOT analysis to develop core business strategies
Subscribe to our newsletter.
Learn with Nulab to bring your best ideas to life
December 4, 2023
How to create a presentation outline (with examples)
Four methods to create a presentation outline and example outlines for inspiration
Co-founder, CEO
Like it or not, if you work in an office environment or go to school, you'll probably have to make a presentation at some point. But creating a great presentation can be challenging, especially when you're short on time or suffering from writers' block.
Luckily, there are lots of ways to get a head start on your presentation outline, and in this article we'll walk through four options for creating a presentation outline and show you several examples of great presentation outlines.
Why should I write a presentation outline?
An outline helps you organize your ideas in a clear and logical way . Instead of getting bogged down on details like formatting or word choice, an outline presents the overarching story of your presentation with just a few main points. This helps to make sure you have a cohesive narrative before you dive in to the nitty gritty work of wordsmithing individual bullet points or selecting the perfect slide theme.
If this sounds like a lot of work, it often is! But spending time writing a great outline will save you time and effort down the road because it will be easier to organize your work and create each slide when you understand how it fits in to the broader presentation.
Here are four ways you can get a start on creating your next presentation outline.
Method 1: Create your outline from scratch
Creating an outline from scratch may sound intimidating if you have never written a presentation outline before, but this is the most straightforward way to get started.
Start by jotting down the three main points you want to make in your presentation. Once you have your main ideas in order, write down a few supporting details and examples for each point.
Then, add an introduction (find an interesting image, quote, or question to help grab the audience's audience) and a conclusion (decide on the best way to summarize the takeaways from your presentation) to the outline, and you are ready to go.
This method is great for those who prefer to have complete control over their presentation and want to create a custom outline that works best for their needs.
Method 2: Create a presentation outline using an AI presentation maker
If you're short on time or looking for a quick way to get a first draft of a presentation outline that you can then refine, using an AI presentation maker is a great option.
Plus AI lets you type a short prompt like "Create a presentation that provides an overview of the Norwegian oil industry," and it will automatically generate an outline of a presentation for you. After Plus creates the outline, you can change the titles of slides, rearrange slides, and remove any pieces of the outline that are not necessary.

From there, once your outline is created, you can click the "Generate presentation" button, choose a template, and let the AI create the first draft of your entire presentation.
This method is a good option for those who want to create a polished presentation without getting stuck with a blank piece of paper. Instead, it frees you up to take a first draft presentation and customize it for your needs.
Method 3: Create a presentation outline using ChatGPT
ChatGPT is an AI chatbot that can help with a wide variety of tasks - everything from acting as a therapist, to sharing recipes, to helping you come up with presentation ideas and creating content for a presentation .
To have ChatGPT help you generate a presentation, you can take two different approaches:
- Use a custom GPT that has been trained to help people create presentations or
- Ask the general ChatGPT interface to "Create a presentation outline for me on the topic of [XYZ]."
Both approaches will yield similar results, but a custom GPT like Plus AI presentation maker will be more fine-tuned to helping people create presentations. It will also provide additional functionality like providing a visual preview of the slides and feedback on how to improve your presentation.
Method 4: Create a presentation outline using a template
Last but not least, using a template is a good way to speed up the process of creating a new presentation outline. Similar to using an AI presentation maker, a template can give you a first draft of an outline that is easier to edit and refine than starting from scratch.
Presentation templates often come pre-designed with example text and images, so all you have to do is fill in your own content. For example, this TED Talk presentation template provides some instructions on how to create an outline for a TED Talk-style slide deck.
The secret to using this method is to find the closest template to the type of presentation you want to create. You should use detailed search terms to and look across multiple sites and resources to find one that matches the content and style that you would like.
Once you have your template, start by reviewing the overall outline or structure and tweak it to meet your needs. Then, you can fill in the specific content (e.g., text and images) with your materials to make it your own to quickly make a beautiful presentation.
Presentation outline examples
Basic presentation outline example.
Let's take a look at a presentation outline and accompanying notes for a persuasive presentation on encouraging people to meditate every day:
I. Introduction
- Hook - find a striking image and tell a story
- Thesis statement - everyone should meditate for 10 min per day
II. Main point 1 - Meditation is one of the easiest ways to improve your health
- Physical health
- Mental health
III. Main point 2 - Meditation is backed up by thousands of years of practice and research
- One anecdote from antiquity
- One anecdote from recent research
IV. Main point 3 - You can get started with meditation today
- Basic technique
- Tips for newcomers
V. Conclusion
- Summarize key points
- Call to action
As you can see, this is a relatively lightweight plan for the presentation, but it provides an easy-to-understand framework that we can fill in with slides.
There are rough notes on specific content for the different points in the presentation, but we don't need to write out everything in fine detail, just the broad strokes.
Pitch deck outline example
Now let's review an outline for a pitch deck that someone might use to present their startup idea to prospective investors. This is for a startup that uses autonomous food trucks to deliver meals to people's homes and workplaces.
I. Problem statement - "Food delivery sucks, and here's why"
- Hook - pictures of typical food delivery headaches (e.g., late/no show, bad selection, etc)
II. Value prop - "FoodDrive revolutionizes the food delivery model"
- Compare value chain of FoodDrive to traditional restaurant and delivery service
- Show how $50 order gets allocated to different people
III. The product - "Customers love our trucks"
- Picture of food truck and menu
- Customer quotes and reviews
IV. Why now? - "Our self-driving technology is ready for prime-time"
V. Business model - "Each truck can generate $2-3M of revenue per year with a 60% gross margin"
- Show high-level financial forecasts on unit basis
VI. Competitive landscape - "FoodDrive's closest competitors don't come close"
- Comparison table with delivery services, in-house delivery, eating out-of-home, etc.
VII. Go to market strategy - "We've tested FoodDrive in 2 markets so far. Here's how we win in new markets"
- Overview of social media strategy
- Case study on new market launch
VIII. Team - "Our team has experience in autonomous vehicles, food delivery, and quick service restaurants"
IX. Traction - "We generate $5M of revenue per year with our 2 trucks, and we can ramp up new trucks immediately"
- Show revenue growth chart with focus on time to ramp new trucks to productivity
X. Fundraising goal - "We are raising $50M to expand FoodDrive to 10 more markets"
- Highlight key milestones we aim to reach with additional funding
Even though a pitch deck is a specialized type of presentation that often requires specific content, it's helpful to start with an outline to build out the 'story' behind the content. That way, you have a cohesive story rather than a set of disparate slides.
How can I create a presentation from an outline?
Once you have your presentation outline written, it's time to start writing your slides. Since you already know the main points you are trying to make in your presentation, the main decisions here are
- What type of visual style you want to follow
- How many slides you want in your presentation
- How you will present or share the slides
To get a head start on creating a first draft of your presentation, you could enter your outline into an AI presentation maker.
This will provide a first draft of the slides so that you can focus on making sure they tell a cohesive story or tweaking individual slides to leave a memorable impression.
Other tips and tricks for great presentations
Here are some resources to help you create great presentations:
- Make slides look good - Here are six tips for making visually appealing slides.
- Number of slides - Here is a calculator that can help you calculate how many slides you need for a presentation depending on how long you need to present.
- Unique presentation ideas - Here are 250 ideas for presentation topics that will help you create a great presentation.
Creating a presentation outline can be one of the most time-consuming parts of the creative process for making a new slide deck. Luckily, there are many tools and templates that can help you kickstart this process.
With these four methods, you can choose the one that works best for your needs and get started on your presentation outline today.
And once you have your outline, make sure to try out a tool like Plus AI presentation maker to quickly get your slides as well!

Latest posts
Latest post.

Five lessons for building AI apps
Five things we've learned the hard way about building AI-powered apps
How many slides do I need for my presentation?
How many slides for a 10 minute presentation and the 3-2-1 rule for presentations

How to add bullet points in Google Slides
For an effective presentation, we’ll show you how to add bullet points in Google Slides as well as how Plus AI can provide you with content for your lists.
More resources
An in-depth review of slidesai and alternative ai presentation tools.
An in-depth review of SlidesAI.io with how it works, pricing, and real user reviews. Includes top alternatives to SlidesAI for making AI presentations.
MagicSlides and alternative AI presentation tools
An in-depth review of MagicSlides features, pricing, and alternative AI slide creation tools

How to convert text to PowerPoint
Want to use an existing doc to give you a jumpstart on creating your slideshow? We’ll show you a few ways to convert text to PowerPoint both online and on your desktop.

How to Outline a Presentation: A Complete Guide From a Pro
- Filed under: Public speaking articles , Speaking tips , Speech preparation
When you’re writing an important speech, you must start with a clear outline. However, I find that many speakers are uncertain of how to write a good outline for their presentation. This is why I decided to write a guide for you, in hopes that learning to perfect your outlines will help you give better presentations in the future.
How do you outline a presentation? Always start with your introduction and end with your powerful closing. Flesh out the body by listing topics in the order that you want to cover them in. Never skimp on the important details of your speech. Remember that an outline is only a draft.
I know at this point that you still have questions, and that you still be confused at how to write the best outline for your speech. But writing a good outline for your presentation does not have to be stressful! This is my complete guide from a pro for you, in hopes that you can take the stress out of this important step.
Table of Contents
How to Outline a Presentation
Outlining a presentation can be done with a regular piece of paper, or on a word processing program on your computer. If you are hosting a PowerPoint presentation, you may prefer to do the entire thing from the comfort of your computer. But if you do decide to write your outline on a piece of paper, make sure you use a pencil and eraser so that you can make changes as you go along.
The very first step in creating an outline is to ask yourself what the purpose of your presentation is.
Write your main message or a one-sentence summary of your thesis at the top of your outline when you get started. This may help you stay on task, and it will keep the purpose of your speech right in your eye’s sight. After all, you don’t want to stray too far off the main topic of your presentation !
Remember, a quality outline is meant to enhance the purpose of your presentation. If you do not write a proper outline, you may risk not properly conveying the right message to your audience.
Or you may even forget to cover essential points that you wanted to talk about. A thorough outline is especially important if you are planning to speak without notes.
You should remember to properly summarize what you want to say with every sentence of your outline. After all, this is not a full script, so a summary is all you really need. Remember to rehearse and practice with your outline, so that you can remember what you have written.
Start With a Strong Beginning
Your introduction is where you start strong by grabbing your audience’s attention from the very beginning. But if that makes you feel stressed out, just remember to stay calm! Creating a great first impression from the beginning of your speech is not as difficult as you might be worrying.
When you create a strong beginning, you should try some of the following:
- Start with an attention-grabbing statement that captures your audience from the start. If you have a few ideas but are not sure what to use, try running your ideas by a trusted friend or mentor.
- Give a strong signal that you are beginning your speech. You don’t want your audience unsure of whether you’ve actually begun or not.
- Give the main thesis statement about the purpose of your presentation.
- You could start by giving a brief preview of all of the things that you are going to talk about in the body of your speech.
- Talk about your credentials at the beginning. However, you should make sure to find a way to do it that is entertaining. You don’t want to risk boring your audience from the very beginning of your speech!
- Thank your audience from the very beginning! This is not only a good way to begin your speech, but a good way to end it, as well.
- If there are any current events or famous historical events that relate to the purpose of your presentation, you can start by talking about these. However, pick only one so that you do not draw your introduction out too long.
- Ask your audience a question at the beginning. You could draw out their interest by answering this question at a later point in your speech.
- Whenever possible, make sure you begin your speech on a positive note . This sets a good tone for the rest of the presentation.
- Start by telling a story that relates to your presentation. A good reason to start with a story is that it helps you form a strong connection with your audience from the beginning. Write some of the main details of your story in your outline so that you remember them.
Be reminded thought, that sometimes it is wise to write your introduction last as only you know what you’ll be introducing. This way, you’ll also avoid including something in your introduction that you won’t be actually talking about.
Once you have written out your introduction, you have completed the first step in creating an excellent outline for your presentation.
Create a Powerful Ending
In my experience, it can be easier to create ending before you flesh out the body of your presentation. However, it is up to you if you prefer to create your outline in a different order.
If you are a regular reader, you might have realized that I already posted an in-depth article here about how to end a presentation in a powerful way . Right now we are going to talk about the same thing in somewhat less detail.
Recommended books
How to Deliver a TED Talk: Secrets of the World's Most Inspiring Presentations
Jeremy Donovan
Resonate: Present Visual Stories that Transform Audiences
Nancy Duarte
Confessions of a Public Speaker
Scott Berkun
Talk Like TED: The 9 Public-Speaking Secrets of the World's Top Minds
Carmine Gallo
The Checklist Manifesto: How to Get Things Right
Atul Gawande
The First 20 Hours: How to Learn Anything... Fast!
Josh Kaufman
Just like with your beginning, make sure that you’ve made it obvious you are ending. After all, few things are more awkward than your audience sitting there long after you’ve finished, feeling confused about whether they should leave or not.
If the point of your speech is to motivate your audience to do something, you might consider ending your speech with a call to action . A call to action is simply an instruction that you give your audience about something you want them to do.
You could also potentially end your presentation with a powerful quote or an entertaining story . And if you have a unique tagline that exists to help promote your personal brand, consider ending with it.
But if you are planning to have a question and answer period at all, make sure you are not directly ending with one. Plan to wrap up your question and answer period before delivering your speech’s closing at the end.
This is because ending with a question and answer period is not only not memorable, but a negative question from an audience member can leave a bad taste in everyone’s mouth . This is not the last thing you want your audience members to remember as they’re leaving!
And as always, you should thank your audience at the end of your speech. This will make them feel valued, and impressed with your gratefulness.
Flesh Out the Body of Your Presentation
So, you’ve got your beginning and ending all figured out, but now what else do you do with your outline? This is the stage where you work on the body of your speech. That is, you will want to think about what you want to say in between your beginning and end. Here are some speech writing tips I have written about previously.
Write the main points of your outline in order
It may be easier for you to write bullet points or even a numbered list. List your main points in order of what you want to talk about. If at first glance the topics don’t seem to flow, it is okay to re-arrange them.
You can also decide at this point if there is anything you want to add or subtract. If you feel like you’ve made a mistake, don’t worry! It is okay to make any changes along the way.
Add sub-points and transitions to your topics
Add sub-points to your main points in order to further flesh out your outline. Even if you want to keep it simple, sub-points may help you to stay on track and remember what you were going to say.
You can also add to the ideas that your main points present. Make sure that the transitions from one point to another flow smoothly from one thing to the next.
Don’t forget the essential details!
Are there any special details that you need to remember for your presentation? Put these in your outline so that you don’t forget them. This can include important names, dates, and locations that you need to remember.
Write down how long will it take
If your speech is supposed to cover a certain amount of time, try listing times for each of your main points. This may help you not go over or under your time.
Also, take a look at these articles:
- 11 Great Tips How to Write a Great Persuasive Speech
- How to Deliver a Perfect Elevator Speech
How to Outline a PowerPoint Presentation?
You may be thinking that you don’t need an outline for your PowerPoint presentation. However, don’t rely on your slides alone ; you need a proper outline, too. An outline for a PowerPoint presentation should also include images that you intend to use for your slides.
Fortunately, the PowerPoint program itself also allows you to view an outline of your slides. This can help give you a visual of your overall presentation.
Remember, This is Only a Draft!
If your outline isn’t the way you want it to be, remember that it is only your very first rough draft. Your outline doesn’t have to be perfect, because it is not your final product. While you should work hard to make your outline as good as possible, you don’t need to stress about it.
And remember that if you finish your outline, and you are not satisfied with how it looks? It is okay for you to scrap it and start all over again. There is no reason that you should stick with an outline that you don’t feel confident about.
An outline is a great place to start whether you intend to read from a full script, read from cue cards, or speak without notes. If you are an avid reader of Speak and Conquer, you’ll remember that I recommend creating an outline in many of my articles.
Get Feedback From Others About Your Outline
There is no reason that you have to go any of this by yourself. If you have a friend or mentor who is experienced with public speaking , why not ask them to take a look at your outline for you? They may see something that needs to be changed that never even occurred to you.
You could also give a practice round of your speech in front of a friend, family member, or mentor. Give them a chance to make suggestions about whether or not there’s anything that you should change. After all, it’s better for you to realize if something needs to be done differently before the actual day of the presentation.
If you don’t have someone who you can rehearse in front of in person, try recording your presentation in front of a video camera . Show it to someone you trust via email or social media. If they have any suggestions for change, you can alter your outline accordingly.
Why is a Presentation Outline so Important, Anyway?
While reading this article, you may be wondering why you even need an outline for your presentation. This may be especially puzzling to you if you are planning to give a speech without notes . But I find that an outline can be incredibly useful no matter what kind of presentation you are planning to give to your audience.
Like I said before, the main point of an outline is to enhance the main purpose of your speech further. But I’m also going to give you a list of some more reasons why I believe an outline is absolutely essential.
Some other good reasons for creating an outline for your presentation are:
- You will have an easy visual to look at the order of the topics you are talking about. This way, you can see if anything looks out of place.
- The proper outline will help to keep your speech organized.
- You will be able to look at the connections between your ideas . This may even help you realize you need to add or subtract certain things from your speech.
- A good outline will help you remember to t ouch on every important point that you need to cover in your presentation.
- Outlining helps you see whether or not your main points and sub-points flow smoothly . If you create your outline and realize that some of your points do not flow, you can easily re-write key parts.
- Using an outline instead of a full script will give you more freedom to improvise during your presentation. This is why creating an outline is a great first strategy if you are speaking without notes, or trying to memorize a speech in a short period of time.
- If you’re not sure where to start preparing for your speech, then writing a loose outline is a good first step to help you out.
- Practicing with an outline will help enhance your memory about the main points and sub-points of your presentation.
No matter what kind of presentation you are planning to give, a solid outline with help you be prepared and ready to go.
Conclusion: How do you make an outline for a talk?
Today, I have compiled a thorough guide about writing a quality outline. We discussed creating a good beginning, ending, and body of your presentation. We have even talked about why a good outline is important, too. If you have any other tips to share about creating an outline for your presentation, make sure to share them in the comments section.
If you are looking to improve your public speaking and presentation skills, check out the rest of my articles on Speak and Conquer. The purpose of my site is to help you succeed in becoming a better public speaker. For example, I have covered popular topics such as how to memorize a speech in less than an hour , and how to use hand gestures effectively during a presentation .
Related Questions
What software should I use to outline my speech? Preferably, you should have a program that allows you to use bullet points or numbered lists. Bullet points and lists are a good place to start when you are outlining. Microsoft Word, Word Processor, or Notepad are acceptable for basic outlines.
How do I decide what the purpose of my speech is? Decide if you are there to inform, educate, motivate, or entertain your audience. When you have narrowed it down to just one of those, you will be able to decide the main idea of your speech. You should preferably speak about a topic that you are well-educated about.
How do I write a speech? Start with a purpose, and then create a detailed outline. Flesh out the points and sub-points from your outline. Decide very early on if you want to give your speech with or without notes. Revise your drafts as much as possible until you have created a full speech. If you are going to speak with notes, write some of the information from your outline onto cue cards.
Useful reading
- 16 secret ways how to speak to a bored audience
How to Use Your Voice Effectively in a Presentation?
- 13 Effective Ways How to Make Speech Pauses
Posts about public speaking you may also like

What To Do With Your Hands During a Speech?
Your speech is all written out, you’ve picked out the perfect outfit to wear, and you feel confident in what you’re about to say. But

9 effective Ways How to Teach Public Speaking to Kids
There are a lot of kids who are getting anxious when their parents force them to go out and meet other people. This is because

The way you use your voice is one of the absolute most important aspects of speaking in public. This can easily change the way your
- Tags: Effective speaking , Good speech , Pauses in speech , Speech preparation process , Speech skills , Speech tips , Unprepared speech , Unprepared speech topics
Recommended gear

Best Portable Speakers For The Presentations

Best Video Cameras for Public Speakers

Best rresenter remotes for public speakers

Best Portable Thumb Drives And Hard Drives for the Presentations
Who is janek tuttar.
My name is Janek Tuttar , and I am the founder and author of Speak and Conquer website.
I have been teaching public speaking at Estonian Entrepreneurship University of Applied Sciences
Here, I am sharing the wisdom of how to cope in different public speaking situations.
More information about Janek »

Share this post

Hi! My name is Janek Tuttar, and I am the founder and author of SpeakAndConquer.com.
I have been teaching and blogging about public speaking since spring 2007. Here, I am sharing the wisdom of how to cope in different public speaking situations.
Send me an e-mail: [email protected]
LEGAL INFORMATION
This site is owned and operated by Janek Tuttar. SpeakAndConquer.com is a participant in the Amazon Services LLC Associates Program, an affiliate advertising program designed to provide a means for sites to earn advertising fees by advertising and linking to Amazon.com.
This site also participates in other affiliate programs and is compensated for referring traffic and business to these companies.

Best teleprompters

Best Computer Mice for the Presentations

Best Laptop Backpacks for Public Speakers
- Frequently Asked Questions (FAQ)
PowerPoint Tip: Start Your Presentation with an Outline
PowerPoint presentations are much like college essays. They present cited, relevant information that is meant to educate and inform. They are made for a wide audience. Do you remember what your teachers used to advise you to do when they assigned an essay writing assignment?
“Don’t forget to make an outline before you write.”
You can use the same concept in your next presentation. Just because it contains pictures and encourages interactivity doesn’t mean that it can’t be approached in a similar fashion. Outlining key points is a powerful strategy, and PowerPoint 2013 has a very useful tool to help you do it. This article will explain the importance of outlining and how to use the PowerPoint Outline View .
Why Create an Outline?
The answer is fairly simple: outlining focuses your presentation. It acts as a sort of pre-first draft, giving you leeway to throw ideas on the table and figure out which ones work best for your presentation. By putting everything you’ve thought of in one space, you can see your ideas and points side-by-side and more efficiently eliminate ones that don’t contribute to your overall message. By tightening the screws and oiling the gears, you will have a more cohesive presentation that works well both in presenting (on your end) and receiving (on the audience’s end).
PowerPoint Outline View
When you switch to Outline View in PowerPoint, you will see all the text currently within your title and text placeholders in a document-style format that appears on the left side of the screen. This will allow you to go through all the text and edit it without having to locate your text boxes one by one, slide by slide. It is a very useful tool to use when you want to focus on both text and image in a single go, consolidating your work from different areas of the screen.

Outline View can easily be switched on and off by using the Ctrl+Shift+Tab key combination or via VIEW → Outline View .

Text typed in Outline View will appear in the title of the current slide. Press Enter to add a new slide. By pressing Tab the current item will be indented and become a subitem of the previous item. Shift+Tab removes the indentation. All of these features are also accessible via the context menu, which can be accessed by right-clicking an outline item.
Importing an Existing Outline
If you have already created an outline in Microsoft Word, you can easily convert it into PowerPoint slides. PowerPoint will use the heading styles that you assigned to your text in Word to determine which paragraphs are titles and which are content. Heading 1 lines will become slide titles, Heading 2 lines will become bulleted items on the slides, and Heading 3 lines will become sub-bulleted items.
To import an existing outline file, click the drop-down menu under New Slide on the HOME tab, and select Slides from Outline . Navigate to the outline file, and click Insert .

Another option is to create an outline in .txt format using Notepad (or any other text editor), as shown in the screenshot below.

Normal paragraphs will be converted into slide titles, whereas paragraphs indented by tabs will result in bulleted lists.
All of the best presentations include three things: research, quality, and purpose. PowerPoint’s Outline View can help you achieve the quality work you desire as you create your presentation and impress your audience with your vision. By consolidating all of your important content into a single segregated window, you can more easily weed out the text you don’t want and refine the text you do want. That way, by the end, you’ll achieve your goal.
- Presentation Tips and Techniques
- April 25, 2016
About ShapeChef

Blog Categories
- Slides and Objects
- Video and Audio
Copyright © 2024 Wulfsoft. All rights reserved.
- Terms of Service
- Legal Notice
We use essential cookies to make Venngage work. By clicking “Accept All Cookies”, you agree to the storing of cookies on your device to enhance site navigation, analyze site usage, and assist in our marketing efforts.
Manage Cookies
Cookies and similar technologies collect certain information about how you’re using our website. Some of them are essential, and without them you wouldn’t be able to use Venngage. But others are optional, and you get to choose whether we use them or not.
Strictly Necessary Cookies
These cookies are always on, as they’re essential for making Venngage work, and making it safe. Without these cookies, services you’ve asked for can’t be provided.
Show cookie providers
- Google Login
Functionality Cookies
These cookies help us provide enhanced functionality and personalisation, and remember your settings. They may be set by us or by third party providers.
Performance Cookies
These cookies help us analyze how many people are using Venngage, where they come from and how they're using it. If you opt out of these cookies, we can’t get feedback to make Venngage better for you and all our users.
- Google Analytics
Targeting Cookies
These cookies are set by our advertising partners to track your activity and show you relevant Venngage ads on other sites as you browse the internet.
- Google Tag Manager
- Infographics
- Daily Infographics
- Popular Templates
- Accessibility
- Graphic Design
- Graphs and Charts
- Data Visualization
- Human Resources
- Beginner Guides
Blog Beginner Guides How To Make a Good Presentation [A Complete Guide]
How To Make a Good Presentation [A Complete Guide]
Written by: Krystle Wong Jul 20, 2023

A top-notch presentation possesses the power to drive action. From winning stakeholders over and conveying a powerful message to securing funding — your secret weapon lies within the realm of creating an effective presentation .
Being an excellent presenter isn’t confined to the boardroom. Whether you’re delivering a presentation at work, pursuing an academic career, involved in a non-profit organization or even a student, nailing the presentation game is a game-changer.
In this article, I’ll cover the top qualities of compelling presentations and walk you through a step-by-step guide on how to give a good presentation. Here’s a little tip to kick things off: for a headstart, check out Venngage’s collection of free presentation templates . They are fully customizable, and the best part is you don’t need professional design skills to make them shine!
These valuable presentation tips cater to individuals from diverse professional backgrounds, encompassing business professionals, sales and marketing teams, educators, trainers, students, researchers, non-profit organizations, public speakers and presenters.
No matter your field or role, these tips for presenting will equip you with the skills to deliver effective presentations that leave a lasting impression on any audience.
Click to jump ahead:
What are the 10 qualities of a good presentation?
Step-by-step guide on how to prepare an effective presentation, 9 effective techniques to deliver a memorable presentation, faqs on making a good presentation, how to create a presentation with venngage in 5 steps.
When it comes to giving an engaging presentation that leaves a lasting impression, it’s not just about the content — it’s also about how you deliver it. Wondering what makes a good presentation? Well, the best presentations I’ve seen consistently exhibit these 10 qualities:
1. Clear structure
No one likes to get lost in a maze of information. Organize your thoughts into a logical flow, complete with an introduction, main points and a solid conclusion. A structured presentation helps your audience follow along effortlessly, leaving them with a sense of satisfaction at the end.
Regardless of your presentation style , a quality presentation starts with a clear roadmap. Browse through Venngage’s template library and select a presentation template that aligns with your content and presentation goals. Here’s a good presentation example template with a logical layout that includes sections for the introduction, main points, supporting information and a conclusion:

2. Engaging opening
Hook your audience right from the start with an attention-grabbing statement, a fascinating question or maybe even a captivating anecdote. Set the stage for a killer presentation!
The opening moments of your presentation hold immense power – check out these 15 ways to start a presentation to set the stage and captivate your audience.
3. Relevant content
Make sure your content aligns with their interests and needs. Your audience is there for a reason, and that’s to get valuable insights. Avoid fluff and get straight to the point, your audience will be genuinely excited.
4. Effective visual aids
Picture this: a slide with walls of text and tiny charts, yawn! Visual aids should be just that—aiding your presentation. Opt for clear and visually appealing slides, engaging images and informative charts that add value and help reinforce your message.
With Venngage, visualizing data takes no effort at all. You can import data from CSV or Google Sheets seamlessly and create stunning charts, graphs and icon stories effortlessly to showcase your data in a captivating and impactful way.

5. Clear and concise communication
Keep your language simple, and avoid jargon or complicated terms. Communicate your ideas clearly, so your audience can easily grasp and retain the information being conveyed. This can prevent confusion and enhance the overall effectiveness of the message.
6. Engaging delivery
Spice up your presentation with a sprinkle of enthusiasm! Maintain eye contact, use expressive gestures and vary your tone of voice to keep your audience glued to the edge of their seats. A touch of charisma goes a long way!
7. Interaction and audience engagement
Turn your presentation into an interactive experience — encourage questions, foster discussions and maybe even throw in a fun activity. Engaged audiences are more likely to remember and embrace your message.
Transform your slides into an interactive presentation with Venngage’s dynamic features like pop-ups, clickable icons and animated elements. Engage your audience with interactive content that lets them explore and interact with your presentation for a truly immersive experience.

8. Effective storytelling
Who doesn’t love a good story? Weaving relevant anecdotes, case studies or even a personal story into your presentation can captivate your audience and create a lasting impact. Stories build connections and make your message memorable.
A great presentation background is also essential as it sets the tone, creates visual interest and reinforces your message. Enhance the overall aesthetics of your presentation with these 15 presentation background examples and captivate your audience’s attention.
9. Well-timed pacing
Pace your presentation thoughtfully with well-designed presentation slides, neither rushing through nor dragging it out. Respect your audience’s time and ensure you cover all the essential points without losing their interest.
10. Strong conclusion
Last impressions linger! Summarize your main points and leave your audience with a clear takeaway. End your presentation with a bang , a call to action or an inspiring thought that resonates long after the conclusion.
In-person presentations aside, acing a virtual presentation is of paramount importance in today’s digital world. Check out this guide to learn how you can adapt your in-person presentations into virtual presentations .

Preparing an effective presentation starts with laying a strong foundation that goes beyond just creating slides and notes. One of the quickest and best ways to make a presentation would be with the help of a good presentation software .
Otherwise, let me walk you to how to prepare for a presentation step by step and unlock the secrets of crafting a professional presentation that sets you apart.
1. Understand the audience and their needs
Before you dive into preparing your masterpiece, take a moment to get to know your target audience. Tailor your presentation to meet their needs and expectations , and you’ll have them hooked from the start!
2. Conduct thorough research on the topic
Time to hit the books (or the internet)! Don’t skimp on the research with your presentation materials — dive deep into the subject matter and gather valuable insights . The more you know, the more confident you’ll feel in delivering your presentation.
3. Organize the content with a clear structure
No one wants to stumble through a chaotic mess of information. Outline your presentation with a clear and logical flow. Start with a captivating introduction, follow up with main points that build on each other and wrap it up with a powerful conclusion that leaves a lasting impression.
Delivering an effective business presentation hinges on captivating your audience, and Venngage’s professionally designed business presentation templates are tailor-made for this purpose. With thoughtfully structured layouts, these templates enhance your message’s clarity and coherence, ensuring a memorable and engaging experience for your audience members.
Don’t want to build your presentation layout from scratch? pick from these 5 foolproof presentation layout ideas that won’t go wrong.

4. Develop visually appealing and supportive visual aids
Spice up your presentation with eye-catching visuals! Create slides that complement your message, not overshadow it. Remember, a picture is worth a thousand words, but that doesn’t mean you need to overload your slides with text.
Well-chosen designs create a cohesive and professional look, capturing your audience’s attention and enhancing the overall effectiveness of your message. Here’s a list of carefully curated PowerPoint presentation templates and great background graphics that will significantly influence the visual appeal and engagement of your presentation.
5. Practice, practice and practice
Practice makes perfect — rehearse your presentation and arrive early to your presentation to help overcome stage fright. Familiarity with your material will boost your presentation skills and help you handle curveballs with ease.
6. Seek feedback and make necessary adjustments
Don’t be afraid to ask for help and seek feedback from friends and colleagues. Constructive criticism can help you identify blind spots and fine-tune your presentation to perfection.
With Venngage’s real-time collaboration feature , receiving feedback and editing your presentation is a seamless process. Group members can access and work on the presentation simultaneously and edit content side by side in real-time. Changes will be reflected immediately to the entire team, promoting seamless teamwork.

7. Prepare for potential technical or logistical issues
Prepare for the unexpected by checking your equipment, internet connection and any other potential hiccups. If you’re worried that you’ll miss out on any important points, you could always have note cards prepared. Remember to remain focused and rehearse potential answers to anticipated questions.
8. Fine-tune and polish your presentation
As the big day approaches, give your presentation one last shine. Review your talking points, practice how to present a presentation and make any final tweaks. Deep breaths — you’re on the brink of delivering a successful presentation!
In competitive environments, persuasive presentations set individuals and organizations apart. To brush up on your presentation skills, read these guides on how to make a persuasive presentation and tips to presenting effectively .

Whether you’re an experienced presenter or a novice, the right techniques will let your presentation skills soar to new heights!
From public speaking hacks to interactive elements and storytelling prowess, these 9 effective presentation techniques will empower you to leave a lasting impression on your audience and make your presentations unforgettable.
1. Confidence and positive body language
Positive body language instantly captivates your audience, making them believe in your message as much as you do. Strengthen your stage presence and own that stage like it’s your second home! Stand tall, shoulders back and exude confidence.
2. Eye contact with the audience
Break down that invisible barrier and connect with your audience through their eyes. Maintaining eye contact when giving a presentation builds trust and shows that you’re present and engaged with them.
3. Effective use of hand gestures and movement
A little movement goes a long way! Emphasize key points with purposeful gestures and don’t be afraid to walk around the stage. Your energy will be contagious!
4. Utilize storytelling techniques
Weave the magic of storytelling into your presentation. Share relatable anecdotes, inspiring success stories or even personal experiences that tug at the heartstrings of your audience. Adjust your pitch, pace and volume to match the emotions and intensity of the story. Varying your speaking voice adds depth and enhances your stage presence.

5. Incorporate multimedia elements
Spice up your presentation with a dash of visual pizzazz! Use slides, images and video clips to add depth and clarity to your message. Just remember, less is more—don’t overwhelm them with information overload.
Turn your presentations into an interactive party! Involve your audience with questions, polls or group activities. When they actively participate, they become invested in your presentation’s success. Bring your design to life with animated elements. Venngage allows you to apply animations to icons, images and text to create dynamic and engaging visual content.
6. Utilize humor strategically
Laughter is the best medicine—and a fantastic presentation enhancer! A well-placed joke or lighthearted moment can break the ice and create a warm atmosphere , making your audience more receptive to your message.
7. Practice active listening and respond to feedback
Be attentive to your audience’s reactions and feedback. If they have questions or concerns, address them with genuine interest and respect. Your responsiveness builds rapport and shows that you genuinely care about their experience.

8. Apply the 10-20-30 rule
Apply the 10-20-30 presentation rule and keep it short, sweet and impactful! Stick to ten slides, deliver your presentation within 20 minutes and use a 30-point font to ensure clarity and focus. Less is more, and your audience will thank you for it!
9. Implement the 5-5-5 rule
Simplicity is key. Limit each slide to five bullet points, with only five words per bullet point and allow each slide to remain visible for about five seconds. This rule keeps your presentation concise and prevents information overload.
Simple presentations are more engaging because they are easier to follow. Summarize your presentations and keep them simple with Venngage’s gallery of simple presentation templates and ensure that your message is delivered effectively across your audience.

1. How to start a presentation?
To kick off your presentation effectively, begin with an attention-grabbing statement or a powerful quote. Introduce yourself, establish credibility and clearly state the purpose and relevance of your presentation.
2. How to end a presentation?
For a strong conclusion, summarize your talking points and key takeaways. End with a compelling call to action or a thought-provoking question and remember to thank your audience and invite any final questions or interactions.
3. How to make a presentation interactive?
To make your presentation interactive, encourage questions and discussion throughout your talk. Utilize multimedia elements like videos or images and consider including polls, quizzes or group activities to actively involve your audience.
In need of inspiration for your next presentation? I’ve got your back! Pick from these 120+ presentation ideas, topics and examples to get started.
Creating a stunning presentation with Venngage is a breeze with our user-friendly drag-and-drop editor and professionally designed templates for all your communication needs.
Here’s how to make a presentation in just 5 simple steps with the help of Venngage:
Step 1: Sign up for Venngage for free using your email, Gmail or Facebook account or simply log in to access your account.
Step 2: Pick a design from our selection of free presentation templates (they’re all created by our expert in-house designers).
Step 3: Make the template your own by customizing it to fit your content and branding. With Venngage’s intuitive drag-and-drop editor, you can easily modify text, change colors and adjust the layout to create a unique and eye-catching design.
Step 4: Elevate your presentation by incorporating captivating visuals. You can upload your images or choose from Venngage’s vast library of high-quality photos, icons and illustrations.
Step 5: Upgrade to a premium or business account to export your presentation in PDF and print it for in-person presentations or share it digitally for free!
By following these five simple steps, you’ll have a professionally designed and visually engaging presentation ready in no time. With Venngage’s user-friendly platform, your presentation is sure to make a lasting impression. So, let your creativity flow and get ready to shine in your next presentation!
Discover popular designs

Infographic maker

Brochure maker

White paper online

Newsletter creator

Flyer maker

Timeline maker

Letterhead maker

Mind map maker

Ebook maker
How To Turn Powerpoint Into Outline

Do you want to turn your PowerPoint presentation into an outline? You can do it easily by utilizing a built-in feature in PowerPoint. Keep reading to find out the steps to creating an outline from your PowerPoint presentation.
Step 1: Click On The “File” Tab
First, you will need to open up the PowerPoint presentation from which you want to create an outline. Click on the “File” tab in the upper left-hand corner of the screen.

Step 2: Select “Export”
Upon clicking “File”, new options will appear. Click on “Export” from the options in the File tab.

Step 3: Create Handouts
Click “Create Handouts” under the Export tab then press the “Create Handouts” icon.

Step 4: Select “Outline Only”
A popup will appear after clicking on the “create handouts” button. Select the “Outline Only” option and press “Ok”.

That’s it! Once you do so, PowerPoint will generate an outline, and it will open in the MS Word program. If you want to make edits to the outline, simply make them in Word and then save the document. We hope you found this helpful. Thanks for reading!
As you see, it’s quite easy to turn your presentation into an outline using PowerPoint’s built-in feature. All you need to do is follow the steps that are outlined in this article. Thanks for reading!
Related Posts:

How to Outline Text in Powerpoint: A Step-by-Step Guide
Outlining text in PowerPoint is a breeze once you know where to look. Simply select the text you wish to outline, then navigate to the “Format” tab. Click on “Text Effects”, followed by “Outline”, and choose your desired outline color and weight. And voilà, your text now stands out with a sleek outline!
After you outline your text, it will appear more prominent and eye-catching on your slides, which can be particularly useful for titles, headings, or any text you want to emphasize.
Introduction
Have you ever found yourself squinting at a PowerPoint presentation, trying to read the text that just seems to blend into the background? Or maybe you’re the one giving the presentation, and you want to make sure your audience can clearly see and understand each point you’re making. Enter the art of outlining text in PowerPoint.
Outlining text can make your words pop off the screen, providing a clear distinction from the background and ensuring your message is received loud and clear. It’s a simple yet powerful tool in making your presentation look professional and polished. Whether you’re a student presenting a project, a business professional pitching to clients, or a teacher trying to engage your class, knowing how to outline text can make all the difference. So, let’s dive in and learn how to make your words stand out!
Step by Step Tutorial: How to Outline Text in PowerPoint
Before we get into the nitty-gritty, let’s first understand what these steps will help you achieve. By following the steps below, you will be able to add an outline to your text, making it more visible and impactful on your PowerPoint slides.
Step 1: Select the Text
Begin by clicking on the text box containing the text you want to outline.
Selecting the text is the first step because you need to tell PowerPoint which text you want to modify. Make sure you click on the actual text box and not just somewhere on the slide. If you’re working with multiple text boxes, you’ll need to repeat these steps for each one you want to outline.
Step 2: Navigate to the Format Tab
After selecting the text, go to the “Format” tab on the PowerPoint ribbon.
This step is where the magic begins. The “Format” tab is your gateway to all the text formatting options PowerPoint has to offer, including the outline feature.
Step 3: Click on Text Effects
In the “Format” tab, look for the “Text Effects” button and click on it.
The “Text Effects” button is a little treasure trove of options that can make your text do some pretty cool things. But for now, we’re focused on the outlining part.
Step 4: Choose Outline
In the “Text Effects” menu, hover over “Outline” to see the outline options, and then click on your choice of outline color and weight.
The outline color is the color of the outline itself, while the weight is how thick or thin you want that outline to be. You can choose from a range of colors and weights to find the perfect look for your text.
Additional Information
When it comes to outlining text in PowerPoint, there are a few extra tidbits that can enhance your experience. For instance, did you know that you can also create custom outline colors? If the default options don’t suit your fancy, simply click on “More Outline Colors” for a full spectrum of choices. Additionally, you can even apply gradient outlines for a more dynamic effect.
Another tip is to consider the background of your slides when choosing your outline color and weight. You want to create enough contrast to ensure readability but also maintain a harmonious color scheme. Also, don’t forget that you can apply transparency to your outline, which can sometimes result in a more subtle but equally effective emphasis.
Lastly, remember that less is often more. Outlining every piece of text on your slide might overwhelm your audience. Use outlines strategically to highlight the most crucial information or to make titles and headings stand out.
- Select the text you want to outline.
- Navigate to the “Format” tab.
- Click on “Text Effects”.
- Choose your desired outline color and weight from the “Outline” options.
Frequently Asked Questions
Can i apply an outline to text in all versions of powerpoint.
Yes, most versions of PowerPoint offer the ability to outline text, but the steps might differ slightly depending on your software version.
Is it possible to outline text in PowerPoint on a Mac?
Absolutely! The steps are essentially the same as on a PC, so Mac users can outline their text with ease.
Can I remove the outline from the text later?
Definitely. Just follow the same steps and choose “No Outline” from the outline options to remove it.
Will the outline show up when I print my slides?
Yes, the outline will be visible on printed slides, making your text stand out even on paper.
Can I save a text style with an outline as a default for future presentations?
While you can’t set it as a default, you can save a text box with the desired style as a template and copy it into future presentations.
Mastering the task of outlining text in PowerPoint can give your presentations that extra oomph they need to captivate your audience. It’s a tool that, when used wisely, can take your slides from mundane to memorable.
Remember, the key to successful text outlining lies in balance. Use it to highlight, not to overshadow. With this newfound knowledge, your next presentation is sure to be a hit. Happy outlining!

Matt Jacobs has been working as an IT consultant for small businesses since receiving his Master’s degree in 2003. While he still does some consulting work, his primary focus now is on creating technology support content for SupportYourTech.com.
His work can be found on many websites and focuses on topics such as Microsoft Office, Apple devices, Android devices, Photoshop, and more.
Share this:
- Click to share on Twitter (Opens in new window)
- Click to share on Facebook (Opens in new window)
Related Posts
- How to Download a Google Slides Presentation as a Powerpoint File
- How to Outline Font in Word 2013: A Step-by-Step Guide
- How to Add a Text Box Outline in Excel 2013: A Step-by-Step Guide
- How to Do a Powerpoint Google Slides Presentation Conversion
- How to Outline a Selection in Photoshop CS5: A Step-by-Step Guide
- How to Hide Background Graphics in Powerpoint 2013: A Step-by-Step Guide
- Can You Save a Powerpoint as a Video in Powerpoint 2013? Find Out Here!
- How to Rotate a Powerpoint Slide Presentation
- How to Delete Multiple Slides in Google Slides: A Step-by-Step Guide
- How to Save Powerpoint as PDF with Notes: A Step-by-Step Guide
- How to Make Text Vertical in Google Docs
- How to Make Google Slides Vertical (5 Quick Steps)
- How to Remove Background Color in Google Docs
- How to Add a Hyperlink on Google Slides
- How to Set Google Docs Background Image
- How to Mirror Image in PPT Files (An Easy 6 Step Guide)
- How to Insert a Google Slides Page Number: Step-by-Step Guide
- How to Make a Powerpoint Slide Vertical in Powerpoint 2013: A Step-by-Step Guide
- How to Add a Border to a Picture in Google Slides: A Step-by-Step Guide
- How to Delete a Slide in Powerpoint 2010: Step-by-Step Guide
Get Our Free Newsletter
How-to guides and tech deals
You may opt out at any time. Read our Privacy Policy
- Skip to main content
- Skip to secondary menu
- Skip to primary sidebar
- Skip to footer
Erin Wright Writing
Writing-Related Software Tutorials
How to Convert a Microsoft Word Outline into PowerPoint Slides
By Erin Wright
This tutorial shows how to convert a Microsoft Word outline into PowerPoint Slides.
Before making the conversion, we first have to format the Word outline levels. For an in-depth look at outlining, please see last week’s tutorial “ How to Use Outline View in Microsoft Word (PC & Mac) .”
Watch all the steps shown here in real time!
Explore more than 250 writing-related software tutorials on my YouTube channel .
Table of Contents:
- How to Format the Word Outline Levels for Conversion to Slides
- How to Convert a Word Outline to PowerPoint Slides
The images below are from Word for Microsoft 365 and PowerPoint for Microsoft 365. These steps also apply to Word 2021, PowerPoint 2021, Word 2019, PowerPoint 2019, Word 2016, and PowerPoint 2016.
Are you on a Mac? Please see “ How to Convert a Microsoft Word Outline into PowerPoint Slides on Mac .”
How to Format the Outline Levels for Conversion to Slides
- Select the File tab followed by Save As to save your Word file under a new name. This is an important step because we will be changing the heading structure of the document.
- Select the View tab.
- Select Outline in the Views group.

- Select the outline items that should appear as slide titles and then select Level 1 in the Outline Level menu.
Pro Tip: Press and Hold the Ctrl key to select multiple items.

- Select the outline items that should appear as first-level bullet points in the slides and then select Level 2 in the Outline Level menu (see figure 2).
- Continue to select items that should appear as lower-level bullet points in the slides and then select the outline level one level lower in the Outline Level menu (see figure 2). For example, select Level 3 to create a second-level bullet point in the slide.
- Save your new Word file and close Word.
How to Convert a Word Outline into PowerPoint Slides
- Open PowerPoint and select Blank Presentation from the Home screen.

- Select the New Slide menu arrow.
- Select Slides from Outline from the drop-down menu.

- Locate and select the Word document in the Insert Outline dialog box and then select the Insert button.

The Word outline should now be converted to PowerPoint slides. This process may take several moments depending upon the length of the outline.
- The first slide will be blank to create a title slide or cover slide. If a title slide is not required, right-click the blank slide and then select Delete Slide from the shortcut menu.

Do you want to convert an entire Word document to PowerPoint slides? If so, see “ How to Convert Microsoft Word Documents to PowerPoint Slides Using Word for the Web .”
Related Resources
How to Create Numbered Lists in PowerPoint (PC & Mac)
How to Insert a Linked PowerPoint Slide in Microsoft Word
How to Convert PDFs to PowerPoint Slides in Adobe Acrobat (PC & Mac)
Updated December 12, 2023
- Microsoft Word Tutorials
- Adobe Acrobat Tutorials
- PowerPoint Tutorials
- Writing Tips
- Editing Tips
- Writing-Related Resources
Home Blog Design The Power of Mind Map Note Taking for Presenters
The Power of Mind Map Note Taking for Presenters

Some people find it challenging to attend a meeting and effectively retrieve information from its outcome. Several tools have been studied over the years to condense data, especially complex concepts , into actionable notes, and today we will approach one visual tool of particular interest for us presenters.
Mind map note-taking is a transformative approach to the typical mind map. This method leverages visual diagrams to represent tasks, words, concepts, or items linked around a central concept. By utilizing mind map notes, presenters can enhance their recall and generate deeper insights into their topics.
Table of Contents
Understanding Mind Map Note Taking
How mind map note taking enhances presentation skills, customizing mind map notes for effective presentations, how to use mind map notes for presentation development, case study: mind map note taking in corporate strategy development, case study: academic research presentation and mind map note taking, case study: application of mind map notes to health care system improvement, recommended mind map note taking templates for powerpoint & google slides, final words.
Mind mapping is a technique where information is visually mapped out in a way that resembles a tree structure. This method is distinct because it encourages non-linear thinking and organization of ideas. The central node represents the main topic, and related sub-topics radiate from it in branches, forming a connected nodal structure that is both intuitive and analytically effective.

On the other hand, we call mind map note-taking the application of mind maps for distilling information into a structured visual form as it is being received or reviewed. Some key aspects include:
- Real-time creation: Unlike general mind maps, which might be created over time and adjusted, mind map notes are often created in real-time during a lecture or meeting.
- Emphasis on keywords: Although this can be considered key for the marketing industry, several other niches can apply this format and capture keywords with their interrelations rather than lengthy sentences. With the proper node structure, recalling information this way is far easier.
- Adaptability: As new information is presented, the concept map templates can grow organically, with new branches or connections added on the fly.
Mind maps are particularly useful for presenters because they condense complex information into a clear, visual format. This not only aids in the internalization of knowledge but also in visual communication and connecting with the audience . Here’s how presenters can use mind maps to boost their presentation skills :
Organization of Ideas
Presenters can expand outward to secondary and tertiary ideas starting with a central idea. This helps structure the presentation logically and ensures no critical point is missed.

Memory Recall
The visual nature of mind maps helps recall information more effectively than traditional notes. The spatial organization and use of colors and images make recall cues more robust and intuitive.
Creativity and Engagement
Creating a mind map can be a dynamic process that stimulates creative thinking . In teamwork settings, this creative process can translate into interactive presentations in which the attendees help to build a collective mind map of the ideas introduced in the meeting.

Flexibility in Editing
Mind maps can be easily adjusted as new ideas emerge or changes are required. This flexibility is crucial during the iterative process of developing a presentation.
Although we can work with pre-made templates, customization is always a must as we ensure the presentation fits our unique needs and style. Here are some tips for tailoring mind maps to fit your presentation:
- Choose Your Tools: Whether digital or on paper, choose the medium that you are most comfortable with. Digital tools often offer functionalities like drag-and-drop editing and easy sharing, and can be presented by sharing the presentation on a screen, through tablets, or in pairs working with a computer. On the other hand, the mind map template we use can be printed as a layout to proceed with mind mapping note taking.
- Use Colors and Icons: Use colors to group related ideas or denote different topics. PowerPoint Icons or vector images can also be added to create visual associations without altering the presentation’s aesthetic values.
- Incorporate Keywords: Instead of full sentences, use keywords to keep the mind map clear and easy to skim.
- Link to Sources and Data: For digital mind maps, link parts of your map to sources, data, or even slides of your presentation for quick reference.
Once you have created a mind map , it can be a foundational tool for developing your presentation. Here’s how you can move from the mind map to the final presentation:
Outline Extraction
Use the structure of your mind map to outline your presentation. Each branch can represent a different section or part of your presentation. From then, you can link the bibliographical information to back up your research in a presentation handout or spare document.
Slide Development
Convert each node or branch into a slide. This ensures that your presentation flows logically and covers all necessary points. As we’ve mentioned in our article on the 10-20-30 rule of presentations , one idea per slide ensures the audience remains focused on the topic in discussion.
Walk through your mind map multiple times. This will help solidify your understanding and presentation flow, making you more comfortable and reducing the need for notes. You can take cues from our guide on the Feynman’s Technique for how to simplify the concepts you have to elaborate from your mind map notes. Additionally, rehearsing the mind map notes contributes to memorizing a presentation.
Feedback Incorporation
After rehearsing, you might find areas that need refining. Use your mind map to incorporate feedback and make adjustments quickly. You can share your mind map notes with a fellow worker to review the final details of the presentation, which makes the process smoother than going slide by slide in your presentation deck .
For our first case study, a multinational corporation is hosting a strategy meeting within the marketing team to overhaul its global marketing strategy. The team has to handle several reports gathered from different departments to tailor the strategy by segment. Therefore, some team members proposed to work with mind map note taking to streamline this process and enhance the learning experience.
The marketing team started a digital mind map PowerPoint template with a central node labeled “Global Marketing Strategy 2024”. From this central node, branches were created for key regions: North America, Europe, Asia, and South America. Each regional brand is further divided into local market trends, consumer behavior, and competitors.

As we can see, each branch from the central node is identified with a unique color. This helps to easily identify to which region does the data belong. By applying an in-company collaborative approach, the team were able to populate sheets with real-time data from the different regions, and add links to the corresponding spreadsheets (which are also colored by region to avoid mix-ups).
The final presentation done to senior management was highly praised for its clarity and depth, directly attributed to the structured preparation done with the mind map note taking technique.
In our second case study, a doctoral candidate in environmental science used mind mapping to organize the research data for her dissertation on climate change impacts on coastal ecosystems.
The core node of her mind map was labeled “Impact of Climate Change on Coastal Ecosystems”. From that node, branches were laid out with new nodes labeled “Current Research”, “Methodology”, “Data Analysis”, “Case Studies”, and “Future Research Directions”. Under each one of those nodes, sub-nodes allowed her to organize the vast amounts of data and research papers effectively.

By integrating graphs, statistical data, and research citations directly into the digital mind map, the researcher can simplify data management. Additionally, she used a color coding system in red-yellow-green format to label:
- Red: Not started
- Yellow: In-progress
- Green: Completed
Thanks to the mind map notes, the researcher was able to structure her oral presentation, anticipating the potential questions that the dissertation committee may ask.
In this final case study, we analyze the scenario in which a hospital administration team uses mind map notes to address the inefficiencies in patient flow and resource allocation within their facility. Initial research showed that some residents were using mind maps to instruct their interns on typical procedures; therefore, the method was used on a larger scale to analyze this problem.
After gathering the required resources, insights, and testimonials from employees and patients, the team constructed a mind map with a core node labeled “Hospital Efficiency.” The branches listed are Patient Admission, Treatment Protocols, Staff Allocation, and Discharge Procedures. Surrounding each sub-node, new branches were created to expose each situation and bottleneck and attach documents with proposed solutions.

From the information retrieved from this mind map, the team was able to craft a new strategy presentation to deliver the revised protocols. Out of the implemented solutions, a 20% improvement in patient throughput was seen in less than 3 months, with a significant increase in staff satisfaction rates.
We gathered our selection of professional mind map note taking templates that guarantee high-efficiency in creative journeys. You can also check our Free Mind Map Template for PowerPoint . Download and customize them now.
1. Animated Mind Map Note Taking PPT Template
Create digital mind maps for note taking with captivating animated effects by implementing this PPT template. You can customize the color scheme, font used, icons, and more. Check it out!
Use This Template
2. Hand-Drawn Concept Map for Note Taking Template
If you are looking for a mind map note taking method that resembles hand drawn diagrams, then this is your template. Print it or work under digital format. It’s entirely customizable in minutes.
3. 5-Steps Note Taking Map PowerPoint & Google Slides Template
The mind mapping method of note taking requires a highly visual layout to comprehend ideas with ease. Thanks to this 5-steps diagram for note taking presenters can discuss processes with precision.
4. Post-It Styled Concept Map for Note Taking PPT Template
For sticky notes fans out there, this playful layout is ideal for diagraming your ideas or explaining concepts by implementing mind map note-taking techniques. Work with the suggested layout or rearrange it to fit your presentation needs. Download now.
5. Mind Map Note Taking Google Slides Template
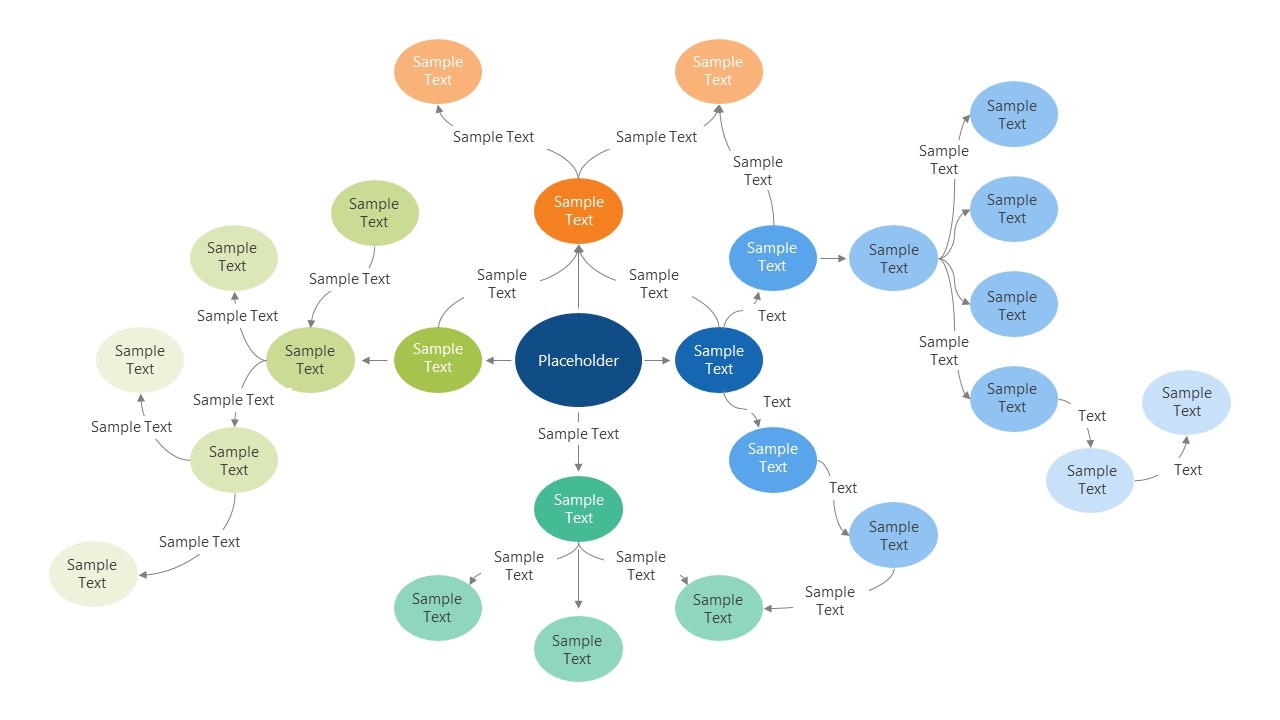
Not all nodes in mind maps have to bear rectangular shapes. This slide deck presents alternatives to the typical mind map notes templates. Check them out and work with the one that best fits your desired aesthetic.
6. Labeled Mind Map PowerPoint Template for Note Taking
This is one of the templates used in our case studies. Presenters can customize all aspects of these labeled cards, reduce them to simple nodes, or present detailed information per point.
7. Circular Concept Map Diagram with 4 Items & 12 Sub-Items Template
We conclude this list with a circular wheel diagram for expressing concept maps in a creative format. Work with the pre-established sub-nodes or alter their count. This template is fully editable in light and dark color schemes.
Mind map note taking is a versatile tool to understand processes. Presenters can implement them in constructing new ideas, learning processes, or to drive more efficiency in terms of developing and delivering presentations. Although you can work with hand-made mind map notes, we highly advise working with a mind map template to speed up the creative process.

Like this article? Please share
Mind Maps, Presentation Ideas Filed under Design , Presentation Ideas
Related Articles

Filed under Design • April 23rd, 2024
How to Create the Perfect Handouts for a Presentation
Learn how to create effective handouts for presentations and the recommended structure for handouts with this guide.

Filed under Presentation Ideas • February 15th, 2024
How to Create a 5 Minutes Presentation
Master the art of short-format speeches like the 5 minutes presentation with this article. Insights on content structure, audience engagement and more.

Filed under PowerPoint Tutorials • February 7th, 2024
How to Make a Venn Diagram in PowerPoint
Discover how easy is to make a Venn Diagram in PowerPoint with three different methods: SmartArt, PowerPoint shapes, and Venn Diagram PowerPoint Templates.
Leave a Reply
How to Create a Table of Contents for PPT: Step-by-step Guide

Table of Contents
Have you ever encountered a lengthy PowerPoint presentation where finding specific information felt like a challenge? Tables of contents (TOCs) are a common feature in various writing formats, helping users navigate content easily. Similar to Microsoft Word’s TOC functionality, PowerPoint offers methods for creating your own TOC. This guide will explore these methods, enabling you to create a helpful tool for both you and your audience during presentations.
Understanding Table of Contents in PowerPoint
Having a table of contents is really important for any long document or presentation. It helps your audience navigate through your material easily, finding the parts that interest them the most. By giving a clear outline of what’s coming up, it keeps your audience focused and engaged.
Also, having a table of contents helps you, as the presenter, stay organized. Breaking your presentation into sections and creating a table of contents ensures you cover everything you need to and don’t forget any important points. It also helps you manage your time better, so you know how much time to spend on each part.
Plus, a table of contents can be handy for later. If your audience wants to go back to a specific part of your presentation afterward, they can easily find it in the table of contents. This is especially useful if your presentation has a lot of data or complicated information that might be hard to remember without a guide.
How to Create a Table of Contents in PowerPoint?
There are 4 methods to Create a Table of Contents in PowerPoint:
Method 1: Use Outline View to Create a Table of Contents
Method 2: dragging slides to create a table of contents in powerpoint, method 3: create a table of contents by slide zoom, method 4: manually add a table of contents.
Step 1: Switch to Outline View: Go to the “View” tab on the ribbon and click “Outline View.” This displays your presentation in a text-based format, showing headings and subheadings.

Step 2: Collapse Headings (Optional): While in Outline View, you can simplify the view by collapsing all headings. Right-click anywhere in the thumbnail pane, navigate to “Collapse,” and choose “Collapse All.” This hides subheadings and makes it easier to select all slide titles.

Step 3: Copy Slide Titles: Select all the slide titles you want to include in your table of contents. Click and drag across the titles, or use Ctrl+Click (Windows) or Command+Click (Mac) for non-contiguous selections. Right-click on the selection and choose “Copy.”

Step 4: Switch Back to Normal View and Paste: Go back to “Normal View” by clicking the button on the “View” tab. Navigate to the slide where you want your table of contents. Click on the text box where you’ll display the titles. Right-click and choose “Paste.”

Step 5: Formatting (Optional): You can format the copied titles to match your desired table of contents style. Use the formatting options on the “Home” tab to adjust font, size, and spacing.

Step 6: Add Hyperlinks: To make your table of contents interactive, you can create hyperlinks for each entry. Select the entry text, then go to the “Insert” tab and click “Hyperlink.” Choose “Place in This Document” and select the corresponding slide from the list. Now clicking the entry in the table of contents will jump to that slide.

Step 1: Create a new slide for your table of contents: Go to the “Home” tab and click “New Slide.” Choose a layout that works for your table of contents, like a title and content layout.

Step 2: Navigate to the “Thumbnails” pane: This pane is usually on the left side of your PowerPoint window and shows thumbnails of all your slides.

Step 3: Drag and drop slides: Click and hold a slide thumbnail you want to include in your table of contents and drag it onto your new table of contents slide. Release the mouse button to drop it. Repeat this process for all the slides you want to add.
Step 4: Arrange and format: Once you have all the slides you want, arrange them in the order you like on your table of contents slide. You can resize the thumbnails by clicking and dragging their corners. You can also format the text associated with each thumbnail to match your presentation style.

PowerPoint’s Zoom feature allows you to create a visual table of contents for your presentation. Here’s how to do it using Slide Zoom:
Step 1: Insert a New Slide: Navigate to the “Home” tab and click “New Slide” to create a dedicated slide for your table of contents.

Step 2: Use Slide Zoom: Go to the “Insert” tab and locate the “Zoom” dropdown menu. Select “Slide Zoom” from the options.

Step 3: Choose Slides: A “Slide Zoom” dialogue box will appear. Here, you can select the specific slides you want to include in your table of contents by clicking on their titles in the list.

Step 4: Insert: Once you’ve chosen the slides, click “Insert” to add them as miniature versions onto your table of contents slide.
Step 5: Arrange: You can then arrange and resize these thumbnails to your preference.

Step 1: Add a table of contents at the beginning of the presentation.
Step 2 : Type the title of each slide in the presentation.
Step 3: You can also go to each slide to copy the title and paste it on the table of contents summary slide.
Step 4 : As this method requires adding hyperlinks manually head to the table of contents slide, select a heading, and click Insert > Link.
Step 5: Navigate to the bottom of the drop-down menu and select Insert Link, which opens the Insert Hyperlinks window.
Step 6: To link to a specific slide in the presentation, click Place in This Document, select the target slide, and insert the table of contents.
Closing Thoughts
Adding a table of contents to your PowerPoint presentations can be a big help for everyone involved. It makes it easier for your audience to find the information they need, keeps you organized as the presenter, and even serves as a handy reference guide after the presentation is over. By following the steps in this guide, you can easily create a clear and helpful table of contents that will improve your presentations overall.
Frequently Asked Questions
What are the shortcut keys for enabling “outline view” in powerpoint.
The shortcut keys for enabling “Outline Views” in PowerPoint are ALT+W+PO.
What Elements Can I Include in My Table of Contents?
Your table of contents can encompass diverse elements such as titles, page numbers, and essential document details. It’s also possible to incorporate headings, subheadings, and corresponding page numbers for every section within your presentation.
How Can I Make My Table of Contents More Visually Appealing?
Enhance the visual appeal of your table of contents by incorporating images or graphics. Customize the font, size, and color of the text to elevate its attractiveness. Consider adding a background image or color to the table of contents slide for added emphasis.
Are There Any Limitations to Creating a Table of Contents in PowerPoint?
Yes, there are certain limitations when crafting a table of contents in PowerPoint. Although you have the freedom to personalize it, embedding hyperlinks into titles or page numbers isn’t possible. Furthermore, once inserted into the presentation, the table of contents cannot be modified, underscoring the necessity to verify all information for accuracy prior to insertion.
Why is a table of contents important in PowerPoint presentations?
A table of contents helps in organizing and navigating through a presentation, making it easier for both the presenter and the audience to locate specific information quickly.
Can I customize the appearance of my table of contents in PowerPoint?
Yes, you can customize the appearance of your table of contents by experimenting with different fonts, colors, layouts, and adding graphics or icons to make it visually appealing.
How often should I update my table of contents?
It’s essential to update your table of contents whenever you make changes to your presentation to ensure accuracy and relevance.
Save Time and Effortlessly Create Presentations with SlidesAI

Purdue Online Writing Lab Purdue OWL® College of Liberal Arts
Welcome to the Purdue Online Writing Lab

Welcome to the Purdue OWL
This page is brought to you by the OWL at Purdue University. When printing this page, you must include the entire legal notice.
Copyright ©1995-2018 by The Writing Lab & The OWL at Purdue and Purdue University. All rights reserved. This material may not be published, reproduced, broadcast, rewritten, or redistributed without permission. Use of this site constitutes acceptance of our terms and conditions of fair use.
The Online Writing Lab at Purdue University houses writing resources and instructional material, and we provide these as a free service of the Writing Lab at Purdue. Students, members of the community, and users worldwide will find information to assist with many writing projects. Teachers and trainers may use this material for in-class and out-of-class instruction.
The Purdue On-Campus Writing Lab and Purdue Online Writing Lab assist clients in their development as writers—no matter what their skill level—with on-campus consultations, online participation, and community engagement. The Purdue Writing Lab serves the Purdue, West Lafayette, campus and coordinates with local literacy initiatives. The Purdue OWL offers global support through online reference materials and services.
A Message From the Assistant Director of Content Development
The Purdue OWL® is committed to supporting students, instructors, and writers by offering a wide range of resources that are developed and revised with them in mind. To do this, the OWL team is always exploring possibilties for a better design, allowing accessibility and user experience to guide our process. As the OWL undergoes some changes, we welcome your feedback and suggestions by email at any time.
Please don't hesitate to contact us via our contact page if you have any questions or comments.
All the best,
Social Media
Facebook twitter.
Got any suggestions?
We want to hear from you! Send us a message and help improve Slidesgo
Top searches
Trending searches

11 templates

teacher appreciation

mother teresa
18 templates

memorial day
12 templates

summer vacation
25 templates

Outline Style Social Media Icon Resources
Outline style social media icon resources presentation, free google slides theme and powerpoint template.
Download the Outline Style Social Media Icon Resources presentation for PowerPoint or Google Slides and start impressing your audience with a creative and original design. Slidesgo templates like this one here offer the possibility to convey a concept, idea or topic in a clear, concise and visual way, by using different graphic resources. You need to talk about a specific topic, but you don't know how to do it? Try using presentations like this one here, 100% customizable!
Features of this template
- 100% editable and easy to modify
- Different slides to impress your audience
- Contains easy-to-edit graphics such as graphs, maps, tables, timelines and mockups
- Includes 500+ icons and Flaticon’s extension for customizing your slides
- Designed to be used in Google Slides and Microsoft PowerPoint
- Includes information about fonts, colors, and credits of the resources used
How can I use the template?
Am I free to use the templates?
How to attribute?
Attribution required If you are a free user, you must attribute Slidesgo by keeping the slide where the credits appear. How to attribute?
Related posts on our blog.

How to Add, Duplicate, Move, Delete or Hide Slides in Google Slides

How to Change Layouts in PowerPoint

How to Change the Slide Size in Google Slides
Related presentations.
Premium template
Unlock this template and gain unlimited access
IMAGES
VIDEO
COMMENTS
Import a Word outline into PowerPoint. Open PowerPoint and select New Slide > Slides from Outline. In the Insert Outline dialog box, find and select your Word outline and select Insert. Note: If your Word document contains no Heading 1 or Heading 2 styles, PowerPoint will create a slide for each paragraph in your content.
The PowerPoint screenshots that you'll see in this section use a template called Brusher from Envato Elements . Brusher PowerPoint Template is an advanced design tool that makes it easy to create great presentations. Now let's look at how to create PowerPoint outlines: 1. Close PowerPoint (If It's Already Open)
On either the Home or Insert tab, select the New Slide drop-down menu. Pick "Slides From Outline." Browse for the outline file on your computer, select it, and click "Insert." After a moment, you'll see your outline load into PowerPoint. As mentioned, each line of the outline is its own slide.
Master presentation outlines with our easy, step-by-step guide, complete with practical examples.
Follow these steps when creating an outline for your presentation: 1. Consider the purpose of your presentation. When creating a presentation outline, determine your goal. To find this, think about what you want your audience to obtain or support after your discussion. For example, a nonprofit that builds wells for impoverished communities may ...
2. Enhance with Quotes, Testimonials, or Data. Make your presentation more interesting by adding extra info like quotes, testimonials, or data. It can make your audience more engaged and reinforce your message. 3. Visualize Your Concepts. How you show your ideas matters a lot.
A presentation outline is a bare-bones version of your talk. It should take the general direction of your pitch, plus summaries of your key points. Its purpose is to help you shape your thinking, organize your thoughts, and make sure your material is presented logically. In this article, we're going to take a closer look at what a ...
Navigate to the Print Options. On your keyboard, hit CTRL+P to open up the print options for your presentation. 2. Navigate to the Outline View. Within the print options, select the 'Full Page Slides' dropdown (the default setting) and within the menu in the upper right-hand corner, select the Outline View.
Method 3: Create a presentation outline using ChatGPT. ChatGPT is an AI chatbot that can help with a wide variety of tasks - everything from acting as a therapist, to sharing recipes, to helping you come up with presentation ideas and creating content for a presentation.
Body. Create a skeleton outline of your presentation by breaking down this main message into smaller parts. Use bullet points or headings to organize these bits of information. Think of the main points as the big chapters and the subpoints as the smaller sections within those chapters.
Microsoft PowerPoint is a presentation design software that is part of Microsoft 365. This software allows you to design presentations by combining text, images, graphics, video, and animation on slides in a simple and intuitive way. Over time, PowerPoint has evolved and improved its accessibility to users.
Flesh out the points and sub-points from your outline. Decide very early on if you want to give your speech with or without notes. Revise your drafts as much as possible until you have created a full speech. If you are going to speak with notes, write some of the information from your outline onto cue cards.
To import an existing outline file, click the drop-down menu under New Slide on the HOME tab, and select Slides from Outline. Navigate to the outline file, and click Insert. Another option is to create an outline in .txt format using Notepad (or any other text editor), as shown in the screenshot below. Normal paragraphs will be converted into ...
Apply the 10-20-30 rule. Apply the 10-20-30 presentation rule and keep it short, sweet and impactful! Stick to ten slides, deliver your presentation within 20 minutes and use a 30-point font to ensure clarity and focus. Less is more, and your audience will thank you for it! 9. Implement the 5-5-5 rule. Simplicity is key.
All you have to do is follow the 3 simple steps. Step-1: Click on the "File" tab. In the open PowerPoint presentation, click on the "File" tab from the menu ribbon located at the top of the screen. In the sidebar of the "File" menu, click on the "Print" option. Step-2: Click on the "Print Layout" option.
Click on the "File" tab in the upper left-hand corner of the screen. Step 2: Select "Export". Upon clicking "File", new options will appear. Click on "Export" from the options in the File tab. Step 3: Create Handouts. Click "Create Handouts" under the Export tab then press the "Create Handouts" icon. Step 4: Select ...
To do that, simply go up to the Home tab and click on New Slide. This inserts a new slide in your presentation right after the one you were on. You can alternatively hit Ctrl+M on your keyboard to insert a new blank slide in PowerPoint. To learn more about this shortcut, see my guide on using Ctrl+M in PowerPoint.
Step 1: Select the Text. Begin by clicking on the text box containing the text you want to outline. Selecting the text is the first step because you need to tell PowerPoint which text you want to modify. Make sure you click on the actual text box and not just somewhere on the slide.
Select the New Slide menu arrow. Select Slides from Outline from the drop-down menu. Figure 4. Slides from Outline option. Locate and select the Word document in the Insert Outline dialog box and then select the Insert button. Figure 5. Insert button. The Word outline should now be converted to PowerPoint slides.
Step 2 - Open Shape Format and Click on Shape Outline. Next, the "Shape Format" ribbon will appear. If you don't see this ribbon, then you need to click and select the text box properly. On the " Shape Format " ribbon, click on the " Shape Outline " tool. Step 3 - Choose a Color to Add Outline to Text Box.
How to Use Mind Map Notes for Presentation Development. Once you have created a mind map, it can be a foundational tool for developing your presentation. Here's how you can move from the mind map to the final presentation: Outline Extraction. Use the structure of your mind map to outline your presentation.
There are 4 methods to Create a Table of Contents in PowerPoint: Method 1: Use Outline View to Create a Table of Contents; Method 2: Dragging Slides to Create a Table of Contents in PowerPoint; Method 3: Create a Table of Contents by Slide Zoom; Method 4: Manually Add a Table of Contents; Method 1: Use Outline View to Create a Table of Contents ...
The Online Writing Lab at Purdue University houses writing resources and instructional material, and we provide these as a free service of the Writing Lab at Purdue.
Download the Outline Style Social Media Icon Resources presentation for PowerPoint or Google Slides and start impressing your audience with a creative and original design. Slidesgo templates like this one here offer the possibility to convey a concept, idea or topic in a clear, concise and visual way, by using different graphic resources.
Discover built-in accessibility features in PowerPoint and how to use them effectively. Thank you to those that completed our survey and shared materials to help shape the content for this session. Based on our survey results, below is a high-level outline of tips and tricks to be covered for accessibility in PowerPoint.