- Start the presentation and see your notes in Presenter view Article
- Add speaker notes to your slides Article
- Rehearse and time the delivery of a presentation Article
- Record a slide show with narration and slide timings Article
- Print your PowerPoint slides, handouts, or notes Article
- Create a self-running presentation Article


Record a slide show with narration and slide timings
You can record your PowerPoint presentation—or a single slide—and capture voice, ink gestures, and your video presence. When completed, it’s like any other presentation. You can play it for your audience in a Slide Show or you can save the presentation as a video file. So, instead of just “handing the deck” to someone, people can see your presentation with the passion and personality intact.
A new feature for Microsoft 365 was rolled out in early 2022. Exactly when your business has this feature is also based on when your admin distributes new features in Microsoft 365.
This article contains procedures for both the new experience and the classic experience:
New experience
Classic experience

All recording tools are in the Record tab in the ribbon, but you can start by selecting the Record button.

You can also record by selecting one of the options in the Record section of the Record tab.

If you have notes in your presentation, they’re turned into text at the top of the screen so you can use them like a teleprompter as you record.
Tip: Use the auto-scroll feature in teleprompter and set it to scroll at your preferred speed.

There are several options you can use when you record a presentation. You can turn your camera and microphone on or off by selecting the icons at the top. There are several options you can use when you record a presentation. You can turn your camera and microphone on or off by selecting the icons at the top. To change your camera or microphone, choose the Select more options <···> icon. You can even add a customizable camera that can be resized, repositioned, and formatted to go with your slide content. Select Edit , then select Cameo . Adjust the formatting for the camera, then select Record again to return to the recording environment.
In the Select the camera mode menu, you can select Show Background or Blur Background .

You can also change the layout in the Views menu to switch between Teleprompter , Presenter View , or Slide View .

When you’re ready, select Start recording and a countdown will begin.
Use the onscreen laser, colored pens, or highlighters in the tray below markup slides and it’ll record as well.
To record narration for a specific slide, use the previous or next arrows.
Note: Narration won’t record during slide transitions so let those play first before you start speaking.
Pause the recording as needed or select Stop if you’re done.
To review the video, select the Play button.
To quickly delete and re-record your video on current slide or on all slides, select Delete . While Clear will delete the recorded narration, Reset to Cameo additionally replaces the recorded narration with the camera feed for an easy retake.

When you’re done, select Export > Export Video .
After you successfully export the video, you can view the video by selecting View and share video .

At any time, you can return to your document by selecting the Edit button.
Want more?
About Record in PowerPoint
Create a self-running presentation
Export or turn your presentation into a video
Classic experience
Turn on the Recording tab of the ribbon: On the File tab of the ribbon, click Options . In the Options dialog box, click the Customize Ribbon tab on the left. Then, in the right-hand box that lists the available ribbon tabs, select the Recording check box. Click OK .

To get ready to record, select Record on either the Recording tab or the Slide Show tab of the ribbon.
Clicking the upper half of the button starts you on the current slide.
Clicking the lower half of the button gives you the option to start from the beginning or from the current slide.

(The Clear command deletes narrations or timings, so be careful when you use it. Clear is grayed out unless you have previously recorded some slides.)
The slide show opens in the Recording window (which looks similar to Presenter view), with buttons at the top left for starting, pausing, and stopping the recording. Click the round, red button (or press R on your keyboard) when you are ready to start the recording. A three-second countdown ensues, then the recording begins.

The current slide is shown in the main pane of the Recording window.
You can stop the recording any time by pressing Alt + S on your keyboard.
Navigation arrows on either side of the current slide allow you to move to the previous and next slides.
PowerPoint for Microsoft 365 automatically records the time you spend on each slide, including any Animate text or objects steps that occur, and the use of any triggers on each slide.
You can record audio or video narration as you run through your presentation. The buttons at the lower-right corner of the window allow you to toggle on or off the microphone, camera, and camera preview:

If you use the pen, highlighter, or eraser, PowerPoint records those actions for playback also.

If you re-record your narration (including audio and ink), PowerPoint erases your previously recorded narration (including audio and ink) before you start recording again on the same slide.
You can also re-record by going to Slide Show > Record .
You can pick a pointer tool (pen, eraser, or highlighter) from the array of tools just below the current slide. There are also color selection boxes for changing the color of the ink. ( Eraser is grayed out unless you have previously added ink to some slides.)
To end your recording, select the square Stop button (or press S on your keyboard).
When you finish recording your narration, a small picture appears in the lower-right corner of the recorded slides. The picture is an audio icon, or, if the web camera was on during the recording, a still image from the webcam.

The recorded slide show timing is automatically saved. (In Slide Sorter view, the timings are listed beneath each slide.)
In this process, what you record is embedded in each slide, and the recording can be played back in Slide Show. A video file is not created by this recording process. However, if you need one, you can save your presentation as a video with a few extra steps.
Preview the recorded slide show
On the Slide Show tab, click From Beginning or From Current Slide .
During playback, your animations, inking actions, audio and video will play in sync.

Preview the recorded sound
In the Recording window, the triangular Play button near the top left corner lets you preview the recording of the slide that currently has the focus in that window.

In Normal view, click the sound icon or picture in the lower-right corner of the slide, and then click Play . (When you preview individual audio in this way, you won't see recorded animation or inking.)

You can pause playback while previewing the audio.
Set the slide timings manually
PowerPoint for Microsoft 365 automatically records your slide timings when you add narrations, or you can manually set the slide timings to accompany your narrations.
In Normal view, click the slide that you want to set the timing for.
On the Transitions tab, in the Timing group, under Advance Slide , select the After check box, and then enter the number of seconds that you want the slide to appear on the screen. Repeat the process for each slide that you want to set the timing for.
If you want the next slide to appear either when you click the mouse or automatically after the number of seconds that you enter—whichever comes first—select both the On Mouse Click and the After check boxes.
You can use manual slide timings to the trim the end of a recorded slide segment. For example, if the end of a slide segment concludes with two seconds of unnecessary audio, simply set the timing for advancing to the next slide so that it happens before the unnecessary audio. That way you don't have to re-record the audio for that slide.
Delete timings or narration
The Clear command is for deleting timings or narration from your recording that you don't want or that you want to replace.
In the Recording window, the Clear command in the top margin of the window allows you to:
Clear recordings on the current slide
Clear recordings on all slides
In Normal view, there are four different Clear commands that allow you to:
Delete the timings on the currently selected slide
Delete the timings on all slides at once
Delete the narration on the currently selected slide
Delete the narration on all slides at once
If you do not want to delete all the timings or narration in your presentation, open a specific slide that has a timing or narration that you do want to delete.
On the Recording tab of the PowerPoint for Microsoft 365 ribbon, on the Record Slide Show button, click the down arrow, point to Clear , and then choose the appropriate Clear command for your situation.

Turn off timings or turn off narrations, and ink
After you've recorded your PowerPoint for Microsoft 365 presentation, any timings, gestures, and audio you performed are saved on the individual slides. But you can turn them all off if you want to view the slide show without them:
To turn off recorded slide timings: On the Slide Show tab, clear the Use Timings box.
To turn off recorded narrations and ink: On the Slide Show tab, clear the Play Narrations box.
Publish the recording to share it with others
Once you've edited the recording to your satisfaction, you can make it available to others by publishing to Microsoft Stream.
With the presentation open, on the Recording tab, select Publish to Stream .
Type a title and a description for the video.
Set other options, including whether you want others in your organization to have permission to see the video.
Select the Publish button.
The upload process can take several minutes, depending on the length of the video. A status bar at the bottom of the PowerPoint window tracks the progress, and PowerPoint shows a message when the upload is finished:

Click the message to go directly to the video playback page on Microsoft Stream.
Create closed captions
To make your video more accessible by including closed captions, choose from these options, which are described in separate Help articles:
Manually write a closed caption file yourself
Get a closed-caption file automatically generated by Microsoft Stream
Once you have a closed-caption file, you can add it to your video file by using PowerPoint .
Record a slide show
With your presentation open, on the Slide Show tab, click Record Slide Show .
(The Clear command deletes narrations or timings, so be careful when you use it. Clear is grayed out unless you have previously recorded some slides.)
In the Record Slide Show box, check or clear the boxes for your recording, and click Start Recording .

More about these options:
Slide and animation timings : PowerPoint automatically records the time you spend on each slide, including any animation steps that occur, and the use of any triggers on each slide.
Narrations, ink, and laser pointer: Record your voice as you run through your presentation. If you use the pen, highlighter, eraser, or laser pointer, PowerPoint records those for playback as well.
Important: Pen, highlighter, and eraser recording are available only if you have the February 16, 2015 update for PowerPoint 2013 or a later version of PowerPoint installed. In earlier versions of PowerPoint, pen and highlighter strokes are saved as ink annotation shapes.
At the top left corner of the window is the Recording toolbar, which you can use to:

If you re-record your narration (including audio, ink, and laser pointer), PowerPoint erases your previously recorded narration (including audio, ink, and laser pointer) when you start recording again on the same slide.
You can also re-record by going to Slide Show > Record Slide Show .
To use ink, eraser, or the laser pointer in your recording, right-click the slide, click Pointer options , and pick your tool:
Laser Pointer
Highlighter
Eraser (This option is grayed out unless you have previously added ink to some slides.)
To change the color of the ink, click Ink Color .
To end your recording, right-click the final slide, and click End Show .
Tip: When you finish recording your narration, a sound icon appears in the lower-right corner of each slide that has narration.
The recorded slide show timings are automatically saved. Timings are shown in Slide Sorter view just beneath each slide.
In this process, what you record is embedded in each slide, and the recording can be played back in Slide Show. A video file is not created by this recording process. However, if you want a video file, you can save your presentation as a video with a few extra steps.
On the Slide Show tab, click From Beginning or From Current Slide.
During playback, your animations, inking actions, laser pointer, audio and video play in sync.
Preview the recorded audio
In Normal view, click the sound icon in the lower-right corner of the slide, and then click Play.
PowerPoint automatically records your slide timings when you add narrations, or you can manually set the slide timings to accompany your narrations.
On the Transitions tab, in the Timing group, under Advance Slide , select the After check box, and then enter the number of seconds indicating how long the slide should appear on the screen. Repeat the process for each slide that you want to set the timing for.
Tip: If you want the next slide to appear either when you click the mouse or automatically after the number of seconds that you enter—whichever comes first—select both the On Mouse Click and the After check boxes.
The Clear command is for deleting timings or narration from your recording that you don't want or that you want to replace. There are four different Clear commands that allow you to:
On the Slide Show tab of the PowerPoint ribbon, on the Record Slide Show button, click the down arrow, point to Clear, and then choose the appropriate Clear command for your situation.
Turn off timings or turn off narrations, ink, and laser pointer
After you've recorded your PowerPoint presentation, any timings, gestures, and audio you performed are saved on the individual slides. But you can turn them all off if you want to view the slide show without them:
To turn off recorded narrations, ink, and the laser pointer: On the Slide Show tab, clear the Play Narrations box.
Turn your mouse into a laser pointer
Animate text or objects
Turn your presentation into a video
Create a self-running presentation
Record your presentation

Toggle video and audio options in the options dropdowns in the recording toolbar.

Note: Your video will be re-recorded just as you had styled.
After you exit Recording Studio with the Esc key (or by clicking End show ) you will see narration (audio/video) applied to your slide along with the proper slide timings and ink animations.
Tip: Audio, video, and inking elements can all be resized and moved in edit view after recording.

Reset to Cameo
To delete your recording and retain your camera style, do the following:
On the Record tab, select Reset to Cameo .

Clear timings or narration
On the Record tab, select Clear Recording

Keyboard shortcuts during the recording process
Related information.
Present with Cameo
Save a presentation as a movie file or MP4
Record audio in PowerPoint for Mac
Add or delete audio in your presentation
Prepare to record
To begin, open the presentation you want and click the Slide Show tab.
Tip: If your presentation has a lot of slides, you might find it more convenient to work in Slide Sorter view. Click View > Slide Sorter to try it out.
Here are some things to check before you begin recording:
If you want to record only part of your slide deck, do one of the following before you begin:
Select the slides you don't want to include, and click Hide Slide .
Click Custom Show > Custom Slide Show > + (add).

Use the Rehearse button to change the timing between slides without affecting the narration or gestures you've already recorded.

Make sure your microphone is set up correctly. On the Mac, go to System Preferences > Sound .
Record your slide show
If you want to add narration or commentary to the slide show, make sure your microphone is set up and working.
To start recording:
Click the Slide Show tab, select the slide where you want the recording to begin, and then click Record Slide Show .

During recording, use Ctrl+click to access the recording commands that let you navigate through the slides, change cursors, or trigger screen blackouts or whiteouts.

Click End Show to stop recording.
A Save dialog box appears. Click Yes to save your recording, or No if you want to record it again.
Saving overwrites anything you've previously recorded. If you want to record another slide show with the same set of slides, save your presentation file with a different name.
Click Play from Start to preview your recording.
You may want to print this list of keyboard shortcuts to refer to while you're recording:
Set playback options
When you've finished recording and are ready to distribute the presentation, click Set up Slide Show and choose the options that are right for your audience.

Show type Show full screen or windowed.
Show options Turn off narration or animations.
Slides Choose a subset of slides, or a Custom show if you've set one up.
Advance slides Set up this version of the slide show so someone can page through it manually.
Add, change, or remove transitions between slides
Start the presentation and see your notes in Presenter view
We're sorry. PowerPoint for the web doesn't support recording a slide show.

Need more help?
Want more options.
Explore subscription benefits, browse training courses, learn how to secure your device, and more.

Microsoft 365 subscription benefits

Microsoft 365 training

Microsoft security

Accessibility center
Communities help you ask and answer questions, give feedback, and hear from experts with rich knowledge.

Ask the Microsoft Community

Microsoft Tech Community

Windows Insiders
Microsoft 365 Insiders
Was this information helpful?
Thank you for your feedback.
How to Record Audio on PowerPoint – Windows & Mac Instructions
Table of Contents
Recording your PowerPoint presentation as a video can make a difference when pitching a client , internally, or transforming your slides into an online course.
Now that Microsoft added a recording function directly into PowerPoint, it has become easier to create a video out of any presentation.
All you need is to start recording yourself narrating.
In this tutorial, we will be taking you through the step-by-step process of recording audio on PowerPoint for both Windows & Mac .
Why Record PowerPoint Presentations?
PowerPoint is a great tool to give live presentations, but there are cases where you won’t be able to present live.
While you could send a PPT file or PDF export, a presentation recording allows you to capture the sentiment of the topic, and helps connect with your audience.
Videos are more engaging than presentations, and especially when giving a lecture or training online, video is a better solution.
Let’s hit that record button and go directly to the instructions:
Recording a PowerPoint Presentation on Windows
Windows is the default option for PowerPoint, follow the instructions below to turn your slides into video. All you need to do is find the Record tab and follow the step-by-step instructions to create a video presentation in no time.
Go to the Record Tab
Located in your toolbar, the record tab includes all the options for recording a video inside the software. Click on it to bring up all the options for recording a video.

Record slide show
Now, you need to start the audio recording and follow the steps to record your PowerPoint slides to turn them into video.
Start the Recording
Choose whether to start the recording from the beginning or a specific slide. This will bring you to the full-screen recording mode.

Be sure to check all the recording options including the camera, microphone, narration, and letter size of the transcription before you start recording.
Start recording
Click on the red circle to start recording. Wait for the countdown and start presenting (or narrating).

Tip: Replay the video playback and ensure the recording is good enough before saving. You may need to delete and reshoot it.
Use the Cameo feature
A recent addition to Microsoft PowerPoint is the Cameo feature where you can also record video from your webcam directly into the presentation. Read more on Microsoft’s website about it.
On the presentation, all you need to do is click on the camera icon 📹 while in presenting mode.
Control the presentation, timing, and transitions
While in presenting mode, you can control the transition between the slides by clicking the next slide button. You will also see the time you are recording to control your timing between slides.
Keep an eye on the timer.
Export the Video
On Windows, there is the Export option in your toolbar to save the recording as a video. Alternatively, you can go through the main menu, but it’s easier after you hit stop to just export directly.

Choose a destination for your video or audio file before hitting the button for “Export Video”.

Customize Export
Choose “customize export” and select your preferred setting for the video file. Here is where you can select your preferred quality, dimensions, and more.
Then, click “Create Video” to get your video file.

Edit the Recording
For longer video recordings, it’s a good idea to do some video editing, trim pauses, and make your presentation look more professional. You may want to add transitions or sounds as well.
Especially if you are creating an online course or training, your presentation will look more professional after editing. Consider a professional video editor to help you out.
Check out our choices for video training tools to edit your videos.
Upload to your LMS
For video training or courses, you will need somewhere to host and deliver your videos to your learners.
LearnWorlds is the top online course platform , you can easily upload your video as a video learning unit .
You can try LearnWorlds a 30-day free trial:
Your professional looking Academy in a few clicks
Recording a powerpoint presentation on mac.
While PowerPoint is a Microsoft software, many Mac users download and use it on their computers as well. With more than 40k reviews on the app store , PowerPoint is a very popular Keynote alternative.
Go to the Record tab
PowerPoint on Mac has a dedicated tab for recording. Find it at the right side of your toolbar.

Record the Presentation
The next step for recording your slide show is to click on the record icon on the left. Click on the icon with the red circle to bring up the full-screen presenting mode.

Control the presentation, slide transition & timing
You can choose whether to show your camera, mute the microphone, use the highlighter, or change slides while narrating.
You can monitor the time you spend recording, and you can record, pause, or stop the recording at any time. The transcript helps to record the narration by reading while recording.
When you press record, wait for the countdown timer and then start speaking.

Cameo on Mac
You can use the Cameo feature to add a video recording of yourself to the presentation.
Use the audio button icon if you just want to insert audio. You can play the audio while presenting a slide live, instead of recording a voice-over.

Replay the video to ensure it was recorded correctly
Before you end the slideshow (End Show option), watch the playback to ensure you have a high-quality recording.
Export Video File
Mac’s “File” toolbar is hidden, so you need to move your cursor out of bounds on the top of your screen to find the “Export…” option.
Choose “File” above the toolbar, and then “Export…”

Choose Destination
Next, choose a destination for your video file.

Customize Export: Compression, Format, Quality, TImings & Narration
Choose the format (MP4 or MOV) instead of a PowerPoint file, the compression, and presentation quality. Be sure to customize the settings to your liking.
Be sure to trim pauses, and do some editing of the video. This is especially important for longer videos for a more professional output. Consider hiring a video editor for better editing.
LearnWorlds is our recommended best learning management system , you can easily upload your video as a course or any other training material. It comes with everything you need to create and sell online education out-of-the-box.
Additional Tips for Recording Audio on Powerpoint
After many meetings, recordings, and live webinars I have hosted over the years, I came to understand the huge importance of high-quality audio in any live interaction,
Before you start recording, be sure you are ready with the right video lighting setup and microphone setup.
You will need to be ready:
- A good microphone (depends on your budget) – and test the sound quality
- Reduce external noise (close windows, have sound absorbents like audio sponges in the room, etc.)
- Prepare your speaking notes or transcript
- Prepare for multiple takes (recordings)
- Practice before-hand
Additionally, be sure your face is well-lit, and for more professional setups, you may need to buy lights for your video recordings.
Recording your presentation comes with many advantages, like making it more engaging and getting to be “present” even asynchronously to your audience.
It makes a huge difference, especially when taking your training material from offline presentations into online courses!
Frequently Asked Questions (FAQs)
How do i record a powerpoint presentation as a video.
PowerPoint includes the built-in ability to record video in slideshow mode and record both audio and your webcam for a more personalized experience.
Can you record a PowerPoint in presentation mode?
Yes, there is a tab dedicated to recording videos in PowerPoint without any additional plugins.
Can you video record yourself on PowerPoint?
Yes, PowerPoint allows you to use the Cameo feature to either add video to your slides or record the presentation while you narrate it.
How do I convert a PPT slideshow into a video?
You will need to record a narration on top of your presentation. You can skip the narration and just record the slides with a transition to create a video.
Can PowerPoint record computer audio?
Yes, you can record audio from your microphone.
How do you add audio and video to a PowerPoint presentation?
You can either record and insert it at that moment or import video and audio from your computer to PowerPoint by clicking on the “Insert” tab.

Nick Malekos
Nick Malekos is a Senior Digital Marketer in LearnWorlds. He is a results based and well-rounded Digital Marketer with years of experience in the education industry, writer and digital literacy trainer.

How to video record yourself presenting a PowerPoint

What type of content do you primarily create?
Recording yourself presenting a PowerPoint can be challenging, especially getting the technical aspects right. You need to capture your screen, webcam, and audio seamlessly while delivering your content naturally and avoiding awkward transitions between slides.
Finding a tool that integrates all these components can seem daunting. However, recording yourself presenting a PowerPoint doesn't have to be reserved for the tech-savvy or professional speakers.
Whether you're a teacher creating online lessons, a marketer producing a product demo, or someone looking to improve their presentation skills, this guide will walk you through user-friendly tools and strategies that will teach you how to video record yourself presenting a PowerPoint.
- Recording yourself presenting a PowerPoint can be challenging, but it doesn't have to be reserved for experts.
- Video recording offers unlimited reach, repurposing opportunities, and a more engaging experience.
- Use PowerPoint's built-in recording feature or tools like Descript for a polished presentation.
- Other tools like Zoom, Loom, OBS Studio, Clipchamp, and Quick Time Player can also be used for recording.
- Tips include practicing your script, using slide notes, ensuring high-quality audio and lighting, and incorporating storytelling techniques.
Why video record yourself presenting a PowerPoint?
Video recording your PowerPoint presentations offers several advantages:
- Unlimited reach : Unlike in-person presentations confined to a specific time and location, recorded videos allow your message to reach audiences globally at their convenience.
- Repurposing opportunities: Recorded presentations can be repurposed as evergreen content across multiple platforms, such as social media, online courses, webinars, and internal training materials, maximizing their value.
- Personal and engaging : Recording yourself narrating a presentation adds a personal touch and dynamic element that static slides alone cannot replicate. Your viewers can see and hear you deliver the content, creating a more immersive and engaging experience.
How to record your presentation with the PowerPoint app
Built-in recording feature in powerpoint.
1. Open the PowerPoint slide you want to record.
2. Click on the Record tab of the top toolbar.
3. Click on the Record button and choose from any of the following options:
- From Current Slide
- From Beginning
4. You'll see the PowerPoint screen recording window.
5. Select the microphone and camera from the icon on the top-right.
6. Click the Stop and Replay buttons to end or replay your recording.
7. To export your presentation's recording, click Export to Video within the Recording tab.
Benefits : Easy to use, no external tools needed
Limitations : Limited editing capabilities.
How to make a more polished recording of your presentation with Descript
While PowerPoint's built-in recording features are helpful, they may not produce the refined result you want for your presentation. That's where Descript comes in handy.
It’s a whole production studio at your fingertips, with video recording, transcription, and editing capabilities, ready to transform dull PowerPoint slides into an engaging experience for your audience. Descript also has a built-in screen recorder.
You can use Descript on Windows, Mac, or even straight from your web browser.
Here's step-by-step guide to recording your PowerPoint presentation with Descript.
Set up your screen recording
1. Install and open Descript. At the top of the editor, click and open the Record panel.
2. Select Screen.
3. Set Recorder settings:
Adjust the default recording settings to your liking, including the transcription language, the maximum recording resolution, and more.
4. Set recording options. Choose which audio and video sources to record (e.g., microphone, computer audio, camera). Remember to turn the camera on to capture your talking head video alongside your PowerPoint presentation.
5. Click the Additional Settings icon for
- Studio Sound (Optional): Enhance audio quality with noise reduction and background removal
- Transcription (Optional): Enable automatic transcription for easier editing
- Recording separate audio tracks
6. Add (optional) Speaker labels for each audio track (e.g., "Narrator," "Expert") by typing them in the text box next to your audio inputs.
Capture your screen recording
1. Select the right recording option:
- Recording into script : Choose this if you haven’t recorded anything yet.
- Replace selection : Choose this if you already have a script and want to replace a specific section with a new recording.
- Record new layer : Pick this for recording your video as a new layer on top of an existing recording.
2. Click Record at the bottom of the Record panel.
3. Drag over the area of your screen you wish to record. Click Start Recording. Press Space to start recording the full screen.
4. Click Stop to finish recording
Bonus: Descript creates separate tracks for camera, microphone, and computer audio. You can edit each track individually for more precise control.
- Do a short test recording to ensure everything is set up correctly.
- Set your recording to transibe for easier editing.
Editing and polishing your PowerPoint recording in Descript
Descript's AI video editing tool makes it a breeze to trim, cut, and splice your video footage, ensuring a seamless flow from start to finish. You can add smooth transitions and other visual effects to make your presentation pop.
Here’s a glimpse of how to edit and polish your PowerPoint recording in Descript:
Edit your recording like a doc
Did you make a mistake during a slide transition? No problem. Just delete those sections in the text transcript (created automatically by Descript) and the video will adjust to match.
Remove filler words
Sound smoother and more confident by easily removing filler words like "um" and "uh" from the transcript.
Fix voiceover mistakes by typing
Didn't nail your delivery on a specific slide? No need to start from scratch! Descript's Overdub feature lets you simply type in the correct narration and replace the audio on that slide with AI voice cloning.
Boost video quality and engagement :
- Crisp up audio quality by reducing background noise and room reverb with the AI-powered Studio Sound feature.
- Replace your background completely with the Green Screen Video Editor —look like you're presenting in a sleek studio or broadcasting from a beach.
- Enable Eye Contact simulation with AI, so it appears you're making direct eye contact with viewers, even if you’re looking or reading something off-camera.
Other ways to video record yourself presenting a PowerPoint
Use Zoom’s meeting recording feature to record yourself giving a PowerPoint presentation. Start a Zoom meeting with yourself, share your PowerPoint window, and enable recording
Loom is a handy screen recording tool that also offers a webcam overlay. Launch the Loom app or Chrome extension and set it to record your screen and webcam. Expect high-quality recordings but no advanced editing features. The free plan offers only five minutes of recording at a stretch.
3. OBS Studio
OBS Studio is a free, open-source screen recorder/streaming software with a steeper learning curve. It’s popular among advanced or tech-savvy users who need granular customization and control.
To record your presentation, add a "Screen Capture" source to capture your PowerPoint window and a "Video Capture Device" source for your webcam.
4. Clipchamp: Recording natively in Windows
You can use Microsoft’s Clipchamp , the built-in screen recorder and video editor for Windows, to simultaneously capture your computer screen, webcam, and audio for recording your PowerPoint presentation. It’s also available as a browser-based app. You can record up to 30 minutes on screen and webcam recordings.
Users can also adjust the screen and webcam recordings in the editing timeline separately.
5. Quick Time Player Recording natively in Mac
Use Mac’s Quick Time Player to record your PowerPoint presentation. It’s not as straightforward as the other options on this list, so here’s a quick guide to help you out:
- Launch Quick Time Player.
- Select File and go to New Movie Recording.
- You'll be recording your entire screen in addition to recording your face, so adjust the size and location of the recording window so that it's in a nonintrusive corner of your PowerPoint.
- Go to View and select Float on Top .
- Next, go to File and select New Screen Recording.
- On the menu that appears, select Record Selected Portion and drag a border around your PowerPoint and the webcam recording window.
- Press Record and start presenting.
- You can adjust the video quality and the audio source in the webcam recording window.
How to turn your PowerPoint presentation slides into a video
Did you know PowerPoint lets you save your presentation as a video, too?
Here's a breakdown of the two ways you can do so—keeping all the presentation elements (narration, animation, pointer movements, timings, and so on) intact in the presentation itself.
Save your PowerPoint presentation as a video
This creates a separate video file (MP4 or WMV) that anyone can play, even without PowerPoint.
Follow these steps:
- Save your presentation
- Go to File > Export > Create a Video
- Ultra HD (4K): Best for large screens (if you have Windows 10+)
- Full HD (1080p): Great for computers and TVs
- HD (720p): Good for streaming online or on DVDs
- Standard (480p): Smallest size, good for phones
4. Decide on narration
- If you haven't recorded yourself talking, choose "Don't Use Recorded Timings and Narrations" from the dropdown menu
- If you have a recording, choose "Use Recorded Timings and Narrations." You can also set how long each slide shows for (default is 5 seconds)
5. Click Create Video
6. Name your video, pick a folder to save it in, and choose a file type (MPEG-4 or Windows Media Video)
Creating the video might take a while, especially for longer presentations. You can even leave it running overnight. Once done, find your video in the chosen folder and double-click to play it.
Save your PowerPoint presentation as a slideshow
This saves your presentation as a special file (PPSX) that starts playing automatically on full screen when opened. It only works with PowerPoint.
Here’s how it works:
- Make sure your presentation is saved (regular PowerPoint file)
- Go to File > Save As .
- Pick a folder to save the slideshow in.
- Under Save as type, choose PowerPoint Show (*.ppsx) .
- Click Save .
Now when someone opens the file, it will automatically play the slideshow.
Pro tips for making better video PowerPoint presentations
Practice your script.
Recording a flawless PowerPoint video rarely happens in one take. The key is practice.
Record practice run-throughs and watch them back. Make notes on areas that need improvement or parts lacking clarity. The more you drill your script, the more confident and natural you'll sound in the final recording.
Take advantage of PowerPoint's built-in Speaker Coach . The feature shows you whether your pace is too fast or slow, your use of filler words like "um," and suggestions to improve your voice modulation.
Use slide notes for coherent delivery
Wouldn’t a personal teleprompter make presentations so much easier? That’s what slide notes are for.
Having your thoughts and talking points organized within your PowerPoint file lets you have all crucial information and prompts readily available when recording.
Go ahead and add detailed notes or even a full script for each slide. This will help you stay on track and provide a handy transcript reference if you need to do any editing or voiceover work in post-production.
Use high-quality audio equipment or turn on Studio Sound
Poor audio recording quality is a surefire way to make even the most visually polished video feel amateurish. Do your presentation justice by investing in a decent external or Bluetooth microphone and audio interface to capture clear voiceover audio.
If you must use a built-in mic, record in a quiet environment to minimize background noise pickup. Or better yet, pair up with an AI-powered audio enhancement tool like Descript's Studio Sound , which reduces background noise , reverb, and other artifacts.
Ensure a clean background and even lighting
Ditch cluttered backgrounds. You want people to focus on the content of your PowerPoint and not be distracted by the funny shapes and colors in your video.
Your video lighting and framing matters, too. Position yourself facing a natural light source or bring supplemental video lighting to eliminate weird shadows and squinting-level glare.
Look directly into the camera or turn on Eye Contact
Looking directly into the camera is essential to create a sense of connection with the audience. Position your webcam or camera at eye level and imagine you're talking to a friend. If you're using Descript, enable the Eye Contact feature to auto-adjust your gaze towards the camera.
- Dress professionally and maintain a good posture to project confidence and authority.
- Use visuals, animations, and multimedia elements to enhance your presentation and keep your audience engaged.
- Consider adding closed captions or subtitles to your video for better accessibility and engagement, especially for those watching without sound.
- Speak clearly and at a moderate pace, using vocal variety to emphasize key points and maintain interest.
- Incorporate storytelling techniques, real-life examples, or personal anecdotes to make your video presentation more relatable and memorable .
Take your PowerPoint presentations from amateur to amazing
Recording yourself virtually presenting a PowerPoint allows you to distribute your message using the most engaging type of content: video. And there are many screen recording tools out there that can capture your screen and web camera footage with just a few clicks.
But how do you stand out?
By focusing on the presentation's depth, your delivery, and the video's quality. The first two are the bare minimum to communicate your message effectively.
But the right screen capture software and all-in-one video creation tool like Descript can help you with third. Use the tool to improve the quality of your recorded PPT presentations.
With Descript, it's easier than ever to record your screen, polish up the audio, and create stunning visuals all in one place. So why wait?
Sign up for Descript today and simplify your workflow while creating a PowerPoint presentation video that sticks with your audience in the long term.
How do you make a presentation video with your face?
To create a presentation video with your face, follow these steps:
- Open your presentation in PowerPoint.
- Go to the Slide Show tab.
- Click on Record and choose From Current Slide or From Beginning .
- Choose your microphone and camera by clicking on a sound icon on the top-right.
- Start recording by clicking on the record button.
- Speak into your microphone to narrate the presentation.
- Your webcam will capture your face during the recording.
- Click Stop when you finish recording.
- Export your recorded presentation by clicking on File> Export>Create a video.
How do you present yourself in PowerPoint?
To present yourself effectively in PowerPoint, follow these steps:
- Determine the key information to include in your presentation.
- Design and prepare your PowerPoint slides with a cohesive theme.
- Craft a compelling introduction to engage your audience.
- Tailor your presentation to different time constraints for flexibility.
- Capture the audience's attention before you begin speaking.
Related articles

Featured articles:
10 excellent Loom alternatives to record your screen
Looking for the best ways to record your screen without Loom? Find out 10 Loom alternatives, their features, and pricing.

How to record a YouTube video: A guide for all devices
If you want to record a YouTube video for personal use or fair-use repurposing, here are the steps to get started.

For Business
Social media video marketing: Everything you need to know
Learn how to win over potential customers (and the algorithms) with the right social media video marketing tools, strategy, and optimizations.

How to record a podcast on Zoom: A beginner’s guide
Follow this step-by-step guide on how to record a podcast on Zoom, then learn about why it may not be your best recording option.

How to record a Microsoft Teams meeting: 5 easy ways
Learn how to record a Microsoft Teams meeting on any device and get answers to common problems.

10 effective how-to videos to engage your audience
How-to videos are a great way to educate your audience. Whether you’re recording a software demo or training instructions, here’s how to create a how-to video.

Articles you might find interesting
How to start a podcast: A step-by-step beginner’s guide
Starting a podcast is no small feat. This beginner’s guide walks you through the process of creating a podcast your audience loves.

How to use background music in your podcast
Here, we share some tricks for selecting good background music for podcasts. We also offer an overview of music licensing, including copyrighted music in podcasts.

The Best Video Game Podcasts You Can’t Miss Out On
Good video game podcasts help listeners stay up to date with the latest games and trends. Gaming is a community oriented for listeners and creators alike.

Podcasting by the numbers: 15 podcast stats for 2024
Who’s driving the growth of the podcasting industry? What do we know about podcast listeners and their behavior? And what can we glean to help podcasters attract those listeners to their show?

Point of view shot: Why a subjective shot is important in film
Here’s a deep dive on this essential shot, including how best to use it and some of the classic film scenes that made it famous.

How They Made It
Drifting Off With Joe Pera on why staying indie is best for the audience
We spoke with the team behind Drifting Off... about their love for Descript, the intimacy of podcasts, and getting energy from the work.
%20(1).JPG)
Join millions of creators who already have a head start.
Get free recording and editing tips, and resources delivered to your inbox.
Related articles:
Share this article

Apr 20, 2023
Record customized camera feeds with cameo in PowerPoint for Mac
Ridhima Gupta
- Add our blog to your RSS feed reader" href="/rss/blog.xml" data-bi-name="RSS Subscription" data-bi-id="rss_feed" data-bi-bhvr="120" data-bi-socchn="RSSSubscription" title="Microsoft 365 Insider Blog RSS" target="blank" class="d-inline-block">
Hey, Office Insiders! My name is Ridhima Gupta, and I’m a Product Manager on the Office Video team. Previously, we let you know about adding a live camera feed with cameo in PowerPoint for Mac . Today, we’re excited to announce that cameo is now available when recording slide shows, allowing you to personalize your camera feed for recorded video stories in PowerPoint for Mac.
Record customized camera feed with cameo
You can now make the video recording of your presentation even more personal and create immersive stories. With cameo supported when recording slide shows in PowerPoint for Mac, you can customize your camera feed’s appearance before you record. You can apply your favorite camera styles, shapes, and sizes to cameo, and choose the perfect place on the slide for your camera feed.
How it works
- Open a presentation that you want to record and share.
- On the Recording tab, select Cameo to add your custom camera feed to the slides.

- To review your video, click the Play preview button.
- If you’re not satisfied, select the Delete button, and then select the Record button to re-record your video. Don’t worry, your camera will appear just as you styled 😊
- When you’re happy with your recording, select Export to export your presentation as a video.

Tips and tricks
- Impress your audience with creative storytelling with different text and camera layouts, such as adding text in front or behind your camera feed.
- Create an engaging story using the power of transitions when moving from slide to slide by clicking the Transitions tab, and then selecting the one you want to use —such as Morph, Fade, and Wipe.

- Find the best place on your slide for your camera feed and get helpful recommendations by selecting Design > Designer .
Requirements
In order to use this feature, you must
- Use a computer equipped with a webcam and microphone.
- Have granted camera permissions to PowerPoint in your computer’s privacy settings.
Availability
This feature is rolling out to Insiders running Beta Channel Version 16.72 (Build 23032701) or later.
Don’t have it yet? It’s probably us, not you.
Features are released over some time to ensure things are working smoothly. We highlight features that you may not have because they’re slowly releasing to larger numbers of Insiders. Sometimes we remove elements to further improve them based on your feedback. Although this is rare, we also reserve the option to pull a feature entirely out of the product, even if you, as an Insider, have had the opportunity to try it.
We want to hear from you! Please click Help > Feedback to send us your thoughts about this feature.
Sorry, JavaScript must be enabled to use this app.
Keynote User Guide for Mac
- What’s new in Keynote 14.0
- Intro to Keynote
- Intro to images, charts, and other objects
- Create a presentation
- Choose how to navigate your presentation
- Open or close a presentation
- Save and name a presentation
- Find a presentation
- Print a presentation
- Undo or redo changes
- Show or hide sidebars
- Quick navigation
- Change the working view
- Expand and zoom your workspace
- Customize the Keynote toolbar
- Change Keynote settings on Mac
- Touch Bar for Keynote
- Create a presentation using VoiceOver
- Add or delete slides
- Reorder slides
- Group or ungroup slides
- Skip or unskip a slide
- Change the slide size
- Change a slide background
- Add a border around a slide
- Show or hide text placeholders
- Show or hide slide numbers
- Apply a slide layout
- Add and edit slide layouts
- Change a theme
- Add an image
- Add an image gallery
- Edit an image
- Add and edit a shape
- Combine or break apart shapes
- Draw a shape
- Save a shape to the shapes library
- Add and align text inside a shape
- Add 3D objects
- Add lines and arrows
- Animate, share, or save drawings
- Add video and audio
- Record audio
- Edit video and audio
- Add live video
- Set movie and image formats
- Position and align objects
- Use alignment guides
- Place objects inside a text box or shape
- Layer, group, and lock objects
- Change object transparency
- Fill shapes and text boxes with color or an image
- Add a border to an object
- Add a caption or title
- Add a reflection or shadow
- Use object styles
- Resize, rotate, and flip objects
- Move and edit objects using the object list
- Add linked objects to make your presentation interactive
- Select text
- Copy and paste text
- Use dictation to enter text
- Use accents and special characters
- Format a presentation for another language
- Use phonetic guides
- Use bidirectional text
- Use vertical text
- Change the font or font size
- Add bold, italic, underline, or strikethrough to text
- Change the color of text
- Change text capitalization
- Add a shadow or outline to text
- Intro to paragraph styles
- Apply a paragraph style
- Create, rename, or delete paragraph styles
- Update or revert a paragraph style
- Use a keyboard shortcut to apply a style
- Adjust character spacing
- Add drop caps
- Raise and lower characters and text
- Format fractions automatically
- Create and use character styles
- Format dashes and quotation marks
- Format Chinese, Japanese, or Korean text
- Set tab stops
- Format text into columns
- Adjust line spacing
- Format lists
- Add a highlight effect to text
- Add mathematical equations
- Add borders and rules (lines) to separate text
- Add or delete a table
- Select tables, cells, rows, and columns
- Add or remove rows and columns
- Move rows and columns
- Resize rows and columns
- Merge or unmerge cells
- Change the look of table text
- Show, hide, or edit a table title
- Change table gridlines and colors
- Use table styles
- Resize, move, or lock a table
- Add and edit cell content
- Format dates, currency, and more
- Create a custom cell format
- Highlight cells conditionally
- Format tables for bidirectional text
- Alphabetize or sort table data
- Calculate values using data in table cells
- Use the Formulas and Functions Help
- Add or delete a chart
- Change a chart from one type to another
- Modify chart data
- Move, resize, and rotate a chart
- Change the look of data series
- Add a legend, gridlines, and other markings
- Change the look of chart text and labels
- Add a chart border and background
- Use chart styles
- Animate objects onto and off a slide
- Animate objects on a slide
- Change build order and timing
- Add transitions
- Present on your Mac
- Present on a separate display
- Present on a Mac over the internet
- Use a remote
- Make a presentation advance automatically
- Play a slideshow with multiple presenters
- Add and view presenter notes
- Rehearse on your Mac
- Record presentations
- Check spelling
- Look up words
- Find and replace text
- Replace text automatically
- Set author name and comment color
- Highlight text
- Add and print comments
- Send a presentation
- Intro to collaboration
- Invite others to collaborate
- Collaborate on a shared presentation
- See the latest activity in a shared presentation
- Change a shared presentation’s settings
- Stop sharing a presentation
- Shared folders and collaboration
- Use Box to collaborate
- Create an animated GIF
- Post your presentation in a blog
- Use iCloud Drive with Keynote
- Export to PowerPoint or another file format
- Reduce the presentation file size
- Save a large presentation as a package file
- Restore an earlier version of a presentation
- Move a presentation
- Delete a presentation
- Password-protect a presentation
- Lock a presentation
- Create and manage custom themes
- Transfer files with AirDrop
- Transfer presentations with Handoff
- Transfer presentations with the Finder
- Keyboard shortcuts
- Keyboard shortcut symbols
Record Keynote presentations on Mac
You can record a presentation with voiceover narration on your Mac to play later in Keynote or export as a video file. This is especially useful when you want to distribute or present a prerecorded presentation virtually, or if you want to record a slideshow for someone to play in your absence.
Record a presentation
Open the presentation, then click to select the first slide in the slide navigator .
Choose Play > Record Slideshow (from the Play menu at the top of your screen). The presenter display appears with recording controls visible at the bottom of your screen.
The timer counts down from 3 before recording begins.
Do any of the following while recording the presentation:
Go to the next slide or build: Press the Right Arrow key.
Go back a slide or reset the builds on the slide: Press the Left Arrow key.
Jump to a different slide: Press any number to make the slide navigator appear, enter the slide number, then press Return.
Open or close a list of keyboard shortcuts: Press the Question Mark (?) key on your keyboard. You can use the shortcuts to control your presentation.
To edit the recording, do one of the following:
Press Esc to exit the presenter display.
The recording is saved with your presentation and can be played in Keynote. To export a recorded presentation as a video or another file format, see Export to PowerPoint or another file format .
To remove a recording from your Keynote presentation, choose Play > Clear Recording, then select Clear in the pop-up menu.
Play a recorded presentation in Keynote on Mac
With the presentation open, do one of the following:
Play recorded presentation in full screen: Choose Play > Play Recorded Slideshow.
Play recorded presentation in a window: Choose Play > Play Recorded Slideshow in Window.
To stop playing the presentation, press Esc.
Microsoft 365 - PowerPoint for Mac - Creating a Screen Recording with Audio
- Campus Technology Support
Screen recording with audio has become an essential tool for professionals, educators, and content creators alike. Whether you‘re creating a software tutorial, giving a virtual presentation, or demonstrating a new feature, capturing your screen along with narration or system sounds elevates the quality and impact of your video content.
While screen recording is relatively straightforward on Windows, the process is a bit more involved on Mac. Don‘t worry though – in this ultimate guide, we‘ll break down exactly how to screen record with audio on your Mac step-by-step. We‘ll cover built-in tools, popular third-party software, and share tips and best practices for creating professional, high-quality screen recordings. Let‘s dive in!
Why Screen Record with Audio on Mac?
Before we get into the how-to, let‘s quickly discuss why you might want to screen record with audio on your Mac. Here are a few compelling reasons:
Creating tutorials and how-to guides. Screen recordings are perfect for demonstrating software workflows, website navigation, or app features. Adding audio narration makes your tutorials more engaging and easier to follow.
Recording presentations and lectures. Whether you‘re a teacher, student, or business professional, screen recording allows you to capture slideshow presentations along with your spoken explanations. This is especially useful for creating educational content or sharing meetings with remote teams.
Producing demo videos. If you‘re a developer or product manager, screen recordings with audio are great for showcasing new features, reproducing bug reports, or creating product demos for stakeholders.
Making video content. Many YouTubers, bloggers, and social media influencers use screen recordings to create reaction videos, software reviews, or gameplay walkthroughs. Recording system audio along with your own commentary adds production value.
The demand for screen recording software has surged in recent years, particularly with the rise of remote work and online learning. According to a Market Research Future report, the global screen recording software market is expected to grow at a CAGR of 11.5% from 2021 to 2028, reaching a value of $4.1 billion.
Using Built-in Screen Recording on Mac
Let‘s start with the built-in tools that come with your Mac for screen recording with audio. There are two primary options: Screenshot Toolbar and QuickTime Player.
1. Screenshot Toolbar
With the release of macOS Mojave in 2018, Apple introduced a new Screenshot Toolbar that allows for easy screen recording. Here‘s how to use it:
- Press Shift + Command + 5 on your keyboard to open the Screenshot Toolbar.
- Click on the "Record Entire Screen" or "Record Selected Portion" button, then choose to record your screen with or without audio.
- To capture audio, click the "Options" button and select a microphone.
- Click "Record" to start your screen recording. To stop, click the stop button in the menu bar.
- Your screen recording will be saved to the desktop by default.
- Convenient access with keyboard shortcut
- Option to record full screen or selected area
- Basic editing tools for trimming and exporting
- Free with macOS
- No option to record system audio
- Limited customization options
- Recordings not optimized for high motion
2. QuickTime Player
Many Mac users don‘t realize that QuickTime Player, the default video playback app, also has screen recording capabilities. Follow these steps:
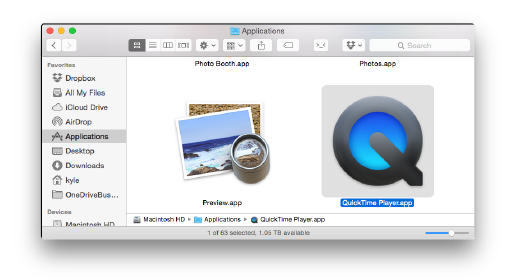
- Open QuickTime Player from your Applications folder.
- Go to File > New Screen Recording.
- In the Screen Recording window, click the arrow next to the record button to change your audio and video inputs as needed.
- To record your own narration, select a microphone input. For system audio, follow the steps to enable the hidden audio input.
- Click the "Record" button, then click anywhere on the screen to begin recording the entire screen, or drag to select an area.
- To stop recording, click the stop button in the menu bar.
- QuickTime Player will automatically open your new recording, allowing you to preview and trim it before saving.
- User-friendly interface
- Can record system audio
- Basic editing and exporting capabilities
- Additional steps to enable system audio recording
- No option to record webcam overlay
- Limited editing tools compared to paid software
While both Screenshot Toolbar and QuickTime Player get the job done for basic screen recording needs, those looking for more advanced features and customization may want to explore third-party apps.
Best Screen Recording Software for Mac
There are numerous screen recording applications available for Mac, each with its own strengths. Here, we‘ll compare five of the most popular options: VideoSolo Screen Recorder, Snag-It, Camtasia, Movavi Screen Recorder, and FonePaw Screen Recorder.
Data sourced from G2, Capterra, and vendor websites as of September 2022.
1. VideoSolo Screen Recorder
VideoSolo is a powerful yet easy-to-use screen recorder for Mac. It offers both free and paid versions, with the free version allowing up to 30 videos at 1 minute each.
To record your screen with audio using VideoSolo:
- Download and install the VideoSolo Screen Recorder from the official website.
- Launch the application and select "Video Recorder."
- Choose to record your full screen, a selected region, or a target window.
- Configure your audio settings, selecting either system sounds or microphone input.
- Click "REC" to begin recording. Use the drawing panel for real-time annotations.
- Click "Stop" to end your recording, then preview and save your video.
VideoSolo shines with its 4K recording quality, useful annotation tools, and intuitive interface. The built-in editing features allow you to trim recordings, apply filters, add captions, and more. It‘s an excellent choice for both beginners and advanced users.
Snag-It from TechSmith is a versatile screen capture and recording tool for Mac. While primarily known for its image capture capabilities, Snag-It also offers robust screen recording.
Here‘s how to record your screen with Snag-It:
- Download and install Snag-It on your Mac.
- Open the application and select "Video" from the capture window.
- Choose your capture area and select "Record system audio" or "Record microphone" as needed.
- Click the "Record" button to start your screen recording.
- Use the Snag-It Editor to preview, trim, and enhance your recording with annotations, effects, and more.
One standout feature of Snag-It is its extensive template library, allowing you to quickly create professional-looking training materials, tutorials, and documentation. The "Favorites" feature lets you save your most-used capture settings for easy access.
While Snag-It is pricier than some other screen recording tools, its robust features and integrations with other TechSmith products make it a worthwhile investment for power users.
3. Camtasia
Camtasia, another offering from TechSmith, is a full-featured screen recording and video editing suite. It‘s widely used by businesses, educators, and content creators for producing high-quality video content.
To record your screen with Camtasia:
- Download and install Camtasia from the TechSmith website.
- Launch Camtasia and select "New Recording."
- Choose your recording area, audio sources, and webcam settings.
- Click "Start Recording" to begin capturing your screen.
- Use the Camtasia Editor to arrange, edit, and enhance your recording with animations, transitions, and effects.
Camtasia boasts an impressive array of post-production features, including a multi-track timeline, interactive quizzes, green screen effects, and extensive asset libraries. Its intelligent "Smart Focus" automatically zooms in on key areas of interest during your recording.
While Camtasia has a steeper learning curve and higher price point compared to other screen recording tools, its professional-grade editing capabilities make it a top choice for serious video creators.
4. Movavi Screen Recorder
Movavi Screen Recorder is a lightweight yet capable screen recording app for Mac. It offers a clean, intuitive interface suitable for users of all skill levels.
Here‘s how to record your screen with Movavi:
- Download and install Movavi Screen Recorder from the official website.
- Open the application and click "Record screen."
- Select your capture area, audio source, and webcam overlay settings.
- Hit "REC" to start your screen recording. Movavi will automatically highlight your mouse clicks.
- Edit your recording with Movavi‘s built-in trimming, splitting, and filter tools.
Movavi stands out with its convenient scheduling feature, allowing you to set start and end times for your recordings in advance. It also offers direct sharing to YouTube, Google Drive, and WhatsApp.
5. FonePaw Screen Recorder
FonePaw Screen Recorder is an easy-to-use screen recording tool with a focus on game recording and mobile device capture. The application offers both free and paid plans.
To record your screen with FonePaw Screen Recorder:
- Download and install FonePaw Screen Recorder from the official website.
- Choose your recording region, audio input, and output preferences.
- Click "REC" to start recording your screen. Use the brush tool to draw and highlight in real-time.
- Save your recording as a video file or GIF.
In addition to Mac screen recording, FonePaw supports screen mirroring and recording for iOS devices, making it a handy tool for app developers and mobile gamers. The application also includes a basic video editor for trimming and splitting recordings.
Audio Recording Tips
Capturing clear, high-quality audio is just as important as recording your screen. Poor sound quality can decrease engagement and detract from your content. Here are some tips for ensuring the best possible audio in your screen recordings:
Use an external microphone. Built-in computer microphones often pick up background noise and produce less-than-ideal sound. Consider investing in a USB condenser microphone for clearer narration.
Record in a quiet environment. Background sounds like fans, typing, or outdoor noise can be distracting in your screen recordings. Choose a quiet room and close any unnecessary applications that might produce notification sounds.
Adjust your microphone settings. Most screen recording applications allow you to select your audio input device and adjust the volume level. Spend some time fine-tuning these settings before you start recording.
Use a pop filter. If you‘re recording voice narration, a pop filter can help reduce plosives and other harsh sounds from your microphone.
Do a test recording. Before diving into your full recording session, do a quick test to ensure your audio levels are appropriate and there are no unwanted background noises.
Record audio separately. For the highest quality, consider recording your audio separately using a digital audio workstation (DAW) like Audacity or GarageBand. You can then sync your audio with your screen recording in post-production.
Editing Your Screen Recording
While capturing high-quality screen recordings is essential, the editing process is where you can really make your content shine. Trimming out mistakes, adding annotations, and incorporating transitions can greatly enhance the professionalism of your final product.
Most screen recording applications include basic editing tools for tasks like:
- Trimming videos to remove unwanted sections
- Splitting recordings into multiple clips
- Adjusting playback speed
- Adding text captions and annotations
- Applying simple transitions and effects
For more advanced editing, you may need to export your screen recording to a dedicated video editing application like Adobe Premiere Pro or Final Cut Pro X. These tools offer more precise control over your audio and video, as well as a wider range of effects, transitions, and color correction capabilities.
When editing your screen recordings, keep the following best practices in mind:
Keep it concise. Trim out any dead space, long pauses, or redundant information to keep your viewers engaged.
Use annotations strategically. Drawings, arrows, and highlights can be useful for emphasizing key points or guiding viewers‘ attention. However, overusing annotations can be distracting, so use them sparingly.
Maintain a consistent style. If you‘re creating a series of screen recordings, use consistent fonts, colors, and transitions to create a cohesive brand aesthetic.
Enhance with music and sound effects. Adding background music or subtle sound effects can make your screen recordings more engaging and professional. Just be sure to balance the audio levels so your narration remains clear.
Export in the appropriate format. When exporting your final video, choose a file format and resolution appropriate for your intended distribution platform. For example, YouTube recommends MP4 files with a minimum resolution of 720p.
Screen recording with audio on Mac may seem daunting at first, but with the right tools and techniques, anyone can create high-quality video content. Whether you opt for the simplicity of built-in options like Screenshot Toolbar and QuickTime Player, or the advanced features of paid apps like Camtasia and Snag-It, the key is to choose a workflow that fits your needs and skill level.
As you dive into screen recording on Mac, remember these key takeaways:
- Plan your recording beforehand to keep your content focused and concise.
- Invest in a quality microphone for clear, professional narration.
- Take advantage of editing tools to refine your recordings and add polish.
- Experiment with different software options to find the best fit for your needs and budget.
With practice and patience, you‘ll be creating impressive, informative screen recordings on your Mac in no time. Happy recording!
- The Lowdown on Meta AI
- What's the Difference? PS5 Slim vs. PS5
How to Get PowerPoint on a Mac
Get the widely used presentation tool
:max_bytes(150000):strip_icc():format(webp)/SamCostello-d7fcf106ec2048ccb06d1e2190b3396d.jpg "how to record a powerpoint presentation mac")
- Ithaca College
:max_bytes(150000):strip_icc():format(webp)/ryanperiansquare-de5f69cde760457facb17deac949263e-180a645bf10845498a859fbbcda36d46.jpg "how to record a powerpoint presentation mac")
- Western Governors University
What to Know
- From the Mac App Store: Apple Menu > App Store > search for PowerPoint > Get > Install > enter Apple ID if prompted > Open .
- PowerPoint requires a subscription from Microsoft. You can sign up via In-App Purchase or at the Microsoft website.
- Keynote, Apple's alternative to PowerPoint, comes pre-installed on new Macs (and can be downloaded from the Mac App Store).
This article explains how to get PowerPoint on Mac, its requirements—including a subscription—and some free alternatives available on the Mac.
How Do I Get PowerPoint on Mac?
Getting PowerPoint on your Mac is very easy. Just a few clicks, and you'll be ready to start making slides and building presentations. Here's what to do:
Open the Mac App Store by going to the Apple menu > App Store or the Applications folder > App Store .
You can also download PowerPoint directly from Microsoft , but these instructions focus on the Mac App Store.
Search for PowerPoint .
On the search results screen, click Get .
Click Install .
Enter your Apple ID password when prompted.
When the download is finished, click Open to launch PowerPoint.
Once you've opened PowerPoint, you'll need to sign into your Microsoft account or use a free trial.
Is PowerPoint Free for the Mac?
PowerPoint is not free on the Mac (or on Windows, for that matter). Microsoft offers a free, 30-day trial after you download PowerPoint. Once the free trial expires, you need to pay to keep using the app. Options include a one-time purchase price or a monthly or annual subscription , which provides cloud storage features and ongoing technical support. You can subscribe through Microsoft's website or use in-app purchases via your Apple ID.
Do Macs Come With PowerPoint?
No. To get PowerPoint on your Mac, you need to download and install it using the steps from the first section of this article (or, as noted before, directly from Microsoft).
What Is the Mac Version of PowerPoint?
While PowerPoint may be the most well-known program for making slides and creating presentations, it's far from the only one. Your Mac probably came with one of the alternatives pre-installed.
Apple makes a program called Keynote which is a direct competitor to PowerPoint. It offers all of the core features of PowerPoint—creating slides and presentations, animations, templates, presenter mode, etc. It integrates tightly with Apple's other software and services like iCloud.
Keynote comes pre-installed for free on all modern Macs. It's likely in your Applications folder as you read this. If it's not, and if your Mac and version of the macOS are compatible with it, you can download it for free from the Mac App Store by searching for "Keynote."
Need to make slides and want to avoid both PowerPoint and Keynote? There are many other PowerPoint alternatives , but one place to start is Google Slides , which is free, web-based, and integrates with your Google account and other Google productivity tools.
To print PowerPoint slides with Notes on a Mac, open your presentation and select Print . In the Print dialog box, select Show Details . In the Layout box, select Notes . Configure the rest of your printing options and select Print .
The easiest way to record a voiceover in PowerPoint on a Mac is to record by slide. Select the slide where you want to add the narration, then select Insert from the menu bar and click Audio > Record Audio . Enter a name for the narration, select Record , read your script, and select Stop when you're finished recording.
To convert PowerPoint to video on a Mac, open the presentation you want to save and select File > Export . In the export window, next to File Format , select a file format option, such as MP4 or MOV . Choose your video quality, choose whether you want to include narrations, adjust timing, and select Export .
Get the Latest Tech News Delivered Every Day
- How to Update a Mac
- How to Use WhatsApp on a Mac
- How to Use Copilot in Powerpoint
- How to Use Microsoft's Free PowerPoint Viewers
- The Best Free Productivity Apps for the iPad
- 4 Ways of Transferring Files From Android to Mac
- How to Install Mac OS on PC
- What Is Microsoft PowerPoint and How Do I Use It?
- The 10 Best Word Processing Apps for iPad in 2024
- What Is Microsoft Word for Mac?
- The 20 Best Mac Apps of 2024
- How to Fix 'Cannot Be Opened Because the Developer Cannot be Verified' Error on Mac
- How to Transfer Files Between an iPhone and a Mac
- How to Convert PowerPoint to Video
- How to Update PowerPoint on Windows and Mac
- What Is an Animation in Presentation Software?
Contribute to the Microsoft 365 and Office forum! Click here to learn more 💡
April 9, 2024
Contribute to the Microsoft 365 and Office forum!
Click here to learn more 💡
PowerPoint Forum Top Contributors: Steve Rindsberg - John Korchok - Bob Jones AKA: CyberTaz ✅
May 10, 2024
PowerPoint Forum Top Contributors:
Steve Rindsberg - John Korchok - Bob Jones AKA: CyberTaz ✅
- Search the community and support articles
- Microsoft 365 and Office
- Search Community member
Ask a new question
Powerpoint for Mac - Screen Recording
Powerpoint for Mac - Updated 2022: "Insert > Screen Recording doesn't show up next to the video and audio boxes, Goal is to record a scrolling Finale Music. Any suggestions? ~ thank you.
Report abuse
Reported content has been submitted
Replies (2)
- Volunteer Moderator
I think the reason you don't find the option to insert a screen recording is because PowerPoint doesn't make screen recordings of other application windows.
You can use QuickTime, which is built-into your Mac for this purpose, then insert the resulting video file. If you are seeking programs with advanced screen recording capabilities, they are out there. Camtasia is one that is well known and respected.
Was this reply helpful? Yes No
Sorry this didn't help.
Great! Thanks for your feedback.
How satisfied are you with this reply?
Thanks for your feedback, it helps us improve the site.
Thanks for your feedback.
Since thanks, Jim, your information was very helpful. Mike
Question Info
- Norsk Bokmål
- Ελληνικά
- Русский
- עברית
- العربية
- ไทย
- 한국어
- 中文(简体)
- 中文(繁體)
- 日本語
- DemoCreator > Easy video recorder and editor for PC & Mac
- DemoAir > Online screen recording tool for everyone
- Visual Assets > NEW Creative video/audio effects for DemoCreator
- Virbo > Easily convert text into spokesperson videos
- Screen Recorder >
- Webcam Recorder >
- Game Recorder > HOT
- Virtual Avatar Recorder > NEW
- Video Presentation >
- Video Editor >
- Cut/Merge Video >
- Resize Video >
- Change Video Speed
- Audio Editing
- Online Screen Recorder >
- Online Voice Recorder >
- Online Webpage Screenshot >
- Screen Recorder for Chrome >
- Online Video Presentation Maker >
- HOT Video Editor > Take your videos to the next level
- NEW DemoCreator > Easily make a visual video presentation
- AI Subtitle Generator > HOT
- AI Voice Generator > HOT
- AI Denoise >
- AI Voice Changer >
- AI Beauty Filter > NEW
- AI Video Object Remover > NEW
- AI Background Remover >
- AI Teleprompter >
- AI Video >
- AI Voice >
- AI News >
- Hot Spot >
- Best AI Avatar Generators >
- AI Audio to Video >
- AI Virtual Friends Apps >
- Best AI Face Generators >
- Online Course >
- PPT Recording >
- Demo Video >
- Game Recording >
- Record on Windows >
- Record on Mac >
- Record on Mobile >
- Game Recording >
- YouTube Videos >
- Creative Effects >
- Audio Editing >
- Video Conference >
- Zoom Recording >
- Remote Work >
- Demo Video Tips >
- Online Class > NEW
- Teacher Skills >
- Elearning Tips >
- Lectures Recording >
- HOT DemoCreator Camp Take your videos to the next level

- User Guide >
- Video Tutorial >
- Tech Specs >
- What's New >
- Download Buy Now Download Buy Now Download Buy Now
- How To Record a Powerpoint Presentation With Audio and Video on Mac

- How to Record Webcam on Windows and Mac
- 6 Best Ways to Take a Scrolling Screenshot in Windows 11 or 10
- Top Tips on How to Record Video on Windows 11
- How to Use a Screen Video Recorder in Windows 7
- Steps on How to Record Videos on Windows 8
- 7 Most Efficient Screen Video Recorders for Windows 10
- 10 Best Free Screen Recorders for PC To Capture Every Moment
- 10 Best Voice Recorder Apps for PC To Enhance Your Recording
- Top Offline Screen Recorder for Mac OS (Free & Paid)
- 10 Best GIF Recorders for Mac
- 10 Best Screen Recorders for Mac [2024]
- How To Record a YouTube Video on a Mac – All Methods
- The Ultimate Race: Top 10 Skype Call Recorders for Mac
- Screen Recorder App for PC, Android, iPhone, and Chrome
- Top 9 Best Android Apps for Screen Recording
- 6 Best Free Webcam Recorders
- Top 8 Secret Screen Recorder Apps in 2023
- How To Record Console Gameplay
- How to Take screenshots in Windows 11
- How to Record YouTube Videos on Your PC [Only 5 Steps]
- How to Record a Zoom Meeting
- Record Facecam on Windows 11 – Top 8 Tools to Try on Windows 11
- Best Webcam Recorder with Facial Beauty Function
- Top 10 Audio Recording Software for Mac
- How to Record Screen on Mac with Audio
- Top Online Sound Recorders
- Audio Extractor: 8 Best Software to Extract Audio from Video
- 6 Best Ways to Record YouTube Audio [Easy]
- 2 Best Ways to Record Audio in Windows 11
- Top 2 Methods for Screen Recording With Audio on Windows 10
- Windows 11 Screen Recorder
- Best OBS Settings for Low-End PC
- Best Windows Game Capture Programs
- 12 Best Android Screen Recorders with Internal Audio
- 10 Best 60 FPS Screen Recorders for Windows/Mac
- Top14 HD 1080P Screen Recorders for PC
- Best Facial Recognition Software
- How To Record Audio in PowerPoint on Mac - Full Guide
Are you a teacher wanting to make remote learning fun for your students? Or a business person needing to give powerful virtual presentations? Recording PowerPoint presentations with audio and video on a Mac can help.
In this tutorial, we will show you how to record PowerPoint presentations with audio and video on a Mac . This will help you create interesting lessons, meetings, or ads that grab your audience's attention. Whether you're running an online workshop or showing off a product, learning this skill will boost your content.
How To Record a PowerPoint Presentation on Mac With Audio and Video Using DemoCreator
The best way to record a video presentation on Mac is by using powerful third-party software solutions. We advise you to try Wondershare DemoCreator to take your recording experience to the next level.
It's a powerful, all-in-one solution that allows you to record and edit your videos and supports up to 4K/8K recordings and 120 FPS, making it suitable for your presentations. Moreover, you can discover the most amazing AI-powered features, such as AI teleprompter, virtual avatar , AI background remover, to elevate your experience and bring your content to life.
Another useful feature that can elevate your video presentation is annotations, where you can draw and interact with the creation during the recording process.
To use the tool, head to the official Wondershare DemoCreator website, download the tool, and follow the steps below:

How To Record a Presentation on Mac Directly in PowerPoint
PowerPoint is also a universal tool that allows you to record your presentations with audio and video on a Mac device. However, you must have a licensed Office account to access this feature. If you do, follow the steps below to learn how to record your creations:
- Open the presentation you want to record.

- Next, select the recording area.

The program will start recording, and you can begin your presentation journey. Beware that the program won't catch any audio elements during transitions, so ensure you don't talk during that period to avoid mistakes.
We don't recommend using this feature to record your PowerPoint presentations because the outcome may be buggy. Moreover, the videos you play within the presentation may be lower in quality, and the audio sequels may also encounter issues.
If you need to record a presentation for professional purposes, you may need more powerful solutions, such as the one above.
Another reason why you should avoid this solution is because it doesn't offer customization features. You cannot create unique recordings, and the journey may be more overwhelming than with third-party software solutions.
- Record screen, audio, and webcam simultaneously
- Various annotation tools to emphasize important points
- AI teleprompter to ensure a smooth presentation
- Compatible with video conference applications like Zoom and Google Meet for live-streamed presentations

Tips for Recording PowerPoint Presentations With Audio and Video on Mac
Recording a professional presentation on a Mac device can be stressful, especially if you have yet to gain experience in the recording field. Thus, we've prepared some tips and guidelines you can follow for the best, most efficient journey.
- Record in a quiet environment - By choosing a quiet place to record your presentations, you'll avoid unnecessary background noises and distractions, leading to more professional results.
- Test your recordings - Before creating the final draft, you should test the recording process and create the most efficient setup. Reviewing your creations lets you see which issues you can work on.
- Ask for opinions - once you record the presentation, you can ask your friends and family members to review the creation and provide honest opinions. It will also help you review your work from an objective perspective.
- I mplement annotations - annotations can help you emphasize the most critical parts of your presentations and convey the appropriate message through your recordings.
- Use captions and subtitles - these textual elements will make your content more accessible and reach a larger audience accordingly.
By using these tips, you'll undoubtedly take your experience to the next level and master the art of presentation recording.

PowerPoint provides some of the best tools and features for creating professional presentations. Once you create your masterpiece, you may want to record it with audio and video elements to enhance its importance. We've covered the best methods you can try to meet your goals and master the art of presentation recording on Mac.
However, to get the most professional results and amaze your audience, you should use powerful third-party software solutions such as Wondershare DemoCreator. This feature-packed tool will allow you to edit and customize your videos, leading to the best presentation experience.
How can I record a PowerPoint presentation on a Mac with audio and video?
What is the best way to record presentations on a mac.
- Open the app and click on the All-in-One Recorder feature.
- Select recording preferences.
- Click the REC button or press the F9 key to start recording.
Can I use DemoCreator to create PowerPoint video presentations on Mac?
You may also like.

Screen record on Mac: Tips and tricks from basics to advanced
Capturing a screen recording on your Mac is valuable for a variety of scenarios. There are handy third-party apps to help with this, but Apple offers a free built-in option with macOS . Follow along for several ways to screen record on Mac.
Table of contents
Built-in macos tool, screen record on mac with third-party apps.
With modern macOS releases (Mojave and later), Macs have a hidden screen record app with more advanced controls like a timer, save to destination choices, show/hide the mouse pointer, remember last selection, microphone control, and more.
If you mostly do straightforward screen recording on Mac, the native functionality is free with no app to download.
However, if you need advanced features, we’ll cover third-party options below too.
Screen record on Mac: Basics to advanced
- On your Mac keyboard, press the combination command + shift + 5 (can be used while running any app)
- In the bottom middle of the screen, choose the rectangle with a circle icon to record the whole screen or the dotted-line rectangle with a circle icon to record a selection of your screen
- Click the Options button if you’d like to enable the microphone, show mouse clicks, select a save location, and more
- Choose Record to start
- When you’re done, click the Stop button (circle with square icon) in the menu bar found in the top middle/right of your screen
- Your recording will show up on your Mac’s desktop by default unless you picked a different save location
You can also pull up this menu in QuickTime by clicking File > New Screen Recording but the keyboard shortcut is usually faster.
Here’s how all that looks on Mac:

From there you can either hit Record to start or click Options to customize your screen record settings.

If you have multiple displays in your setup you’ll get to choose which screen to record if you selected the full-screen option.
When you’re done, click the Stop button (circle with square icon) in the menu bar found in the top middle/right of your screen.

Look for your saved screen recording on your desktop or where you chose to save it when customizing
If you need advanced screen record features, a favorite of the team here at 9to5Mac is CleanShot X .
Capabilities include:
- Annotations
- Quick access overlay
- Scrolling capture in addition to entire screen, selection, windows, more
- Freeze screen
- Record as GIF
- Auto-enable Do Not Disturb
- Show/Hide cursor
- Hide clutter from your desktop when recording
- Capture Clicks
- Capture Keystrokes
- Upload screenshots and recordings and get a link to share with CleanShot Cloud
- Team management features
- Custom domain and branding
CleanShot X is priced at $29 for 1 Mac as a one-time purchase that includes updates for a year (optional $19 annual subscription for future updates). Meanwhile, CleanShot Cloud Pro offers all the features including custom domain names and branding, self-destruct control, and more from $8/month per user when paid annually .
Two more popular third-party screen record apps for Mac worth checking out include:
- Snagit – free trial then $39/year or $63 lifetime
- Monosnap – free basic plan or $2.50 or $5/month for advanced and commercial plans
Read more 9to5Mac tutorials:
- Best USB-C and Thunderbolt displays for Mac
- Use iMac as monitor: How to create a Mac to Mac, PC to Mac, or iPad to Mac setup
- Tips and tricks to fix Bluetooth connection issues on Mac
- 30+ Mac tips for new setups that everyone should know [Video]
FTC: We use income earning auto affiliate links. More.
Check out 9to5Mac on YouTube for more Apple news:

Apple’s Mac lineup consists of MacBook, MacBoo…
A collection of tutorials, tips, and tricks from…

Michael is an editor for 9to5Mac. Since joining in 2016 he has written more than 3,000 articles including breaking news, reviews, and detailed comparisons and tutorials.
Michael Potuck's favorite gear

Satechi USB-C Charger (4 ports)
Really useful USB-C + USB-A charger for home/work and travel.

Apple Leather MagSafe Wallet
My slim wallet of choice for iPhone 12

Manage push notifications
Record video, audio, gameplay, and webcam to record precious moments easily.
How to Convert PowerPoint Slides into Video [5 Doable Ways]

You are probably looking for a way to make your PowerPoint easy to present while keeping its dynamics and interactive state. Well, the best thing you can do is convert it into a video, which you can play on various devices and let your audiences watch. Now, how do you convert PowerPoint to video? Well, continue reading this post, for it features 5 workable yet efficient ways to convert PowerPoint to video! So, without further ado, start exploring each of them now.
Default Ways to Convert PowerPoint to Video [Windows/Mac]
As mentioned earlier, this post featured 5 workable ways that you can do to convert PowerPoint to video. Now, in this specific part, you will see 2 different default ways to convert PowerPoint to video on Windows and Mac platforms. You can follow the one that is applicable on your end. So, without further delay, explore them now.
If you are utilizing a Windows computer, here are the steps on how to convert PowerPoint slides into video:
Step 1 Launch the PowerPoint program on your Windows computer and access the presentation you wish to convert to video. After that, tick the "File" button and select the "Export" option.

Step 2 Next, on the "Export" section, tick the "Create a Video" button, click the "Presentation Quality" dropdown button, and select your preferred option. Before selecting a specific quality option, consider their corresponding file sizes.

Step 3 Then, if your presentation contains timings and narrations, select the "Use Recorded Timings and Narrations" option from the dropdown list below the quality options. Otherwise, select the "Don’t Use Recorded Timings and Narrations" option if not.

Step 4 After that, specify the display time for each video by entering specific seconds on the "Seconds spent on each slide" input field. Once you are done, tick the "Create Video" button, and on the "Save As" window, select a file folder to store the converted PPT and rename it.

Step 5 Then, tick the "Save as type" dropdown button and select the "MPEG-4 Video (*.mp4)" option. Finally, tick the "Save" button to initiate the conversion process. And that’s it! That’s how you convert PowerPoint to video on a Windows computer.

Otherwise, if you are utilizing a Mac computer, here are the steps on how to convert PowerPoint to video on Mac:
Step 1 Launch the PowerPoint on your Mac and access the presentation you wish to convert into video. After that, tick the "File" tab and select the "Export" option.
Step 2 Then, on a pop-up window, head to the "File Format" dropdown menu and select "MP4" or MOV format. Next, select your preferred quality by ticking the "Quality" option’s dropdown button. Before selecting a specific quality option, consider their corresponding file sizes.

Step 3 After that, choose whether you want to include the presentation’s record timings and narrations or not (if there are any). Click the "Use Recorded Timing and Narrations" checkbox to include them.

Step 4 Next, choose whether you want to increase/decrease the timing for the slides by ticking the "Up and Down" button next to "Second spent on each slide without a set timing". Finally, click the "Export" button. And that’s it! That’s how you convert PowerPoint to video on Mac.

How to Record and Convert PowerPoint to Video with Audio
That’s it! Those are the 2 easy ways how to convert PowerPoint to video! If you want to capture your presentation with audio, control its playback speed, and add annotations to highlight key points, you can use the 4Easysoft Screen Recorder tool! This tool lets you record PowerPoint presentations on the full-screen selected region or an active window. Moreover, it provides high-quality settings with up to 60 fps and 4K resolution. Furthermore, it offers real-time drawing features that enable you to add text, lines, arrows, shapes, etc., highlighting a key point or making your PPT much more creative. Also, unlike the default ways above, this tool saves your video in different formats, such as MP4, MOV, WMV, WebM, and more. With this tool, you can control how long you wish to display each slide based on your preferences!

Gives you tweaking options that let you set format, quality, fps, etc., before recording.
Provide customizable hotkeys that let you set hotkeys for start, pause, stop, etc.
Offer you a built-in video trimmer to cut unwanted parts of the recordings.
Support scheduled recording that lets you set tasks to start/stop recording the PPT.
100% Secure
How to Convert PowerPoint to Video via the 4Easysoft Screen Recorder:
Step 1 Download and install the 4Easysoft Screen Recorder tool on your Windows or Mac computer. Then, access the presentation you want to turn into a video on the PowerPoint program. After that, launch the installed tool and click the "Video Recorder" option.

Step 2 Next, choose whether you want to capture your whole screen (Full), the PowerPoint presentation only (Custom), or a specific area (resolution).

Whatever your chosen option, you can still move the borderlines freely and place them in the area where your PowerPoint presentation is located.
Step 3 After that, if your presentation has sound or recordings, you can turn on the "System Sound" option by toggling its switch button. If you also plan to record it with your voice, you can turn on the "Microphone" by toggling its switch button.

Step 4 Then, once you are done setting up the above options, tick the "REC" button to start recording the presentation. While recording, you can add shapes, text, lines, and callouts and take screenshots as well.

Step 5 Once you are done recording, click the "Stop" icon. Then, on the preview window, you can trim the video's unwanted start and ending parts. Lastly, tick the "Save" button to export the recordings. And that’s it! That’s how you convert PowerPoint to video via recoding!

2 Easy Ways to Convert PPT to Video Online for Free
There you have it! That’s how you convert PowerPoint to video via screen recording. Apart from the above ways, you can also use online tools to convert PPT to video! These online tools are the best option if you only wish to convert a simple PowerPoint to a video. So, without further delay, start exploring each of them now.
1. Zamzar PPT Converter
If you are looking for a tool that can easily and quickly convert PowerPoint to video, then the Zamzar PPT Converter tool is what you are searching for. With this online tool’s intuitive interface, you can quickly initiate the conversion process in no time. But, the waiting time for the conversion process will still depend on your internet speed. So, how to convert PowerPoint slides into video using Zamzar? Here are the steps you must follow:
Step 1 Access the Zamzar PPT Converter on your computer browser. Then, click the "Choose Files" button to import the presentation that you wish to convert.
Step 2 After that, tick the "Convert To" dropdown button, select a video format under the "Video Formats", and click the "Convert Now" button to initiate the conversion process.

2. CloudConvert PPT Converter
The last online tool recommendation that you can utilize to convert PowerPoint to video is the CloudConvert PPT Converter. The same goes for Zamzar; CloudConvert also offers a straightforward conversion process. With just a few ticks, you can convert PowerPoint to video quickly! However, similar to Zamzar, this tool’s conversion speed relies on your internet connection. Moreover, it only offers SWF format to convert your PowerPoint. If that’s ok with you, here are the steps to convert PowerPoint to video using CloudConvert.
Step 1 On your browser, search and access the CloudConvert PPT Converter website. After that, tick the "Select File" button to import the presentation you want to convert.
Step 2 Then, tick the "Convert to" dropdown button, select the "Video" menu, and click the "SWF" option. Finally, tick the "Convert" button to initiate the conversion process.

FAQs about How to Convert PowerPoint to Video
How long does it take to save the presentation as a video on PowerPoint?
The conversion process will take a few seconds or minutes and might also take an hour. But, the waiting time length will depend on your PowerPoint presentation's file size.
What would be the best resolution or quality to convert PowerPoint to video?
The best resolution or quality to convert PPT to video is based on the platform you will put it on. It is important to consider the platform when choosing a resolution/quality option so you can truly provide audiences with the best watching experience.
Are there any considerations I need to keep in mind when converting PowerPoint presentations to video?
Yes, there are a few things you need to consider when converting PowerPoint to video. Some things you need to consider are file size, resolution, and compatibility. Additionally, you also consider the possibility that not all of the animations may be perfectly converted to video.
There you have it! Those are the 5 workable yet efficient ways to convert PowerPoint to video! After reading this page, you can now easily present your PowerPoint presentation to your audiences and play it on various devices while keeping its interactive state! Suppose you are looking for a tool that will allow you to convert PPT to video easily with customized playback speed and annotations. In that case, the 4Easysoft Screen Recorder is what you are searching for! To discover more about this tool, visit its official website today.
Related Articles
- Quick Way How to Make Snapchat Shortcuts for Streaks [Tutorial]
- 6 Best Ways How to Save Reddit Videos Quickly & Free [Computer/Mobile]
- Top 5 Best DVR Recorders for Cable TV with High Quality [2024 Lineup]
- Complete Guide to Record System Audio on Mac with/without Soundflower

How to Screen Record on a Mac
Quick links, how to screen record on a mac using the screenshot utility, how to screen record on a mac using quicktime player, how to screen record on a mac with obs.
- The built-in Screenshot utility makes it easy to start or stop a screen recording on your Mac with keyboard shortcuts.
- QuickTime Player is a great alternative if your Mac is running macOS High Sierra or older.
- A third-party app like OBS Studio can offer more control and customization options for recording your Mac's screen.
You may want to record your Mac's screen to make a screencast tutorial, capture gameplay footage or video calls, create a business presentation, and more. Whatever your reason, we'll teach you how to screen record on a Mac.
You may be tempted to install third-party screen recorders on your Mac, but the easiest way to record your Mac's screen is by using the built-in Screenshot utility. This tool lets you capture screen recordings and screenshots with simple keyboard shortcuts.
Press Command + Shift + 5 on your keyboard to open the Screenshot utility. At the bottom of the window that appears, you'll see two options for screen recording: Record Entire Screen and Record Selected Portion .
If you choose Record Entire Screen , a camera icon will appear as your mouse cursor. This is handy if you use more than one monitor. Just move the camera to the screen you want to record and click for the recording to begin.
If you choose Record Selected Portion , drag the corners of the box you see to adjust the frame size. You can also move the box to a different area on your screen.
Clicking Options allows you to select various options for your Mac screen recording. This includes choosing your desired microphone, the location to save your recording, and whether you want to record mouse clicks. Once you're ready, hit the Record button to start the recording.
Once you're done recording your Mac's screen, you may be unsure how to stop it, as the Screenshot utility window won't be visible anymore. Instead, you'll see a small Stop icon in the macOS menu bar. Click on it to stop the screen recording on your Mac.
You can also hit Command + Control + Esc to stop recording your Mac's screen quickly. Alternatively, you can press Command + Shift + 5 to bring up the Screenshot utility window again, where you'll find the option to stop recording.
Can You Screen Record a FaceTime Call on Your Mac?
You may be wondering if you can screen record a FaceTime call. While Apple doesn't offer a native option in the FaceTime app itself, you can use the Screenshot utility to record video calls too.
It's important to note that the other person (or participants) on FaceTime won't be notified that you're recording the video call, so be sure to let them know.
An alternative method to record your Mac's screen is to use QuickTime Player. QuickTime Player uses the same Screenshot utility we described above, but the difference is that you control everything directly from the QuickTime Player app instead. This may be useful for old Macs running macOS High Sierra or earlier versions.
To record using the QuickTime Player, open the app, then select File > New Screen Recording from the menu bar.
This launches an overlay, allowing you to select various options to record your screen. You can choose to either Record Entire Screen or Record Selected Portion , similar to the Screenshot utility.
Once everything's set up, start recording by clicking the Record button. And when you're done, click the Stop icon in the macOS menu bar to end the screen recording session.
The recorded video will open immediately. You can choose to edit it as required (using Trim or Rotate tools). Once you're done, simply click File > Save from the menu bar or hit Command + S on your keyboard to save the video to your desired location.
While both methods let you record audio from your Mac's microphone, you can't record the system audio. A workaround is to install a free audio driver on your Mac to record system audio during screen recordings . However, if your screen recordings still don't have any audio, check out our troubleshooting guide to fix audio issues with your Mac screen recordings .
With the above two options, there's little reason to seek a third-party app for recording your Mac's screen unless you want more features. If you're unsatisfied with the built-in options, though, OBS Studio is our favorite third-party freeware to record your Mac's screen and audio easily.
The consensus among both casual and hardcore users is that there's no free screen recording utility as good as OBS Studio. The app offers features that allow you to customize every aspect of your screen recording. You can also use OBS Studio to stream directly to multiple platforms, including YouTube, Facebook, Twitch, and more.
Download: OBS Studio (Free)
As you can see, starting or stopping a screen recording on your Mac is pretty easy, especially if you're familiar with the useful macOS keyboard shortcuts . You have multiple built-in tools to record your screen on a Mac easily, but if you want advanced options, an open-source program like OBS can do the job. Hopefully, one of these methods is exactly what you need to record your Mac's screen.

How to record audio on your Mac
MacOS has a lot of great built-in tools for capturing your screen and audio — here's how they work.
Recording audio on the best Macs should be a simple process, but that unfortunately isn’t the case. Sure, recording only your microphone audio is easy through the Voice Memos app, but recording your system audio and screen is more difficult. For a long time, Macs did not support system audio recording at all.
Surprisingly, this is a feature that just works on our great iPhones . While Apple did add system audio recording to macOS through the ScreenCaptureKit API at one point, a lot of apps still don’t support the feature. In this guide, we’ll help you try and solve this entire mess in the easiest way possible.
10 must-have apps you should install on your new Mac
How to record audio on mac using the voice memos app.
If your goal is to simply record your voice using your mic, the Voice Memos app is your best bet. This is a native app that’s already installed on your Mac, and it’s great for capturing quick voice notes or ideas without video. You could also use it for recording voiceovers.
- Click Done to stop the recording.
How to record your screen and microphone using QuickTime
If you want to record your screen and microphone simultaneously, the QuickTime Player app is a good choice. Like the Voice Memos app, this is also a native macOS app that should be preinstalled on your system. Unfortunately, there is no system audio recording feature. Nevertheless, you can still record your screen and microphone with ease.
It's important to note that at the time of writing this article, the QuickTime Player doesn't allow you to record system audio. However, there is a clever workaround for this in the next section.
Use a third-party plugin to record system audio with QuickTime
While QuickTime doesn't natively support system audio recording, you can install a third-party plugin called BlackHole to enable this feature. The process is a bit involved, but it's a one-time setup that you'll thank yourself every time you have to record your screen and system audio in the future.
Exploring the built-in macOS tools
The best thing about macOS is its built-in tools and features. While recording system audio isn't the simplest process, installing the BlackHole plugin for QuickTime is a one-time setup that works well. This goes to show that third-party apps and the built-in features are both equally great. If you want to improve your macOS experience even further, here are some essential Mac apps you should be using .
Introducing Copilot+ PCs
May 20, 2024 | Yusuf Mehdi - Executive Vice President, Consumer Chief Marketing Officer
- Share on Facebook (opens new window)
- Share on Twitter (opens new window)
- Share on LinkedIn (opens new window)

An on-demand recording of our May 20 event is available .
Today, at a special event on our new Microsoft campus, we introduced the world to a new category of Windows PCs designed for AI, Copilot+ PCs.
Copilot+ PCs are the fastest, most intelligent Windows PCs ever built. With powerful new silicon capable of an incredible 40+ TOPS (trillion operations per second), all – day battery life and access to the most advanced AI models, Copilot+ PCs will enable you to do things you can’t on any other PC. Easily find and remember what you have seen in your PC with Recall, generate and refine AI images in near real-time directly on the device using Cocreator, and bridge language barriers with Live Captions, translating audio from 40+ languages into English .
These experiences come to life on a set of thin, light and beautiful devices from Microsoft Surface and our OEM partners Acer, ASUS, Dell, HP, Lenovo and Samsung, with pre-orders beginning today and availability starting on June 18. Starting at $999, Copilot+ PCs offer incredible value.
This first wave of Copilot+ PCs is just the beginning. Over the past year, we have seen an incredible pace of innovation of AI in the cloud with Copilot allowing us to do things that we never dreamed possible. Now, we begin a new chapter with AI innovation on the device. We have completely reimagined the entirety of the PC – from silicon to the operating system, the application layer to the cloud – with AI at the center, marking the most significant change to the Windows platform in decades.
YouTube Video
The fastest, most secure Windows PCs ever built
We introduced an all-new system architecture to bring the power of the CPU, GPU, and now a new high performance Neural Processing Unit (NPU) together. Connected to and enhanced by the large language models (LLMs) running in our Azure Cloud in concert with small language models (SLMs), Copilot+ PCs can now achieve a level of performance never seen before. They are up to 20x more powerful [1] and up to 100x as efficient [2] for running AI workloads and deliver industry-leading AI acceleration. They outperform Apple’s MacBook Air 15” by up to 58% in sustained multithreaded performance [3] , all while delivering all-day battery life. With incredible efficiency, Copilot+ PCs can deliver up to 22 hours of local video playback or 15 hours of web browsing on a single charge. [4] That is up to 20% more battery in local video playback than the MacBook Air 15”. [5]
Windows now has the best implementation of apps on the fastest chip, starting with Qualcomm. We now offer more native Arm64 experiences than ever before, including our fastest implementation of Microsoft 365 apps like Teams, PowerPoint, Outlook, Word, Excel, OneDrive and OneNote. Chrome, Spotify, Zoom, WhatsApp, Adobe Photoshop, Adobe Lightroom, Blender, Affinity Suite, DaVinci Resolve and many more now run natively on Arm to give you great performance with additional apps, like Slack, releasing later this year. In fact, 87% of the total app minutes people spend in apps today have native Arm versions. [6] With a powerful new emulator, Prism, your apps run great, whether native or emulated.
Every Copilot+ PC comes secured out of the box. The Microsoft Pluton Security processor will be enabled by default on all Copilot+ PCs and we have introduced a number of new features, updates and defaults to Windows 11 that make it easy for users to stay secure. And, we’ve built in personalized privacy controls to help you protect what’s important to you. You can read more about how we are making Windows more secure here .
Entirely new, powerful AI experiences
Copilot+ PCs leverage powerful processors and multiple state-of-the-art AI models, including several of Microsoft’s world-class SLMs, to unlock a new set of experiences you can run locally, directly on the device. This removes previous limitations on things like latency, cost and even privacy to help you be more productive, creative and communicate more effectively.
Recall instantly
We set out to solve one of the most frustrating problems we encounter daily – finding something we know we have seen before on our PC. Today, we must remember what file folder it was stored in, what website it was on, or scroll through hundreds of emails trying to find it.
Now with Recall, you can access virtually what you have seen or done on your PC in a way that feels like having photographic memory. Copilot+ PCs organize information like we do – based on relationships and associations unique to each of our individual experiences. This helps you remember things you may have forgotten so you can find what you’re looking for quickly and intuitively by simply using the cues you remember. [7]
You can scroll across time to find the content you need in your timeline across any application, website, document, or more. Interact intuitively using snapshots with screenray to help you take the next step using suggested actions based on object recognition. And get back to where you were, whether to a specific email in Outlook or the right chat in Teams.
Recall leverages your personal semantic index, built and stored entirely on your device. Your snapshots are yours; they stay locally on your PC. You can delete individual snapshots, adjust and delete ranges of time in Settings, or pause at any point right from the icon in the System Tray on your Taskbar. You can also filter apps and websites from ever being saved. You are always in control with privacy you can trust.
Cocreate with AI-powered image creation and editing, built into Windows
Since the launch of Image Creator, almost 10 billion images have been generated, helping more people bring their ideas to life easily by using natural language to describe what they want to create. Yet, today’s cloud offerings may limit the number of images you can create, keep you waiting while the artwork processes or even present privacy concerns. By using the Neural Processing Units (NPUs) and powerful local small language models, we are bringing innovative new experiences to your favorite creative applications like Paint and Photos.
Combine your ink strokes with text prompts to generate new images in nearly real time with Cocreator. As you iterate, so does the artwork, helping you more easily refine, edit and evolve your ideas. Powerful diffusion-based algorithms optimize for the highest quality output over minimum steps to make it feel like you are creating alongside AI. Use the creativity slider to choose from a range of artwork from more literal to more expressive. Once you select your artwork, you can continue iterating on top of it, helping you express your ideas, regardless of your creative skills.

Take photo editing and image creation to the next level. With Restyle Image, you can reimagine your personal photos with a new style combining image generation and photo editing in Photos. Use a pre-set style like Cyberpunk or Claymation to change the background, foreground or full picture to create an entirely new image. Or jumpstart your next creative project and get visual inspiration with Image Creator in Photos. On Copilot+ PCs you can generate endless images for free, fast, with the ability to fine tune images to your liking and to save your favorites to collections.
Innovative AI experiences from the creative apps you love
We are also partnering with some of the biggest and most-loved applications on the planet to leverage the power of the NPU to deliver new innovative AI experiences.
Together with Adobe, we are thrilled to announce Adobe’s flagship apps are coming to Copilot+ PCs, including Photoshop, Lightroom and Express – available today. Illustrator, Premiere Pro and more are coming this summer. And we’re continuing to partner to optimize AI in these apps for the NPU. For Adobe Creative Cloud customers, they will benefit from the full performance advantages of Copilot+ PCs to express their creativity faster than ever before.

DaVinci Resolve Studio
Effortlessly apply visual effects to objects and people using NPU-accelerated Magic Mask in DaVinci Resolve Studio.

Remove the background from any video clip in a snap using Auto Cutout running on the NPU in CapCut.
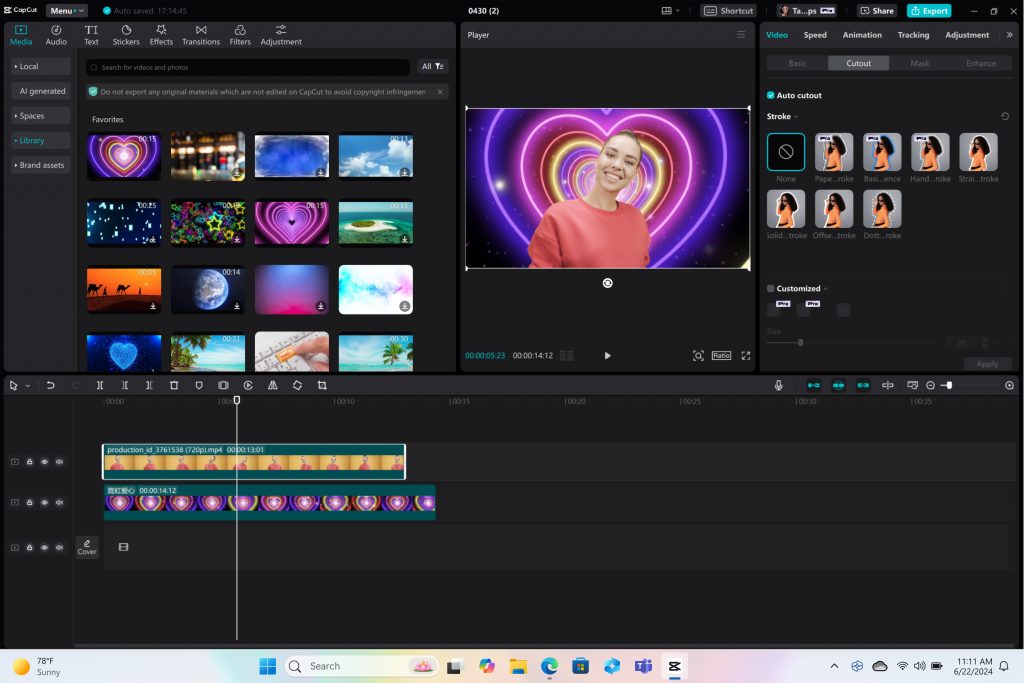
Stay in your flow with faster, more responsive adaptive input controls, like head movement or facial expressions via the new NPU-powered camera pipeline in Cephable.

LiquidText
Make quicker and smarter annotations to documents, using AI features that run entirely on-device via NPU, so data stays private in LiquidText.

Have fun breaking down and remixing any music track, with a new, higher-quality version of NeuralMix™ that’s exclusive to NPU in Algoriddim’s djay Pro.

Connect and communicate effortlessly with live captions
In an increasingly connected and global world, Windows wants to bring people closer together. Whether catching up on your favorite podcast from a different country, or watching your favorite international sports team, or even collaborating with friends and colleagues across the world, we want to make more content accessible to more people.
Live Captions now has live translations and will turn any audio that passes through your PC into a single, English-language caption experience, in real time on your screen across all your apps consistently. You can translate any live or pre-recorded audio in any app or video platform from over 40 languages into English subtitles instantly, automatically and even while you’re offline. Powered by the NPU and available across all Copilot+ PCs, now you can have confidence your words are understood as intended.
New and enhanced Windows Studio Effects
Look and sound your best automatically with easily accessible controls at your fingertips in Quick Settings. Portrait light automatically adjusts the image to improve your perceived illumination in a dark environment or brighten the foreground pixels when in a low-light environment. Three new creative filters (illustrated, animated or watercolor) add an artistic flare. Eye contact teleprompter helps you maintain eye contact while reading your screen. New improvements to voice focus and portrait blur help ensure you’re always in focus.
Copilot, your everyday AI companion

Every Copilot+ PC comes with your personal powerful AI agent that is just a single tap away on keyboards with the new Copilot key. [8] Copilot will now have the full application experience customers have been asking for in a streamlined, simple yet powerful and personal design. Copilot puts the most advanced AI models at your fingertips. In the coming weeks, get access to the latest models including GPT-4o from our partners at OpenAI, so you can have voice conversations that feel more natural.
Advancing AI responsibly
At Microsoft, we have a company-wide commitment to develop ethical, safe and secure AI. Our responsible AI principles guided the development of these new experiences, and all AI features are aligned with our standards. Learn more here .
New Copilot+ PCs from Microsoft Surface and our partners
We have worked with each of the top OEMs — Acer, ASUS, Dell, HP, Lenovo, Samsung — and of course Surface, to bring exciting new Copilot+ PCs that will begin to launch on June 18. Starting at $999, these devices are up to $200 less than similar spec’d devices [9] .
Surface plays a key role in the Windows ecosystem, as we design software and hardware together to deliver innovative designs and meaningful experiences to our customers and fans. We are introducing the first-ever Copilot+ PCs from Surface: The all-new Surface Pro and Surface Laptop.

The new Surface Laptop is a powerhouse in an updated, modern laptop design with razor-thin bezels, a brilliant touchscreen display, AI-enhanced camera, premium audio, and now with a haptic touchpad.
Choose between a 13.8” and 15” display and four stunning colors. Enjoy up to 22 hours of local video playback on Surface Laptop 15” or up to 20 hours on Surface Laptop13.8” on top of incredible performance and all-new AI experiences.
The new Surface Pro is the most flexible 2-in-1 laptop, now reimagined with more speed and battery life to power all-new AI experiences. It introduces a new, optional OLED with HDR display, and ultrawide field of view camera perfect for Windows Studio Effects. The new Surface Pro Flex Keyboard is the first 2-in-1 keyboard designed to be used both attached or detached. It delivers enhanced stability, with Surface Slim Pen storage and charging integrated seamlessly, as well as a quiet, haptic touchpad. Learn more here.
New Copilot+ PCs from the biggest brands available starting June 18:
- Acer : Acer’s Swift 14 AI 2.5K touchscreen enables you to draw and edit your vision with greater accuracy and with color-accurate imagery. Launch and discover AI-enhanced features, like Acer PurifiedVoice 2.0 and Purified View, with a touch of the dedicated AcerSense button.
- ASUS : The ASUS Vivobook S 15 is a powerful device that brings AI experiences to life with its Snapdragon X Elite Platform and built-in Qualcomm® AI. It boasts 40+ NPU TOPS, a dual-fan cooling system, and up to 1 TB of storage. Next-gen AI enhancements include Windows Studio effects v2 and ASUS AiSense camera, with presence-detection capabilities for Adaptive Dimming and Lock. Built for portability, it has an ultra-slim and light all-metal design, a high-capacity battery, and premium styling with a single-zone RGB backlit keyboard.
- Dell : Dell is launching five new Copilot+ PCs, including the XPS 13, Inspiron 14 Plus, Inspiron 14, Latitude 7455, and Latitude 5455, offering a range of consumer and commercial options that deliver groundbreaking battery life and unique AI experiences. The XPS 13 is powered by Snapdragon X Elite processors and features a premium, futuristic design, while the Latitude 7455 boasts a stunning QHD+ display and quad speakers with AI noise reduction. The Inspiron14 and Inspiron 14 Plus feature a Snapdragon X Plus 1and are crafted with lightweight, low carbon aluminum and are energy efficient with EPEAT Gold rating.
- HP : HP’s OmniBook X AI PC and HP EliteBook Ultra G1q AI PC with Snapdragon X Elite are slim and sleek designs, delivering advanced performance and mobility for a more personalized computing experience. Features include long-lasting battery life and AI-powered productivity tools, such as real-time transcription and meeting summaries. A 5MP camera with automatic framing and eye focus is supported by Poly Studio’s crystal-clear audio for enhanced virtual interactions.
- Lenovo : Lenovo is launching two AI PCs: one built for consumers, Yoga Slim 7x, and one for commercial, ThinkPad T14s Gen 6. The Yoga Slim 7x brings efficiency for creatives, featuring a 14.5” touchscreen with 3K Dolby Vision and optimized power for 3D rendering and video editing. The T14s Gen 6 brings enterprise-level experiences and AI performance to your work tasks, with features including a webcam privacy shutter, Wi-Fi 7 connectivity and up to 64GB RAM.
- Samsung : Samsung’s new Galaxy Book4 Edge is ultra-thin and light, with a 3K resolution 2x AMOLED display and Wi-Fi 7 connectivity. It has a long-lasting battery that provides up to 22 hours of video playback, making it perfect for work or entertainment on the go.
Learn more about new Copilot+ PCs and pre-order today at Microsoft.com and from major PC manufacturers, as well as other leading global retailers.
Start testing for commercial deployment today
Copilot+ PCs offer businesses the most performant Windows 11 devices with unique AI capabilities to unlock productivity, improve collaboration and drive efficiency. As a Windows PC, businesses can deploy and manage a Copilot+ PC with the same tools and processes used today including IT controls for new features and AppAssure support. We recommend IT admins begin testing and readying for deployment to start empowering your workforce with access to powerful AI features on these high-performance devices. You can read more about our commercial experiences here .

AI innovation across the Windows ecosystem
Like we’ve always done with Windows, we have built a platform for our ecosystem partners to build on.
The first Copilot+ PCs will launch with both the Snapdragon® X Elite and Snapdragon® X Plus processors and feature leading performance per watt thanks to the custom Qualcomm Oryon™ CPU, which delivers unrivaled performance and battery efficiency. Snapdragon X Series delivers 45 NPU TOPS all-in-one system on a chip (SoC). The premium integrated Qualcomm® Adreno ™ GPU delivers stunning graphics for immersive entertainment. We look forward to expanding through deep partnerships with Intel and AMD, starting with Lunar Lake and Strix Point. We will bring new Copilot+ PC experiences at a later date. In the future we expect to see devices with this silicon paired with powerful graphics cards like NVIDIA GeForce RTX and AMD Radeon™, bringing Copilot+ PC experiences to reach even broader audiences like advanced gamers and creators.
We are at an inflection point where the PC will accelerate AI innovation. We believe the richest AI experiences will only be possible when the cloud and device work together in concert. Together with our partners, we’re setting the frame for the next decade of Windows innovation.
[1] Based on snapshot of aggregated, non-gaming app usage data as of April 2024 for iGPU-based laptops and 2-in-1 devices running Windows 10 and Windows 11 in US, UK, CA, FR, AU, DE, JP.
[2] Tested April 2024 using Phi SLM workload running 512-token prompt processing in a loop with default settings comparing pre-release Copilot+ PC builds with Snapdragon Elite X 12 Core and Snapdragon X Plus 10 core configurations (QNN build) to Windows 11 PC with NVIDIA 4080 GPU configuration (CUDA build).
[3] Tested May 2024 using Cinebench 2024 Multi-Core benchmark comparing Copilot+ PCs with Snapdragon X Elite 12 core and Snapdragon X Plus 10 core configurations to MacBook Air 15” with M3 8 core CPU / 10 Core GPU configuration. Performance will vary significantly between device configuration and usage.
[4] *Battery life varies significantly by device and with settings, usage and other factors. See aka.ms/cpclaims*
[5] *Battery life varies significantly based on device configuration, usage, network and feature configuration, signal strength, settings and other factors. Testing conducted May 2024 using the prelease Windows ADK full screen local video playback assessment under standard testing conditions, with the device connected to Wi-Fi and screen brightness set to 150 nits, comparing Copilot+ PCs with Snapdragon X Elite 12 core and Snapdragon X Plus 10 core configurations running Windows Version 26097.5003 (24H2) to MacBook Air 15” M3 8-Core CPU/ 10 Core GPU running macOS 14.4 with similar device configurations and testing scenario.
[6] Based on snapshot of aggregated, non-gaming app usage data as of April 2024 for iGPU-based laptops and 2-in-1 devices running Windows 10 and Windows 11 in US, UK, CA, FR, AU, DE, JP.
[7] Recall is optimized for select languages (English, Chinese (simplified), French, German, Japanese, and Spanish.) Content-based and storage limitations apply. Learn more here .
[8] Copilot key functionality may vary. See aka.ms/keysupport
[9] Based on MSRPs; actual savings may vary
Tags: AI , Copilot+ PC
- Check us out on RSS
IMAGES
VIDEO
COMMENTS
In the Options dialog box, click the Customize Ribbon tab on the left. Then, in the right-hand box that lists the available ribbon tabs, select the Recording check box. Click OK. To get ready to record, select Record on either the Recording tab or the Slide Show tab of the ribbon.
This video shows how to record presentation and export it as a video file on PowerPoint for Mac version 16.37.
Recording a PowerPoint Presentation on Mac. While PowerPoint is a Microsoft software, many Mac users download and use it on their computers as well. With more than 40k reviews on the app store, PowerPoint is a very popular Keynote alternative. Go to the Record tab. PowerPoint on Mac has a dedicated tab for recording.
Open the PowerPoint presentation for which you want to record a video to share. In the top-right corner, select the Record button, or select Record > From Beginning or Record > From Current Slide . NOTE: To record engaging and dynamic camera layouts, design your slides with cameo object by select Record > Cameo . To refer to your script while ...
Step 2 | Start Recording. To record narrations in PowerPoint, start of by finding the Slide Show tab on PowerPoint's ribbon. Click on the Slide Show tab to change the available options. Make sure that you start on the first slide in PowerPoint to record audio and timings for the entire presentation. Now, find the Record Slide Show buton and ...
Do you want to be able to record your PowerPoint presentations with audio on Mac? 👉In this tutorial, we'll show you two easy methods for recording audio on ...
How it works. Just like before, you can enter the Record Slide Show experience by clicking Slide Show > Record Slide Show. 1. Toggle video and audio options in the options dropdowns in the recording toolbar. 2. Use the Record, Pause, and Resume buttons to control narration and navigation recording. 3. After clicking the Stop button to stop ...
A step-by-step tutorial on how to record a slide show and narrate with PowerPoint. This uses the Microsoft PowerPoint "Record Slide Show" feature. This incl...
Presenter drawing recording . You can also now record notes taken with the pen or highlighter tool. Any drawing done in the recording state will be captured. When you or your audience member plays the presentation back, it will seem like you are drawing on the slides in real time. Laser pointer recording . Similar to recording for the pen tool ...
Here's step-by-step guide to recording your PowerPoint presentation with Descript. Set up your screen recording. 1. Install and open Descript. At the top of the editor, click and open the Record panel. 2. Select Screen. 3. Set Recorder settings:
With cameo supported when recording slide shows in PowerPoint for Mac, you can customize your camera feed's appearance before you record. You can apply your favorite camera styles, shapes, and sizes to cameo, and choose the perfect place on the slide for your camera feed. How it works. Open a presentation that you want to record and share.
To customize the presenter display before you start recording, move the pointer, then click . For more details about modifying the display, see Customize the presenter display. Click to record your presentation. The timer counts down from 3 before recording begins. Do any of the following while recording the presentation:
Recording WITHOUT Webcam. In PowerPoint, open the finished presentation you would like to narrate. Go to the "Slide Show" tab. Select "Record Slideshow" and choose the "Recording from Beginning" option. Once you select "Record from Beginning", the PowerPoint will automatically display presentation mode. Only sound needs to be ...
Open QuickTime: Go to the file menu and select New Screen Recording. The Screen Recording window will open: Click the down arrow next to the record button and select the Microphone as the Internal Microphone: Click the record button: Once the recording starts, start the PowerPoint presentation and speak as needed during the recording.
Here's how to use it: Press Shift + Command + 5 on your keyboard to open the Screenshot Toolbar. Click on the "Record Entire Screen" or "Record Selected Portion" button, then choose to record your screen with or without audio. To capture audio, click the "Options" button and select a microphone. Click "Record" to start your screen recording.
The easiest way to record a voiceover in PowerPoint on a Mac is to record by slide. Select the slide where you want to add the narration, then select Insert from the menu bar and click Audio > Record Audio. Enter a name for the narration, select Record, read your script, and select Stop when you're finished recording.
Hi. I think the reason you don't find the option to insert a screen recording is because PowerPoint doesn't make screen recordings of other application windows. You can use QuickTime, which is built-into your Mac for this purpose, then insert the resulting video file. If you are seeking programs with advanced screen recording capabilities, they ...
If you need to record your PowerPoint presentation on your Mac so that it can be used online either on a video sharing platform like YouTube or perhaps in a...
Open your PowerPoint presentation and the app and click on the All-in-One Recorder option. Next, customize your recording preferences in the next window, as presented in the image below. Set the capture area and decide whether you want to record system audio, microphone, or webcam simultaneously. After completing the customizations, click the ...
In the bottom middle of the screen, choose the rectangle with a circle icon to record the whole screen or the dotted-line rectangle with a circle icon to record a selection of your screen. Click ...
Step 1 Launch the PowerPoint program on your Windows computer and access the presentation you wish to convert to video. After that, tick the "File" button and select the "Export" option. Step 2 Next, on the "Export" section, tick the "Create a Video" button, click the "Presentation Quality" dropdown button, and select your preferred option.
Options Record. Stop. Command + Control + Esc Command + Shift + 5. File > New Screen Recording. Record Entire Screen Record Selected Portion. Record Stop. File > Save Command + S. While both ...
Press the Command + Spacebar keys on your keyboard to bring up Spotlight Search. Search for the Voice Memos app. After launching the app, click the red record button to record your voice. You ...
About Press Copyright Contact us Creators Advertise Developers Terms Privacy Policy & Safety How YouTube works Test new features NFL Sunday Ticket Press Copyright ...
Use the Screenshot app. The built-in Screenshot works in a very similar way to QuickTime. Locate the video on YouTube and make it full screen. Press Command-Shift-5. Click the Record full screen button. Click Record. Click play on the YouTube video. When the section you want to record is finished, pause the video.
An on-demand recording of our May 20 event is available. Today, at a special event on our new Microsoft campus, we introduced the world to a new category of Windows PCs designed for AI, Copilot+ PCs. Copilot+ PCs are the fastest, most intelligent Windows PCs ever built. With powerful new silicon capable of an incredible...