- Print Products
- Paper And Substrates
- Coatings, Bindings, and More!
- The Print Dictionary
- Are Your Files Print Ready?
- Design Tips And Tutorials
- Design Inspiration!
- Print Templates
- Print Marketing Strategies
- Running A Small Business
- Marketing 101
- Go To Printivity.com
- Color Copies
- Black and White Copies
- Saddle Stitch Booklets
- Perfect Bound Books
- Spiral Bound Booklets
- Wire-O Booklets
- Business Cards
- Shipping Boxes
- About Printivity Insights
- Sustainability and Treefo at Printivity
- Print Ready Files

Presentation Folder Design Guide

Last updated on November 22nd, 2023 at 01:14 pm
The Importance of Presentation Folder Design
In the professional landscape, a presentation folder is more than a document holder — it’s a branding powerhouse.
With a creative design, presentation folders can make a great first impression, which is crucial in how your brand is perceived. Whether meeting potential clients, investors, or associates, a meticulously designed folder speaks volumes about your company’s professionalism and attention to detail.
Presentation folder examples abound, but what sets yours apart? It’s the tangible quality that digital methods can’t replicate. A well-crafted folder is a functional, new marketing asset. It continues to promote your company whenever viewed, subtly reinforcing brand recognition and loyalty.
Customization is key. Your folder can tell your brand’s story through its creative elements.
This is where presentation folder printing services come into play, allowing for high-quality materials, vibrant colors, and precise finishes. These small details can distinguish your brand in a competitive market.
Moreover, the design process doesn’t have to be complex. With easy-to-use tools and templates, you can create compelling pocket folder designs that resonate with your audience and convey your company’s values and identity.
Investing in your presentation folder’s design is not just prudent; it’s essential. As a tangible extension of your brand, it communicates your commitment to excellence and leaves a lasting impression. With this understanding, let’s explore the basics of crafting a memorable presentation folder.
Know The Basics
Sometimes designing for a specific product, like presentation folders, might seem intimidating compared to a simple color copy or business card. But when you break it down to the basics, you will see it’s simple to design a folder!
The initial setup for your presentation folder file should start like any other product that you are designing for print. Open a fresh file in whichever program you feel the most comfortable designing in to start your professional print presentation folders. We recommend designing in InDesign because of the advanced color management and the flexibility of control of your presentation folder design. Verify that the color profile is set for CMYK .
*Pro tip: Printivity offers Pantone color matching and hard copy proofs upon request for color-critical orders.
All images and visual content should be designed at 300 DPI for high-quality folder printing. If content is designed under 300 DPI it runs the risk of being blurry and/or pixelated.

The Right Dimensions
9”x12” is the standard dimension of presentation folders in order to neatly fit letter size sheets in the 4” pockets. Adding pockets is a traditional option for folders, and you can choose to have them on the right side, left side, or both sides.
For the sake of this article, we will use the full bleed dimensions for a folder with both pockets, 16.25” x 18.25”. You will need to extend the background of your design an additional .125” on each side for the full bleed effect. In addition to adding full bleed , please be aware of the folder safety margin, which is the additional .125” from the final “cut line” that starts at 16”x18”. It is important to accommodate for the safety margin in order to avoid the risk of important content from getting cut.
Designing Page 1
Now let’s take a couple steps back. A presentation folder with pockets is printed on a single sheet of paper, folded, and glued for the finished product. Because of this, page 1 of your file will include the outside front and back cover as well as the outside of both pockets. The covers are the top 12” of the file, with the right side being the front cover and the left side being the back cover. The bottom 4” will be the pockets. We’ll get into more details about designing for the folder pockets later on in the article.
Designing Page 2
If you are planning on ordering single-sided printing and you want the interior of the presentation folder to be white, you can skip this section and go straight to pockets! However, if you want to utilize all printing space for branding and advertising, we recommend taking advantage of double-sided printing. This modern approach ensures you have more room for promotional content and keeps your brand at the forefront.

Due to the pockets at the bottom, the top 8” of the folder’s design will be the most visible. It is still recommended to extend your presentation folder design to cover the full sheet for a cohesive look.
When choosing what to include in the design of the interior of the folder, remember that this part of the design will be covered by your brochures, flyers , and other marketing materials. Choose content that emphasizes your brand, separates you from competitors, and leaves a lasting impression. This is a perfect opportunity to incorporate your logo and other key elements of the company identity.
Take Advantage of Printed Pockets
Adding pockets to your custom presentation folders gives you more opportunity to reach your customers. The pockets will be the most visible content when your folder is open, so be sure to include eye-catching images and branding.
Setting up the design for the pockets is the most unique part of designing presentation folders. As previously stated, the pockets will be printed on the same side of the sheet as the outside covers. In order to keep your design in the correct orientation, you will need to flip the pocket design upside down. Also remember that the left pocket will need to be designed on the right side (front cover) of the folder.

Other unique features of the presentation folders pockets are the center die cut and the optional business card slits. Be aware that pocket folders require a diagonal die at the center fold that could cut up to .625” at the farthest point on each side. The best practice would be to keep all important text and content away from this cut line.
Business Card Slots
When your presentation folders include pockets, take advantage of the opportunity to give a customer a small piece of you and your brand to be remembered by. When including business cards in your folder, it comes with numerous options for the orientation and number of slits that hold the card. Business cards are not automatically included, so remember to order custom business cards in your presentation pocket folder order!
You will need to make this decision before completing your presentation folder design, otherwise you run the risk of covering your design. The business card slits will be located in the center of the pocket and approximately 4” long. Horizontal slits are 2.5” in from the center fold and outside cut line, 1” from the top of the pocket, and .75” from the bottom of the pocket. Vertical slits are 3.25” from the outside cutline and 3.5” from the center fold, and .25” from the top and bottom of the pockets.
Save as PDF-X1a
If you have designed your pocket folder file in Photoshop or Illustrator , you are able to save your file as a PDF-X1a, which is the preferred file format to be submitted to Printivity. Once you have completed your design, go to “File” in the left-hand corner and click “Save As” in the drop down. Change the format to “Adobe PDF” in Illustrator or “Photoshop PDF” in Photoshop in the format field at the bottom, then click “Save”. Another pop-up will appear. In the “General” section update the “Adobe PDF Preset” to “High Quality Print Modified”. Under that, you will need to update the “standard” to “PDF/X-1a”. Before saving, make sure that the compression is set at “Do Not Downsample” in order to maintain high resolution. Once you press “Save PDF” you are done!

If you are unable to save as a PDF-X1a, Printivity also accepts PDF, Illustrator, Photoshop, and Indesign files.
Other Quick Tips For Custom Presentation Folders
Enhancing the utility and attractiveness of your custom presentation folders goes beyond the initial design and print. After all, you’re not just ordering a utility item; you’re investing in a powerful component of your company’s branding. Here are more advanced tips to ensure your folders are not just functional but also aesthetically appealing and memorable:
Select the Right Material: The material of your folder can make a significant difference. A thicker, heavier stock exudes quality and professionalism. Printivity offers a variety of paper stocks, ranging from eco-friendly options to premium, heavy-duty materials that enhance durability and the perceived value of the folder’s contents.
Maintain Color Consistency: When ordering folders, especially in bulk, ensure color consistency across the batch. This maintains a uniform brand image. Printivity utilizes advanced color-matching technology to ensure your hues are consistent and true to your brand.
Choose an Appropriate Finish: While glossy finishes add a bright sheen, there might be better choices for environments with intense light due to glare. Matte finishes, on the other hand, offer a more subdued, sophisticated look and feel, which is perfect for high-end brands or formal events.
Embrace Sustainability: If your company values environmental responsibility, communicate this through your print materials. Opt for recycled or sustainably sourced paper.
Add a Touch of Luxury: Once you have completed the layout and presentation folder design, you are ready to place your order! To add a luxury look to your custom folders, we recommend choosing any of our coating options. Printivity offers two types of gloss coating: UV Coating and Gloss Lamination. Both options add a shiny finish, enhance the colors of your design, and protect your prints from normal wear and tear.
UV Coating is only able to be applied to the outside of the pocket folders regardless of single or double-sided folder printing. While Gloss Lamination would be applied to each side of the folders that have been printed on. For a more soft and dull appearance, we offer Matte Lamination that will be applied to each folder side that printing was ordered.
Download folder templates directly from Printivity.com before you start designing. Once you’re ready to order, or have questions during the ordering process, contact our expert customer service department at 1-877-649-5463.
Don’t have time to design your presentation folder? Printivity has you covered! We offer graphic design services to help you get your designs ready and printed quickly!
RELATED ARTICLES MORE FROM AUTHOR
8 children’s book cover ideas to ignite the imagination, how to design a product catalog: examples & tips, how to design a dazzling pageant program book, leave a reply cancel reply.
Save my name, email, and website in this browser for the next time I comment.
Most Popular Print Articles
The complete guide to real estate brochure design, how bookmark printing can boost your marketing strategy, printing memorable pageant programs, sports program printing tips, a guide to publishing books.
PRINT Magazine
Presentation Folder Templates: Free Dielines, Mockups, and Designs

- Click to share on Facebook (Opens in new window)
- Click to share on Twitter (Opens in new window)
- Copy this page's address to your clipboard Link copied to clipboard
For those who lack graphic design experience, the word “template” has become something of a dirty word. It calls to mind cheap cookie-cutter designs stuffed with clip art. But there’s more than one type of template, and many of them are much more than just an easy shortcut; they’re absolutely vital to the print design process.
Any time you design presentation folders , you’re eventually going to need a template at some point—whether you’re forming your initial idea and layout, creating the design itself, or presenting a finished design mockup to your client.

Finding the right template for your project can be challenging. There are lots of them out there, and not all of them are free; you might end up paying for a template only to realize that it’s completely wrong for your pocket folder concept. Fortunately, Company Folders has invested a great deal of time into creating the following free downloads, with each template fashioned to make your design process as smooth and painless as possible.
Mockup Templates
Raw design files aren’t very helpful when you present your work to a client, especially for print projects that need to be folded into shape, such as two pocket folders . Parts of the folder will appear upside-down, which will confuse those who are less familiar with how dielines work. In situations like this, mockup templates are a lifesaver. They allow you to quickly convert your design files into fully realized mockups, so your design will look the way it will when it’s actually printed and folded.
These mockups can be further customized with a background of your choice, so your presentation folders can be set against a wooden table, a grassy field, or another surface or environment.
Front and Inside Folder Mockup Template

This versatile template shows off both the front cover and inside right panel of the folder.
Stacked Presentation Folders Mockup Template

Show your client what their folders will look like fanned out across a table , focusing exclusively on the front cover.
Inside View Two Pocket Folder Mockup Template

This template is most useful when the most interesting elements of a folder design are on its interior, showcasing the pockets and inside panels.
See more Mockup Templates.
Die Cut Templates
Even if you never make use of any other type of template when crafting a presentation folder design, you’re not going to get very far without a die cut template. Also known as “dieline” templates, these function as the canvas upon which you will construct your actual design. Without an appropriate die cut template, a printer will be unable to print your work.
In situations where you don’t actually need your design printed (such as when you don’t have a client and are just experimenting with creating folders), it’s still worth it to use a die cut template. That way, you’ll always have the option to print it later if the need arises. Plus, this will make it easier to apply your design to a mockup template and incorporate it into your portfolio.
4-Color Process Letter Size Two Pocket Folder

Specifically designed for a folder printed with four-color process, this template is a great choice for colorful, cost-effective designs.
6×9 2 Pocket Small Presentation Folder

This template is well-suited for compact, lightweight designs meant to hold leaflets or other smaller materials.
Serpentine Cut Right Pocket Presentation Folder

With its creative, eye-catching pocket, this curvy template is perfect for when you want your design to stand out from the crowd.
See more Die Cut Templates.
Design Templates
Folder design templates give you a pre-made design that you can mix and match with your own images and text. Since practically every element of the template can be replaced with something else, you don’t need to worry about your design looking identical to someone else’s; it’s just a convenient time-saving solution when you need help coming up with a general layout.
Templates are available in both Illustrator and Photoshop formats. Even if you
don’t turn one of these templates into a design of your own, browsing them might just give you the inspiration you need to create something completely original.
Illustrator Templates
Six design services folder and business card template.

Modern typography and a pattern of diagonal lin es give this template a dynamic, energetic feel.
Green Eco-Friendly Presentation Folder Design Template

Perfect for “green” businesses, this earthy design template expresses a love of the natural world.
Photoshop Templates
School district pocket folder and business card template.

This template makes use of primary colors and creative illustrations to create a warm and welcoming tone.
See more Design Templates.
Rethinking Templates
Don’t think of templates as a lazy way to avoid doing work for your client. Instead, think of them as a way to save valuable time and reinvest it into expressing the creativity and craftsmanship that your client hired you for. Templates function best as a way to enhance the hard work you do, not skirt around it.
Any questions or comments regarding these folder templates? Share them in the comments below.
More like this
PRICE QUOTE REQUEST
1-800-492-1218.
Sales & Service Team:
8AM - 8PM ET

The Ultimate Guide To Presentation Folders: Design, Ordering, And Printing Options
I. introduction, what are presentation folders.
Presentation folders are specialized folders that are used to hold and organize documents and other materials for presentations, meetings, or events. They are designed to be visually appealing and professional-looking, typically made of sturdy materials such as cardstock or polypropylene, and feature various pockets and slits to hold different types of documents, business cards, or CDs/DVDs. Presentation folders come in a variety of styles, sizes, and colors, and can be customized with company logos, branding, or other graphics. They are commonly used by businesses, schools, and organizations to enhance their marketing and communication efforts and to leave a lasting impression on their clients or audience.
Why are presentation folders important?
Presentation folders are important for several reasons:
Organization : Presentation folders provide a way to organize and present documents in a professional and organized manner. This makes it easier to keep important documents together and find what you need quickly.
Branding : Customized presentation folders can include a company's logo and other branding elements such as name, logo, and color scheme, which helps to create a professional and cohesive look for the organization.
Marketing : Presentation folders can be used as a marketing tool to promote products or services. The design of the folder can be used to showcase the company's offerings and highlight its unique selling points.
Impressions : The use of presentation folders during meetings or presentations can create a positive impression on clients, partners, or potential customers. It shows that the company takes its work seriously and pays attention to details.
Protection : Presentation folders also provide protection for important documents. They can help prevent documents from getting lost or damaged, which can save time, money, and potential legal issues.
Overall, presentation folders are an important tool for any organization that wants to create a professional image and stay organized.
The Overview of what this guide will cover
The Ultimate Guide to Presentation Folders is a comprehensive resource that will provide you with everything you need to know about designing, ordering and printing presentation folders. Presentation folders are versatile marketing tools that can be used to hold promotional materials, such as brochures, flyers, and business cards, and they can help you create a professional image for your company or organization. In this guide, you'll learn about the different types of presentation folders, including standard and custom options, and the various printing techniques available. You'll also discover tips and tricks for designing a folder that stands out and effectively showcases your brand. Whether you're a marketer, graphic designer, or business owner, this guide will equip you with the knowledge and skills to create presentation folders that make an impact.
II. Designing Presentation Folders
Elements of a great design.
When it comes to designing a presentation folder that will make a lasting impression on your audience, there are several key elements to consider. Here are some of the most important elements of a great presentation folder design:

Branding : Your presentation folder should be an extension of your brand and convey your message and values. Incorporate your company logo, color scheme, and other visual elements that reflect your brand.
Clear and concise messaging : Your messaging should be clear and easy to understand. Avoid using jargon or technical terms that your audience may not be familiar with.
High-quality images : Use high-quality images that are relevant to your message and complement your design. Avoid using stock images that are overused or generic.
Typography : Choose fonts that are easy to read and complement your branding. Avoid using too many fonts, as this can make your design appear cluttered and confusing.
Consistency : Consistency is key to a successful presentation folder design. Ensure that your design is consistent throughout the entire folder, including the cover, pockets, and inside pages.
White space : Use white space effectively to give your design room to breathe. This will make your presentation folder appear more organized and professional.
Durability : Choose high-quality materials that are durable and can withstand wear and tear. This will ensure that your presentation folder can be used multiple times and will continue to make a good impression.
By incorporating these key elements into your presentation folder design, you can create a visually appealing and effective marketing tool that will help you stand out from the competition.
How to choose the right template or style
When it comes to designing a presentation folder, choosing the right template or style is crucial to creating a professional and effective marketing tool. Here are some tips to help you choose the right template or style for your presentation folder:
Consider your brand identity : Your presentation folder should reflect your brand identity, including your company's logo, color scheme, and overall style. Choose a template or style that complements your brand's look and feel.
Think about your audience : Consider who your target audience is and what message you want to convey. For example, if you're targeting a more corporate audience, a classic and professional design may be more appropriate, while a more creative and visually engaging design may work better for a younger or more artistic audience.
Choose the right size : Presentation folders come in various sizes, so it's important to choose the right size for your needs. Think about what materials you want to include in the folder and choose a size that can accommodate them comfortably.
Look at design elements : Pay attention to the design elements of the template or style you're considering, including the placement of text, images, and graphics. Make sure the design elements are well-balanced and easy to read.
Don't be afraid to customize : Many presentation folder templates and styles can be customized to better fit your brand and messaging. Don't be afraid to make changes to the template to make it more personalized and unique.
By considering these factors, you can choose a template or style that is not only visually appealing but also effectively conveys your brand and message to your audience.
Design tips for branding, marketing, and more
Designing a presentation folder can be a challenging task, but it's also an opportunity to showcase your brand and make a lasting impression on your audience. Here are some design tips to help you create a folder that effectively promotes your brand and marketing message:
Start with a clear goal : Before you begin designing your folder, make sure you have a clear understanding of what you want to achieve. What message do you want to convey to your audience, and what action do you want them to take after seeing your folder? Once you have a clear goal in mind, you can design your folder with a specific purpose in mind.
Keep it simple : A cluttered design can overwhelm your audience and detract from your message. Keep your design simple and focused, with a clear hierarchy of information. Use a limited color palette and typography that is easy to read.
Use high-quality images : Images can be a powerful tool for communicating your brand and message. Use high-quality images that are relevant to your brand and message, and make sure they are optimized for print.
Incorporate your branding : Your presentation folder should be an extension of your brand, so make sure to incorporate your branding elements, such as your logo, colors, and typography. Use your branding consistent throughout your folder design, so your audience can easily recognize and remember your brand.
Consider the paper and finish : The type of paper and finish you choose can also impact the effectiveness of your presentation folder. Consider the weight and texture of the paper, as well as the finish, such as gloss or matte. The right combination can help your folder stand out and communicate a professional image.
Highlight your unique selling points : What sets your brand apart from the competition? Make sure to highlight your unique selling points in your folder design, whether it's through copy, images, or graphics. This will help your audience understand why they should choose your brand over others.
Test and refine : Finally, don't be afraid to test and refine your folder design. Show it to colleagues or customers for feedback, and make adjustments as necessary to ensure it effectively communicates your message and achieves your goals.
By following these design tips, you can create a presentation folder that effectively promotes your brand and marketing message and helps you stand out from the competition.
III. Paper Options
Types of paper stock for presentation folders.
When it comes to designing and printing presentation folders, choosing the right paper stock is crucial for achieving the desired look and feel. Here are some of the most common types of the paper stock used for presentation folders:
Glossy Paper Stock : Glossy paper stock has a shiny finish that can make colors appear brighter and more vibrant. This type of paper stock is ideal for designs with high-contrast images and bold colors.
Matte Paper Stock : Matte paper stock has a non-reflective finish that can give your presentation folder a more sophisticated and subtle look. This type of paper stock is best suited for designs that require a softer and more understated feel.
Uncoated Paper Stock : Uncoated paper stock has a natural, textured finish that can add a tactile element to your presentation folder. This type of paper stock is great for designs that want to convey a sense of authenticity or a handmade feel.
Linen Paper Stock : Linen paper stock has a distinct woven texture that can give your presentation folder a high-end look and feel. This type of paper stock is often used for formal or elegant designs.
Recycled Paper Stock : Recycled paper stock is made from post-consumer waste and can be a great choice for companies looking to demonstrate their commitment to sustainability. This type of paper stock can also have a unique look and feel, depending on the specific materials used.
When selecting a paper stock for your presentation folder, it's important to consider factors such as budget, brand image, and the intended audience. By choosing the right paper stock, you can create a presentation folder that effectively conveys your message and enhances your brand.
How to choose the right paper for your needs
Choosing the right paper for your presentation folders is an important decision that can impact the overall quality and effectiveness of your marketing materials. Here are some key factors to consider when selecting paper for your presentation folders:
Weight and Thickness : The weight and thickness of the paper you choose can affect the durability and stiffness of your folder. Heavier paper stocks, such as 14pt or 16pt cardstock, are more durable and provide a sturdy feel. Thinner paper stocks, such as 80lb or 100lb text paper, are more flexible and lightweight, making them easier to handle and fold.
Finish : The finish of the paper can affect the look and feel of your presentation folder. Glossy finishes provide a shiny and reflective surface, while matte finishes offer a more subdued and elegant look. Textured finishes, such as linen or felt, can add a tactile element to your folder.
Color : The color of the paper can impact the overall look and feel of your folder. White or off-white paper is a common choice for presentation folders, as it provides a neutral background that can showcase your design and branding elements. Colored paper can be used to create a more unique and eye-catching folder, but keep in mind that it may affect the legibility of text.
Environmental Considerations: If sustainability is important to your brand or organization, consider choosing paper made from recycled content or from responsibly sourced materials.
Overall, the right paper choice for your presentation folder will depend on your specific needs and preferences. It's important to take the time to explore different options and samples before making a final decision. A reputable printer can provide guidance and recommendations based on your requirements and budget.
Specialty paper options and finishes
Specialty paper options and finishes can enhance the look and feel of your presentation folder, making it more visually appealing and professional. Here are some of the most popular specialty paper options and finishes to consider:
Textured Paper - Textured paper can give your presentation folder a unique and tactile feel. There are many different textures to choose from, including linen, felt, and laid.
Glossy Paper - Glossy paper has a shiny finish that can make colors pop and give your folder a polished look. It is a popular option for photo-heavy designs.
Matte Paper - Matte paper has a non-glossy finish that can give your folder a more understated and elegant look. It is often used for designs with a lot of text.
Foil Stamping - Foil stamping is a process that uses heat and pressure to apply metallic foil to paper. It can add a luxurious and eye-catching element to your folder.
Embossing and Debossing - Embossing and debossing involve creating a raised or recessed design on paper by pressing it with a metal die. These techniques can add depth and texture to your folder.
Spot UV Coating - Spot UV coating is a technique that involves applying a shiny, clear coating to specific areas of your folder, such as your logo or other design elements. It can add contrast and dimension to your design.
When choosing specialty paper options and finishes, it's important to consider your brand image and the message you want to convey. A folder with a shiny, metallic finish might be appropriate for a luxury brand, while a folder with a more understated, textured paper might be a better fit for a professional services firm. Experiment with different options to find the combination that best suits your needs.
IV. Printing Options
Types of printing options for presentation folders.
When it comes to printing presentation folders, there are several options to choose from. Each option has its unique advantages and disadvantages, depending on the type of design you're looking for, the budget, and the printing volume. Here are some of the most popular types of printing options for presentation folders:
Digital Printing : Digital printing is a cost-effective option that uses digital files to print directly onto paper. It's ideal for small to medium print runs, as it's a quick and easy way to produce high-quality prints. However, it may not be suitable for large volumes or printing on certain materials.
Offset Printing : Offset printing is a popular option for larger print runs, as it's more cost-effective than digital printing for higher quantities. It involves creating a plate with the design, which is then transferred onto the paper. Offset printing produces high-quality prints with crisp and clean lines and vibrant colors.
Letterpress Printing : Letterpress printing is a traditional printing method that involves pressing ink into the paper using a metal plate. It creates a beautiful, tactile finish and is ideal for designs that require a unique and luxurious look and feel.
Foil Stamping: Foil stamping is a popular printing technique for adding metallic or colored foil to the surface of the paper. It creates a striking and high-end finish and is often used to highlight logos, text, or other important details.
Embossing and Debossing : Embossing and debossing involve creating a raised or recessed design on the paper by pressing it with a metal die. Embossing creates a raised design, while debossing creates a recessed design. Both techniques add texture and depth to the design and can create an elegant and sophisticated look.
When selecting a printing option for your presentation folders, consider the design, budget, and printing volume. Each option has its unique advantages and can help you achieve the desired look and feel for your folders.
How to choose the right printing method for your needs
When it comes to printing presentation folders, there are several methods to choose from, each with its own advantages and limitations. Here are some factors to consider when choosing the right printing method for your needs:
Quantity : If you need a large number of presentation folders, offset printing may be the best choice, as it is the most cost-effective option for high-volume runs. On the other hand, if you only need a small number of folders, digital printing may be a more affordable option.
Color : If your design requires full-color printing or complex graphics, digital printing may be the best choice. This method can produce high-quality, detailed images with accurate color reproduction. However, if you require a specific Pantone color or metallic ink, offset printing may be a better choice.
Paper stock : Different printing methods work better with certain paper stocks. For example, if you want to use textured or heavy paper, offset printing may be the best option. Digital printing can work well with glossy or matte-coated paper stocks.
Turnaround time : If you need your presentation folders printed quickly, digital printing may be the best choice. This method allows for shorter turnaround times and can often be done on the same day. Offset printing typically takes longer due to the setup required.
Budget : Your budget will also play a role in determining the printing method you choose. Offset printing is typically more expensive upfront due to the setup required, but can be more cost-effective for high-volume runs. Digital printing may be more affordable for smaller runs or for those on a tight budget.
By considering these factors, you can determine the best printing method for your specific needs and ensure that your presentation folders are printed to your satisfaction.
Specialty printing options and finishes
When it comes to printing presentation folders, there are a variety of specialty printing options and finishes that can help your folder stand out from the crowd. These printing techniques can add visual interest, texture, and depth to your design, and can help communicate the quality and professionalism of your brand. Here are some of the most popular specialty printing options and finishes to consider:
Foil Stamping: Foil stamping involves applying a metallic or colored foil to a specific area of the folder, such as the logo or text. This technique can create a shiny or reflective effect that catches the eye and adds an element of luxury to the folder.
Embossing: Embossing involves creating a raised impression on the folder by pressing a design into the paper from underneath. This can add texture and dimension to the folder and can be used to highlight specific elements of the design, such as a company logo or name.
Spot UV: Spot UV involves applying a glossy, clear coating to specific areas of the folder, such as the logo or text. This creates a contrast between the matte paper and the shiny coating, which can add visual interest and emphasis to the design.
Die Cutting : Die cutting involves cutting the paper into a specific shape or design using a die, which is a metal template. This technique can create unique and intricate shapes that stand out from traditional rectangular folders.
Soft Touch Coating : Soft touch coating involves applying a velvety, matte coating to the paper that feels soft and luxurious to the touch. This can add a tactile element to the design and make the folder more memorable and enjoyable to handle.
By incorporating these specialty printing options and finishes into your presentation folder design, you can create a unique and memorable marketing tool that communicates the quality and professionalism of your brand.
V. Ordering Process
How to order presentation folders online
Ordering presentation folders online can be a convenient and efficient way to get the professional folders you need for your business or organization. Here's a step-by-step guide on how to order presentation folders online:
Determine the type of presentation folder you need. There are a variety of options available, including standard or custom sizes, different paper stocks, and various printing options.
Find a reputable online printer that offers presentation folder printing. Look for a printer that has a user-friendly website and good reviews from other customers. Here is a list of online printers who can take care of your folder printing needs: a.) Staples b.) Companyfolders c.) DesignsnPrint d.) Vistaprint
Upload your design files. Make sure your design meets the printer's specifications for file type, resolution, and color mode.
Select your options. Choose the size, paper stock, and printing options you want for your presentation folders. Some common printing options include full-color printing, spot UV, foil stamping, and embossing.
Review your proof. Most online printers will provide you with digital proof of your design before printing. Take the time to carefully review the proof for any errors or issues.
Place your order. Once you're satisfied with your proof, place your order and provide any necessary payment information.
Wait for delivery. Your presentation folders will be printed and shipped to you. Be sure to check the estimated delivery date provided by the printer so you can plan accordingly.
By following these steps, you can easily order high-quality presentation folders online and have them delivered right to your door.
Tips for creating custom orders
When it comes to creating custom presentation folders, there are several tips to keep in mind to ensure you get the best possible result. Here are some tips to consider:
Choose the right size : Consider the size of the materials you plan to include in your folder and choose a size that accommodates them. Additionally, consider the overall look and feel you want to achieve, and choose a size that reflects that.
Select the right paper stock : The paper stock you choose can have a significant impact on the overall look and feel of your presentation folder. Consider factors such as weight, texture, and finish, and choose a paper stock that complements your design.
Pay attention to the design : The design of your presentation folder is crucial, as it will be the first thing people see when they receive it. Make sure the design is clean, professional, and reflects your brand's personality. Consider the use of colors, images, and typography to create a cohesive design.
Add finishing touches : Finishing touches, such as embossing, foil stamping, and spot UV, can make your presentation folder stand out and add a touch of elegance. Consider adding these finishing touches to enhance the overall look and feel of your folder.
Work with a reputable printer : When it comes to custom orders, it's essential to work with a reputable printer who has experience creating presentation folders. They can offer guidance on paper stock, design, and finishing touches, and ensure that your custom order is of the highest quality.
By following these tips, you can create a custom presentation folder that effectively showcases your brand and makes a lasting impression on your audience.
What to expect during the ordering process
When it comes to ordering presentation folders, there are a few things you can expect during the process. Here are some of the key steps you'll likely encounter:
Choose a vendor : First, you'll need to find a vendor who can create the type of presentation folder you're looking for. Look for a company that specializes in folder printing and has a good reputation for quality and customer service.
Select your folder type : There are a variety of folder types to choose from, including standard folders, custom folders, and mini folders. Consider the purpose of your folder and your budget when making this decision.
Choose your folder design : You'll need to decide on the design for your folder, which can include your company logo, images, and other branding elements. If you're not a graphic designer, many vendors offer design services to help you create a professional-looking folder.
Select your folder features : You'll also need to decide on any additional features you want for your folders, such as business card slots, pockets, or a custom size. Make sure to communicate these specifications clearly to your vendor.
Review proofs : Once you've finalized your design, your vendor will likely provide you with proof of your folder to review and approve before printing. Take the time to carefully review the proof for any errors or design issues.
Place your order : After you've approved the proof, you can place your order. Make sure to double-check the quantity, size, and other details before finalizing your purchase.
Receive your folders : Depending on the vendor and shipping method you choose, you should receive your folders within a few days to a few weeks. Make sure to inspect them upon arrival to ensure they meet your expectations.
By following these steps, you can expect a smooth and straightforward ordering process for your presentation folders.
VI. FAQs and Best Practices
Common questions about presentation folders.
What are presentation folders used for? Presentation folders are often used for business and marketing purposes. They can be used to hold and distribute marketing materials, such as brochures, flyers, and business cards, at events, trade shows, and sales meetings. They can also be used to organize important documents, such as proposals or contracts, for meetings or presentations.
What types of presentation folders are available? There are several types of presentation folders available, including standard folders with pockets on the inside, folders with reinforced edges, folders with custom die-cut shapes or sizes, and folders with additional features such as business card slits or CD/DVD pockets.
What printing options are available for presentation folders? Presentation folders can be printed using a variety of techniques, including offset printing, digital printing, and screen printing. Each printing method has its own advantages and disadvantages, depending on factors such as the design, the quantity, and the desired quality of the final product.
How should I design my presentation folder? When designing a presentation folder, it's important to keep in mind the purpose of the folder and the audience you are targeting. Consider including your company logo and branding, as well as any relevant images or graphics. You should also ensure that the layout and typography are clear and easy to read.
How do I order presentation folders? There are several online printing companies that specialize in producing presentation folders. To order, you'll typically need to provide the printing company with your design files and select the type of folder, printing method, and quantity you require. Some companies may also offer design services if you need help creating your presentation folder.
Tips for getting the most out of your presentation folders
If you want to get the most out of your presentation folders, there are several tips and strategies you can use. Here are some of the best ways to maximize the impact of your folders:
Use high-quality images and graphics : The design of your presentation folder is crucial for making a good impression. Use high-quality images and graphics that are relevant to your brand and message. Make sure the images are clear and well-defined and avoid using low-resolution or pixelated graphics.
Keep your message clear and concise : Don't overload your presentation folder with too much information. Keep your message clear and concise, and focus on the most important aspects of your brand or product. Use bullet points and headings to make your information easy to read and digest.
Choose the right paper stock : The type of paper you choose for your presentation folder can impact its look and feel. Choose a high-quality paper stock that is durable and has a professional finish. You may also want to consider using a gloss or matte finish to enhance the visual appeal of your folder.
Include a call to action : A call to action (CTA) is a powerful tool for encouraging your audience to take action. Include a clear CTA in your presentation folder, such as "Visit our website" or "Contact us for more information." Make sure your CTA is prominent and easy to find.
Add interactive elements : Consider adding interactive elements to your presentation folders, such as QR codes or augmented reality (AR) features. These can help to engage your audience and make your brand more memorable.
Customize your folders : Finally, consider customizing your presentation folders to make them more unique and memorable. You can add custom die cuts, embossing, or foil stamping to give your folders a premium look and feel. You can also experiment with different colors and finishes to create a folder that stands out from the crowd.
By following these tips, you can create presentation folders that effectively showcase your brand and leave a lasting impression on your audience.
Best practices for designing and printing presentation folders
When it comes to designing and printing presentation folders, there are several best practices that you should follow to ensure that your folders are both visually appealing and effective at conveying your message. Here are some key tips to keep in mind:
Keep it simple: Your presentation folder should be visually appealing, but it should also be easy to understand. Avoid cluttering your design with too much text or graphics. Instead, focus on key messages and use whitespace to create a clean, streamlined look.
Use high-quality images: If you include images in your design, make sure they are high-resolution and of professional quality. Low-quality images can make your presentation folder look cheap and unprofessional.
Consider your target audience: Think about who will be receiving your presentation folder and design it with them in mind. Consider their interests, preferences, and needs, and tailor your design accordingly.
Use consistent branding: Your presentation folder should reflect your brand and be consistent with your other marketing materials. Use your brand colors, fonts, and logo to create a cohesive look.
Choose the right paper stock: The paper stock you choose can have a big impact on the look and feel of your presentation folder. Consider factors like thickness, texture, and finish to find the best option for your design.
Work with a professional printer: While there are many online printing options available, working with a professional printer can ensure that your presentation folders are of high quality and meet your exact specifications. Look for a printer with experience creating presentation folders and a good reputation for quality and customer service.
By following these best practices, you can create presentation folders that are not only visually appealing but also effectively communicate your message to your target audience.
VII. Conclusion
To recap we have covered several topics, including:.
Introduction to presentation folders : This section provides an overview of what presentation folders are, their benefits, and how they are used in different industries.
Types of presentation folders : This section covers the different types of presentation folders available, including standard folders, capacity folders, mini folders, and tri-fold folders.
Design considerations : This section discusses various design elements that should be considered when designing a presentation folder, including the folder size, color scheme, branding elements, and the type of paper and finishes to be used.
Printing options : This section covers different printing options available for presentation folders, including digital printing, offset printing, and foil stamping.
Ordering considerations : This section provides tips on how to order presentation folders, including selecting a reputable printer, requesting samples, and understanding the pricing and turnaround time.
Conclusion : The article concludes by summarizing the key points covered and emphasizing the importance of presentation folders as a marketing tool for businesses.
Final thoughts and recommendations
In conclusion, "The Ultimate Guide to Presentation Folders: Design, Ordering, and Printing Options" is a comprehensive and informative article that covers all the essential aspects of presentation folders. The article provides valuable insights into the different types of presentation folders, design considerations, printing options, and ordering considerations.
Moreover, the article highlights the importance of presentation folders as a marketing tool for businesses and emphasizes the need to select a reputable printer and understand pricing and turnaround time before placing an order.
Overall, if you are looking to design and order presentation folders for your business or personal use, this article is a great resource that provides practical tips and recommendations to ensure you create an effective and visually appealing presentation folder that meets your needs.
Call 1-800-492-1218 for more information or Request A Price Quote online
Do You want design or printing?
Hi there! I'm Michael Reid, and I specialize in design and printing. Would you like me to help you with an upcoming project?
1820 Highway 20 SE
Suite 114, PMB 1094
Conyers, GA 30013
Join our Email List for Exclusive Offers and Updates.
Be the first to know about special offers, new product launches, features, events and more.
17 Ways to Customize a Presentation Folder Design

Vladimir Gendelman has been designing inspirational presentation folders for business clients for nearly a decade and offers a plethora of unique cuts at his online folder emporium, CompanyFolders . He is a master of clever printing techniques and this is a guest blog post on the many ways to customize a presentation folder design.
Enter Vladimir
There’s a common misconception that designing for digital media is no different from designing for print media, and that knowing how to design graphics for a website is basically the same as creating a presentation folder. While it’s true that the basic tenets of design are universal no matter the medium, there are still special considerations you need to take into account when designing for print – mainly due to the fact that you are creating a physical object.
That means not only do your presentation folder designs have to look good, they have to create a sensory experience when they’re physically touched. Folder designs also need to be functional so that people can properly interact with it. Since there are many things you can accomplish with print that you can’t accomplish on a computer screen, there are more possibilities available to you when customizing a presentation folder.
1. Custom die-cut pockets and panels
Custom die-cuts let you alter the entire shape of the folder, essentially changing the canvas to your liking, so to speak. Not only are unique die-cut designs fun to look at and interact with, they let you fully customize the folder design to match the contents inside or establish a brand identity.
The texture of printed materials is very important and custom die cutting gives you the tools to manipulate the way your folder feels. In a pile of papers and other printed materials, you can always find the one that has a custom die-cut design using touch alone.
There are a variety of interesting design ideas to apply to your custom die cuts. For example, the folder panels and pockets can be shaped to highlight a strong design element, such as a logo. If you’re looking for something a little more playful, use die cuts shapes that have relevance to your brand identity, such as a car-shaped pocket for an auto dealer.
2. Media slits
Die cut media slits give you the ability to easily display and store business cards, brochures, CDs and other items directly on top of the pocket, instead of inside the pocket itself. This not only ensures that these media items will be out in the open for people to see, but that they won’t be lost in the shuffle.
Many printers include shaped media slits as a standard feature on their folder templates. However, these are usually just your standard tab or corner-style slits. With custom die-cuts, your business card slits can be cut into any reasonable size or shape. Find more information on slits here .
3. Die-cut windows
Since folders open like a book, we naturally think of the front panel as the “cover” while the inside panels are the “content.” A die-cut window can allow you to display this content directly from the cover by offering a sneak peek of what’s inside. This tantalizes people and makes them eager to flip open the folder to see what lies within.
Die cut windows can be any shape, allowing you to conform to the shape of the design element you want to highlight. Alternatively, you can let the window itself be the design – cutting a design into the front and having a color or pattern behind it.
4. Stock thickness
Stock thickness or weight can affect the way your audience perceives your design, even if it’s not directly part of the design itself. You know how cheap items can feel flimsy and poorly made? It’s the same thing for stock thickness. Thicker, heavier stock has a higher quality feel, reflecting well on both your design and the brand it represents, but thinner stock has the opposite effect.
5. Stock texture
Stocks come in a variety of texture – even some that mimic other materials, such as vellum and linen. These textures make your folder have a unique feel, but they can alter the look of your printed designs, so using them can limit your options.
On the other hand, uniquely textured stock leaves a lasting impression on your audience because it feels new and unfamiliar, which creates a stronger sense memory. Textured stock is also a good option for embossing, which adds even more touch sensation to your design. There’s more than a few great stock options available for presentation folders, here are some examples .
6. Stock color
Stocks come in a variety of colors, but the color of your stock can alter the appearance of your printed elements. Some designers embrace this quality and use colored stock to play with different color combinations, creating new effects when the ink is applied to the colored stock. It’s also possible to print on colored stock by using a layer of white ink first; but there will still be some loss of color quality.
Designers usually print a colored background instead of relying on colored stock, but colored stock has an advantage in the fact that the color goes all the way through the paper. If you use white stock to print a colored background, that white stock will be visible along the edge of every cut.
7. Embossing
The embossing process creates a textured impression on the stock that is raised off the page, just like the seal on an official document. Embossed elements are as irresistible as bubble wrap – they practically beg to be touched. Think of embossing as bait you can use to ensure that the audience makes a tactile connection to your design.
Embossing is the most compatible design option because it can be combined with nearly any other imprint method to create distinctive raised design elements. You can make printed pictures pop off the page or create the illusion of real metal by combining it with foil stamping. Blind embossing is when you use embossing alone to create your design, which gives your folder an elegant, sophisticated look.
8. Debossing
Debossing is like the identical twin cousin of embossing – it’s the same process, but in reverse. Instead of the imprint popping out at you, it’s depressed directly into the page. This creates a similar effect to embossing, but debossing has a unique quality that sort of pulls the audience into the design itself. For maximum variety in texture, use a combination of both techniques.
9. Metallic foil stamping
Metallic foil is a reflective material that mimics the appearance of metal. Metallic foil stamping is often paired with dark stock or colored stock to make the foil really stand out. This technique used by itself can be subtle and elegent, or you can go for big bold designs by pairing it with other imprint methods.
Since the foil is a different material than the stock, it adds a smooth texture to your folder. When combined with embossing, the two effects create a realistic metallic look that also feels somewhat like metal that’s been affixed to the page.
10. Non-metallic foil stamping
Non-metallic foil stamping uses the same process and provides a lot of the same benefits as metallic foil, such as a compatibility with colored stocks and embossed designs. There are several different types of non-metallic foils, such as colored foils that resemble vinyl or special effect foils that have holographic or three-dimensional properties.
11. Metallic ink
Metallic ink represents the middle ground between printing in ink and using metallic foil. The shiny effect comes from actual metal shavings mixed into the ink. This creates a subtle effect that is less flashy and a bit more diverse than metallic foil.
Metallic ink still acts primarily like normal ink, so you’re able to create more detailed imagery than what’s available to you with foil stamping. It’s also better for small details, since it doesn’t require adhesion like foil. This technique is capable of producing a greater variety of tones since it can be applied in multiple layers.
12. Textured coatings
Coating not only adds protection to your folder, it can add texture to your design. Aqueous coating comes in a wide variety of styles and will protect against weathering, bleaching and general wear and tear.
Laminate and matte coatings are both smooth, but laminate also has a shiny effect while matte is static. Soft-touch coating creates a feeling that is reminiscent of velvet, which guarantees a tactile connection with your media. Vinyl coating has a texture like satin, which is silky and pleasing to the touch.
13. UV coatings
UV coating helps make your colored print designs look brighter and pop off the page, especially designs that use color photography. In fact, it’s best to think of UV coating like the coating of a glossy photograph – it offers some minimal protection for the folder, but is only available in a smooth texture. Therefore, UV coating is more about making your design look its best instead of getting the audience to interact with the folder.
14. Spot coating
Different coatings can be applied to the same design, allowing you to create textural variety in your folder. You could choose to make your logo or other important design element in a highly-textural coating while making the rest of your folder smooth. The audience’s fingers will gravitate towards the different texture, creating a stronger connection to that element.
15. Spot printing
There are two standard ink printing options for folders, 4-color process and PMS ink. 4-color process is similar to what your computer printer uses – it creates colors from cyan, magenta, yellow and black (CMYK) tones. Meanwhile, PMS inks are pre-mixed, which ensures that the colors are always accurate.
4-color process is usually the standard for designs that use more than two or three colors. However, much like spot coating, you can also spot print with PMS ink, letting you have a larger variety of colors to work with than what’s normally available with just 4-color process. This lets you correct color inaccuracies, use precise branding colors or add metallic ink effects to any 4-color design. Check out these tips for designing for 4CP.
16. Spine attachments
Custom spine attachments let you utilize your folder like the cover to a book. These can be used to bind your materials into the folder itself instead of using pockets. You can also opt to use the spine to attach additional materials such as a stitched brochure. Attachments not only make your information more easily accessible, they put it front and center and make it the star of the folder’s interior.
17. Folder accessories
A presentation folder is a great tool for making an impact, but it can only do so much on its own. You require additional folder accessories to create a full presentation packet and it’s best to design all of these contents at once to establish a consistent brand image. Likewise, having one printer who can create all of your materials at once lets you save time and money. At CompanyFolders, we carry six accessories to choose from.
The most popular accessory is folder inserts, which help you create an attractive package by displaying your leading points on stacked, cascading information pages. These not only look nice, they make it easier for recipients to find what they’re looking for.
If you plan mailing your folder, pair it with a portfolio sleeve. These are specially designed for folders and can be created using many of the same special print options available for folders, allowing you to maintain a consistent design scheme.
Your best bet for an alluring presentation folder is to have a strong relationship with your printer. They can tell you what type of special options are available and how to best use them to make your folder design truly unique.
Do you have any question on designing presentation folders? Is there something you need more information about? Let us know in the comments!
branding creative folders Graphic Design presentation presentation folders

Written by CrazyLeaf Editorial
Follow us on Twitter @crazyleaf , Facebook , Pinterest
Leave a Reply

Your email address will not be published. Required fields are marked *
By using this form you agree with the storage and handling of your data by this website. *
This site uses Akismet to reduce spam. Learn how your comment data is processed .
Loading…
Wallpaper Designs #32
20+ double sided business cards for inspiration, ad blocker detected.
- Free Design
- Promo Products Store
- One Pocket Folders
- Two Pocket Folders
- Three Pocket Folders
- Letter Size Folders
- Legal Size Folders
- File Folders
- Document Folders
- Photo Folders
- Card Folders
Your Comprehensive Guide to Presentation Folders
Presentation folders are like wrapping paper for the ideas that you want to present. What’s inside the folder won’t be seen until the right moment, so the outside has to grab the recipient’s attention and keep them excited for what’s in store.
Do you want to present your company’s important ideas and information in an attractive package, or do you want to be the one at the party with the gift wrapped in newspaper? Our complete guide to presentation folders will help you to learn how to expertly design folders and use them to make an impact.
Design Ideas and Inspiration:

4 Elements Of Effective Presentation Folder Design – Create a professional look every time with these four easy-to-understand design principles.
16 Amazing Presentation Folder Ideas – Find inspiration for your own marketing materials from this collection of interesting and unique presentation folder designs.
9 Common Presentation Folder Design Mistakes – Avoid a busy or boring folder design by learning to recognize these signs of a clunky pocket folder design.
How To Give Your Folder A Color Background That “Pops” – If you want a color background, you probably don’t want a colored stock. Find out why with this guide to utilizing color in the background of your folder.
6 Awesome Paper and Linen Stocks for Your Presentation Folders – Different stocks have very different effects on the look and texture of your folder. Discover the difference between gloss, felt, vellum and more.
Design Resources:

50+ Folder Design Templates – An excellent repository of free, print-ready folder design templates for Adobe Photoshop, Illustrator, and InDesign.
17 Folder Mockup PSD Templates – Download these free PSD templates to turn your folder designs into realistic mockups that let you demonstrate what your design will look like once it’s printed and folded into shape.
Folder Design Cheat Sheet – A two-part series consisting of Important Folder Tips and a Print Ready Checklist to help you design and prepare your artwork for printing.
Folder Design Services – For an original design or enhancement of an existing design, CF’s graphic artists ensure that it will look great in print.
Basics and Essentials:

The Ultimate Guide to Presentation Folder Styles – Learn the difference between a pocket folder, tri-fold folder, belly band presentation package and more in this in-depth look into folder styles and types.
The Difference Between One and Two Sided Folder Printing – It’s not as simple as you might think. This article will help you know exactly what to ask for when placing an order.
All About Coating Finishes for Your Presentation Folders – A complete look at the benefits of using different coatings and finishes, from protective to design considerations.
How to Save the Earth with Recycled Presentation Folders – A guide for eco-friendly businesses on what qualities to look for in a green folder, including what type of stocks and inks you should use.
Add-Ons and Special Features:
4 Indispensable Tips for Designing Embossed Presentation Folders – People sometimes misunderstand what embossing actually is. Learn the terminology of embossed designs and techniques for ensuring that your folder looks its best.
5 Dazzling Die Cut Designs for Presentation Folders – A guide to the different customization options that die cutting brings to the table, from windows to unique openings and pocket shapes.
6 Designer Folder Accessories and Add-Ons – Sometimes all it takes is a little something extra. Take a look at the different accessories that give your folder added impact, like stepped inserts and spine attachments.
4 Foil Stamp Options That Make Your Folders Look Fancy – Learn how to give your folder some sparkle or just a dramatic accent with metallic, clear or other foil options.
The Complete Guide to Custom Presentation Folders – A handy roadmap to help make you a more informed consumer of presentation folders, this guide goes more in-depth than Your Comprehensive Guide to Presentation Folders.
Printing Recommendation:
Presentation Folder Printing – Select from over 100 styles of custom printed folders starting as low as 19¢ each, including free shipping and a lifetime warranty. Each is fully customizable with a variety of stocks, coatings, foils, imprint methods and more.
Earn a 20% Discount by Becoming a Reseller – If you’re in the printing or graphic design field, you can get 20% off when providing quality marketing materials to your clients.
Consider these links your first semester of “Presentation Folders 101”– by no means do they represent the full extent of knowledge available to you. If you’re serious about creating dynamic marketing collateral, check out your local library for books on design elements or consider taking a design course online.
Posted in Folder Designs , Print Design
Don`t neglect your friends, share this right away.

Our marketing, design and printing experts are passionate about sharing their knowledge. We're eager to help make your vision a reality in print. Be sure to explore the rest of the Printwand blog for more reliable, easy-to-understand information.

Leave a Reply Cancel reply
Your email address will not be published. Required fields are marked *
Notify me of followup comments via e-mail
- Copywriting (37)
- Illustrator Tips & Tutorials (3)
- InDesign Tips & Tutorials (3)
- Photoshop Tips & Tutorials (6)
- Logo Design Tips (3)
- Branding (6)
- Direct Marketing (3)
- Event Marketing (3)
- Guerrilla Marketing (2)
- Market Research (4)
- Marketing Ideas (7)
- Marketing Plans (3)
- Product Launch Marketing (26)
- Promotional Marketing (9)
- Public Relations (4)
- Trade Shows Marketing (1)
- Business Card Designs (1)
- Envelope & Packaging Designs (1)
- Folder Designs (10)
- Promotional Product Designs (1)
- Printing Technology (6)
Recent Posts
- Coffee Infographic: Everything You Need To Know About Coffee
- Stop Polluting the Planet with Disposable Plastic Water Bottles
- Quick customer service makes cups life of the party
- Should You Use Rhetorical Questions in Advertising?
- A Guide to Targeted Writing for Business Audiences
Search Site
- Terms & Conditions
- Privacy Policy
- Help Center
- Google Docs Editors
- Privacy Policy
- Terms of Service
- Submit feedback
- Get started with Google Slides
- Create a presentation
How to use Google Slides
Want advanced Google Workspace features for your business?
Try Google Workspace today!
Google Slides is an online presentation app that lets you create and format presentations and work with other people.
Step 1: Create a presentation
To create a new presentation:
- Open the Slides home screen at Google Slides .
You can also create new presentations from the URL https://slides.google.com/create .
Step 2: Edit and format a presentation
You can add, edit, or format text, images, or videos in a presentation.
- Insert and arrange text, shapes, and lines
- Add, delete & organize slides
- Add animations to a slide
Step 3: Share & work with others
You can share files and folders with people and choose whether they can view, edit, or comment on them.
Related articles
Learn more about Tool finder for Docs, Sheets & Slides
Need more help?
Try these next steps:.
Using Google products, like Google Docs, at work or school? Try powerful tips, tutorials, and templates. Learn to work on Office files without installing Office, create dynamic project plans and team calendars, auto-organize your inbox, and more.
Got any suggestions?
We want to hear from you! Send us a message and help improve Slidesgo
Top searches
Trending searches

holy spirit
35 templates

11 templates

business pitch
598 templates

ai technology
169 templates

21 templates

environmental science
36 templates
Interactive Folders
It seems that you like this template, interactive folders presentation, free google slides theme, powerpoint template, and canva presentation template.
Folders are very useful when it comes to organizing classes, whether you are a student or a teacher. Today we bring you a digital and interactive version of them. You will love its colorful design, full of illustrations that will bring joy to your notes. In the number tabs on the right you can include links that will take you directly to the slide you want, saving you time. Prepare your lessons or write out your notes, complete them with editable charts, timelines, maps and infographics - you'll be the envy of your classmates!
Features of this template
- 100% editable and easy to modify
- 38 different slides to impress your audience
- Contains easy-to-edit graphics such as graphs, maps, tables, timelines and mockups
- Includes 500+ icons and Flaticon’s extension for customizing your slides
- Designed to be used in Google Slides, Canva, and Microsoft PowerPoint
- 16:9 widescreen format suitable for all types of screens
- Includes information about fonts, colors, and credits of the free resources used
How can I use the template?
Am I free to use the templates?
How to attribute?
Combines with:
This template can be combined with this other one to create the perfect presentation:

Attribution required If you are a free user, you must attribute Slidesgo by keeping the slide where the credits appear. How to attribute?
Related posts on our blog.

How to Add, Duplicate, Move, Delete or Hide Slides in Google Slides

How to Change Layouts in PowerPoint

How to Change the Slide Size in Google Slides
Related presentations.

Premium template
Unlock this template and gain unlimited access


Everything you need to know about… Presentation Folders
Custom presentation folders are an excellent asset for many companies. When handing customers multiple papers, this is the ideal way to keep everything together and help store papers for future reference.
Over the years, we have received many questions regarding the layout of folders and what options are available for print. While a presentation folder can seem like an easy design to put together, the cuts and folds tend to make it harder than it looks. The below information is intended to help guide you in the design and ordering process of your custom presentation folders .
How do Primoprint Presentation Folders Differ From Others?
At Primoprint, we print all of our folders “flat.” That means that the folder is not cut, folded, or glued at the time of printing. Printing flat allows us to print on the entire front, back, and inside pockets all at one time. This is considered a “front only” print (4/0). If you would like to print a color, text, or graphics on the inside of the folder, behind the pockets, you’ll want to choose a two-sided print (4/4).
What Paper Types Are Available For Presentation Folders?
As a standard item, Primoprint folders are available in eight different paper options.
-Silk Laminated
-Pearl Metallic
-100lb Gloss Cover
What sizes can I order?
Depending on your usage, presentation folders are available in two different sizes.
-6×9 – Perfect for small flyers and specialty presentations
-9×12 – Standard folder fit for 8.5×11 sheets
Always Use a Template
When designing your folder, be sure to download the correct template from our website. Doing so will show you exactly where the folds, cuts, and edges are to help plan your artwork accordingly.

Beware of the Folds
During the cutting & folding process, there is a potential of a 1/16in shift in design placement. While this shift is actually very small, it can have a big impact on your designs. We advise that you do not place solid lines along the edge of a fold. If a shift occurs, the line could be off and look wrong. Instead, bleed the colored line/graphic through the fold to the other side so that with or without the shift, the artwork will still line up and look intentional.
Additional Resource: Elevate Your Brand with Presentation Folders

It’s important to remember that when designing your folder that the pockets are inverted on the template. This means that you’ll want to place the pocket graphics upside down on the template. Then when the pockets are folded up, they’ll appear in the correct direction.

Make It Your Own
When ordering folders, you will have a few customization options. You can select only to have one pocket, which you have the opportunity to include on the left or the right side. You can also choose to have business card slits on both pockets or just one.
When asked if you want them on the left or right side, think about how the folder will appear when printed and open. This will determine which is the left or the right. Also, pay attention to whether your business cards will be inserted horizontally or vertically and select the corresponding option.
If you need help or if you’d like to have us double-check your artwork, don’t hesitate to reach out. Our customer service or design team would be more than happy to help you with the process! To see samples of the designs created by Primoprint, check out their Dribbble page or follow us on Instagram .

Brooke is the Sr. Director of Design & Branding at Primoprint. With more than 20 years of experience, she oversees the design department, assists with client graphic design projects, and develops all internal branding for Primoprint.
You May Also Like...

Using Vision Boards to Create Your Brand Image
Posted by Primoprint April 21, 2024

Top 10 Unique Ways To Use Trading Cards
Posted by Primoprint March 25, 2024

Spring 2024 Design Colors & Inspiration
Posted by Primoprint March 18, 2024
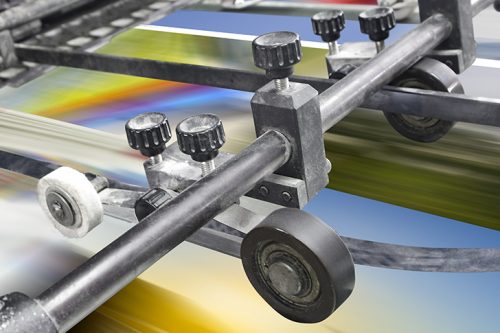
Moving Past the Print Myths
Posted by Primoprint February 12, 2024
Critical PowerPoint Shortcuts – Claim Your FREE Training Module and Get Your Time Back!
How to Make a PowerPoint Presentation (Step-by-Step)
- PowerPoint Tutorials
- Presentation Design
- January 22, 2024
In this beginner’s guide, you will learn step-by-step how to make a PowerPoint presentation from scratch.
While PowerPoint is designed to be intuitive and accessible, it can be overwhelming if you’ve never gotten any training on it before. As you progress through this guide, you’ll will learn how to move from blank slides to PowerPoint slides that look like these.

Table of Contents
Additionally, as you create your presentation, you’ll also learn tricks for working more efficiently in PowerPoint, including how to:
- Change the slide order
- Reset your layout
- Change the slide dimensions
- Use PowerPoint Designer
- Format text
- Format objects
- Play a presentation (slide show)
With this knowledge under your belt, you’ll be ready to start creating PowerPoint presentations. Moreover, you’ll have taken your skills from beginner to proficient in no time at all. I will also include links to more advanced PowerPoint topics.
Ready to start learning how to make a PowerPoint presentation?
Take your PPT skills to the next level
Start with a blank presentation.
Note: Before you open PowerPoint and start creating your presentation, make sure you’ve collected your thoughts. If you’re going to make your slides compelling, you need to spend some time brainstorming.
For help with this, see our article with tips for nailing your business presentation here .
The first thing you’ll need to do is to open PowerPoint. When you do, you are shown the Start Menu , with the Home tab open.
This is where you can choose either a blank theme (1) or a pre-built theme (2). You can also choose to open an existing presentation (3).
For now, go ahead and click on the Blank Presentation (1) thumbnail.

Doing so launches a brand new and blank presentation for you to work with. Before you start adding content to your presentation, let’s first familiarize ourselves with the PowerPoint interface.
The PowerPoint interface

Here is how the program is laid out:
- The Application Header
- The Ribbon (including the Ribbon tabs)
- The Quick Access Toolbar (either above or below the Ribbon)
- The Slides Pane (slide thumbnails)
The Slide Area
The notes pane.
- The Status Bar (including the View Buttons)
Each one of these areas has options for viewing certain parts of the PowerPoint environment and formatting your presentation.
Below are the important things to know about certain elements of the PowerPoint interface.
The PowerPoint Ribbon

The Ribbon is contextual. That means that it will adapt to what you’re doing in the program.
For example, the Font, Paragraph and Drawing options are greyed out until you select something that has text in it, as in the example below (A).

Furthermore, if you start manipulating certain objects, the Ribbon will display additional tabs, as seen above (B), with more commands and features to help you work with those objects. The following objects have their own additional tabs in the Ribbon which are hidden until you select them:
- Online Pictures
- Screenshots
- Screen Recording
The Slides Pane

This is where you can preview and rearrange all the slides in your presentation.
Right-clicking on a slide in the pane gives you additional options on the slide level that you won’t find on the Ribbon, such as Duplicate Slide , Delete Slide , and Hide Slide .

In addition, you can add sections to your presentation by right-clicking anywhere in this Pane and selecting Add Section . Sections are extremely helpful in large presentations, as they allow you to organize your slides into chunks that you can then rearrange, print or display differently from other slides.

The Slide Area (A) is where you will build out your slides. Anything within the bounds of this area will be visible when you present or print your presentation.
Anything outside of this area (B) will be hidden from view. This means that you can place things here, such as instructions for each slide, without worrying about them being shown to your audience.

The Notes Pane is the space beneath the Slide Area where you can type in the speaker notes for each slide. It’s designed as a fast way to add and edit your slides’ talking points.
To expand your knowledge and learn more about adding, printing, and exporting your PowerPoint speaker notes, read our guide here .
Your speaker notes are visible when you print your slides using the Notes Pages option and when you use the Presenter View . To expand your knowledge and learn the ins and outs of using the Presenter View , read our guide here .

You can resize the Notes Pane by clicking on its edge and dragging it up or down (A). You can also minimize or reopen it by clicking on the Notes button in the Status Bar (B).
Note: Not all text formatting displays in the Notes Pane, even though it will show up when printing your speaker notes. To learn more about printing PowerPoint with notes, read our guide here .
Now that you have a basic grasp of the PowerPoint interface at your disposal, it’s time to make your presentation.
Adding Content to Your PowerPoint Presentation
Notice that in the Slide Area , there are two rectangles with dotted outlines. These are called Placeholders and they’re set on the template in the Slide Master View .
To expand your knowledge and learn how to create a PowerPoint template of your own (which is no small task), read our guide here .

As the prompt text suggests, you can click into each placeholder and start typing text. These types of placeholder prompts are customizable too. That means that if you are using a company template, it might say something different, but the functionality is the same.

Note: For the purposes of this example, I will create a presentation based on the content in the Starbucks 2018 Global Social Impact Report, which is available to the public on their website.
If you type in more text than there is room for, PowerPoint will automatically reduce its font size. You can stop this behavior by clicking on the Autofit Options icon to the left of the placeholder and selecting Stop Fitting Text to this Placeholder .
Next, you can make formatting adjustments to your text by selecting the commands in the Font area and the Paragraph area of the Home tab of the Ribbon.

The Reset Command: If you make any changes to your title and decide you want to go back to how it was originally, you can use the Reset button up in the Home tab .

Insert More Slides into Your Presentation
Now that you have your title slide filled in, it’s time to add more slides. To do that, simply go up to the Home tab and click on New Slide . This inserts a new slide in your presentation right after the one you were on.

You can alternatively hit Ctrl+M on your keyboard to insert a new blank slide in PowerPoint. To learn more about this shortcut, see my guide on using Ctrl+M in PowerPoint .
Instead of clicking the New Slide command, you can also open the New Slide dropdown to see all the slide layouts in your PowerPoint template. Depending on who created your template, your layouts in this dropdown can be radically different.

If you insert a layout and later want to change it to a different layout, you can use the Layout dropdown instead of the New Slide dropdown.
After inserting a few different slide layouts, your presentation might look like the following picture. Don’t worry that it looks blank, next we will start adding content to your presentation.

If you want to follow along exactly with me, your five slides should be as follows:
- Title Slide
- Title and Content
- Section Header
- Two Content
- Picture with Caption
Adding Content to Your Slides
Now let’s go into each slide and start adding our content. You’ll notice some new types of placeholders.

On slide 2 we have a Content Placeholder , which allows you to add any kind of content. That includes:
- A SmartArt graphic,
- A 3D object,
- A picture from the web,
- Or an icon.
To insert text, simply type it in or hit Ctrl+C to Copy and Ctrl+V to Paste from elsewhere. To insert any of the other objects, click on the appropriate icon and follow the steps to insert it.
For my example, I’ll simply type in some text as you can see in the picture below.

Slides 3 and 4 only have text placeholders, so I’ll go ahead and add in my text into each one.

On slide 5 we have a Picture Placeholder . That means that the only elements that can go into it are:
- A picture from the web

To insert a picture into the picture placeholder, simply:
- Click on the Picture icon
- Find a picture on your computer and select it
- Click on Insert
Alternatively, if you already have a picture open somewhere else, you can select the placeholder and paste in (shortcut: Ctrl+V ) the picture. You can also drag the picture in from a file explorer window.

If you do not like the background of the picture you inserted onto your slide, you can remove the background here in PowerPoint. To see how to do this, read my guide here .
Placeholders aren’t the only way to add content to your slides. At any point, you can use the Insert tab to add elements to your slides.
You can use either the Title Only or the Blank slide layout to create slides for content that’s different. For example, a three-layout content slide, or a single picture divider slide, as shown below.

In the first example above, I’ve inserted 6 text boxes, 3 icons, and 3 circles to create this layout. In the second example, I’ve inserted a full-sized picture and then 2 shapes and 2 text boxes.
The Reset Command: Because these slides are built with shapes and text boxes (and not placeholders), hitting the Reset button up in the Home tab won’t do anything.
That is a good thing if you don’t want your layouts to adjust. However, it does mean that it falls on you to make sure everything is aligned and positioned correctly.
For more on how to add and manipulate the different objects in PowerPoint, check out our step-by-step articles here:
- Using graphics in PowerPoint
- Inserting icons onto slides
- Adding pictures to your PowerPoint
- How to embed a video in PowerPoint
- How to add music to your presentation
Using Designer to generate more layouts ideas
If you have Office 365, your version of PowerPoint comes with a new feature called Designer (or Design Ideas). This is a feature that generates slide layout ideas for you. The coolest thing about this feature is that it uses the content you already have.
To use Designer , simply navigate to the Design tab in your Ribbon, and click on Design Ideas .

NOTE: If the PowerPoint Designer is not working for you (it is grey out), see my troubleshooting guide for Designer .
Change the Overall Design (optional)
When you make a PowerPoint presentation, you’ll want to think about the overall design. Now that you have some content in your presentation, you can use the Design tab to change the look and feel of your slides.
For additional help thinking through the design of your presentation, read my guide here .
A. Picking your PowerPoint slide size
If you have PowerPoint 2013 or later, when you create a blank document in PowerPoint, you automatically start with a widescreen layout with a 16:9 ratio. These dimensions are suitable for most presentations as they match the screens of most computers and projectors.
However, you do have the option to change the dimensions.
For example, your presentation might not be presented, but instead converted into a PDF or printed and distributed. In that case, you can easily switch to the standard dimensions with a 4:3 ratio by selecting from the dropdown (A).
You can also choose a custom slide size or change the slide orientation from landscape to portrait in the Custom Slide Size dialog box (B).

To learn all about the different PowerPoint slide sizes, and some of the issues you will face when changing the slide size of a non-blank presentation, read my guide here .
B. Selecting a PowerPoint theme
The next thing you can do is change the theme of your presentation to a pre-built one. For a detailed explanation of what a PowerPoint theme is, and how to best use it, read my article here .
In the beginning of this tutorial, we started with a blank presentation, which uses the default Office theme as you can see in the picture below.

That gives you the most flexibility because it has a blank background and quite simple layouts that work for most presentations. However, it also means that it’s your responsibility to enhance the design.
If you’re comfortable with this, you can stay with the default theme or create your own custom theme ( read my guide here ). But if you would rather not have to think about design, then you can choose a pre-designed theme.
Microsoft provides 46 other pre-built themes, which include slide layouts, color variants and palettes, and fonts. Each one varies quite significantly, so make sure you look through them carefully.
To select a different theme, go to the Design tab in the Ribbon, and click on the dropdown arrow in the Themes section .

For this tutorial, let’s select the Frame theme and then choose the third Variant in the theme. Doing so changes the layout, colors, and fonts of your presentation.

Note: The theme dropdown area is also where you can import or save custom themes. To see my favorite places to find professional PowerPoint templates and themes (and recommendations for why I like them), read my guide here .
C. How to change a slide background in PowerPoint
The next thing to decide is how you want your background to look for the entire presentation. In the Variants area, you can see four background options.

For this example, we want our presentation to have a dark background, so let’s select Style 3. When you do so, you’ll notice that:
- The background color automatically changes across all slides
- The color of the text on most of the slides automatically changes to white so that it’s visible on the dark background
- The colors of the objects on slides #6 and #7 also adjust, in a way we may not want (we’ll likely have to make some manual adjustments to these slides)

Note: If you want to change the slide background for just that one slide, don’t left-click the style. Instead, right-click it and select Apply to Selected Slides .
After you change the background for your entire presentation, you can easily adjust the background for an individual slide.

Inside the Format Background pane, you can see you have the following options:
- Gradient fill
- Picture or texture fill
- Pattern fill
- Hide background
You can explore these options to find the PowerPoint background that best fits your presentation.
D. How to change your color palette in PowerPoint
Another thing you may want to adjust in your presentation, is the color scheme. In the picture below you can see the Theme Colors we are currently using for this presentation.

Each PowerPoint theme comes with its own color palette. By default, the Office theme includes the Office color palette. This affects the colors you are presented with when you format any element within your presentation (text, shapes, SmartArt, etc.).

The good news is that the colors here are easy to change. To switch color palettes, simply:
- Go to the Design tab in the Ribbon
- In the Variants area, click on the dropdown arrow and select Colors
- Select the color palette (or theme colors) you want
You can choose among the pre-built color palettes from Office, or you can customize them to create your own.
As you build your presentation, make sure you use the colors from your theme to format objects. That way, changing the color palette adjusts all the colors in your presentation automatically.
E. How to change your fonts in PowerPoint
Just as we changed the color palette, you can do the same for the fonts.

Each PowerPoint theme comes with its own font combination. By default, the Office theme includes the Office font pairing. This affects the fonts that are automatically assigned to all text in your presentation.

The good news is that the font pairings are easy to change. To switch your Theme Fonts, simply:
- Go to the Design tab in the Ribbon
- Click on the dropdown arrow in the Variants area
- Select Fonts
- Select the font pairing you want
You can choose among the pre-built fonts from Office, or you can customize them to create your own.
If you are working with PowerPoint presentations on both Mac and PC computers, make sure you choose a safe PowerPoint font. To see a list of the safest PowerPoint fonts, read our guide here .
If you receive a PowerPoint presentation and the wrong fonts were used, you can use the Replace Fonts dialog box to change the fonts across your entire presentation. For details, read our guide here .
Adding Animations & Transitions (optional)
The final step to make a PowerPoint presentation compelling, is to consider using animations and transitions. These are by no means necessary to a good presentation, but they may be helpful in your situation.
A. Adding PowerPoint animations
PowerPoint has an incredibly robust animations engine designed to power your creativity. That being said, it’s also easy to get started with basic animations.
Animations are movements that you can apply to individual objects on your slide.

To add a PowerPoint animation to an element of your slide, simply:
- Select the element
- Go to the Animations tab in the Ribbon
- Click on the dropdown arrow to view your options
- Select the animation you want
You can add animations to multiple objects at one time by selecting them all first and then applying the animation.
B. How to preview a PowerPoint animation

There are three ways to preview a PowerPoint animation:
- Click on the Preview button in the Animations tab
- Click on the little star next to the slide
- Play the slide in Slide Show Mode
To learn other ways to run your slide show, see our guide on presenting a PowerPoint slide show with shortcuts .
To adjust the settings of your animations, explore the options in the Effect Options , Advanced Animation and the Timing areas of the Animation tab .

Note: To see how to make objects appear and disappear in your slides by clicking a button, read our guide here .
C. How to manage your animations in PowerPoint

The best way to manage lots of animations on your slide is with the Animation Pane . To open it, simply:
- Navigate to the Animations tab
- Select the Animation Pane
Inside the Animation Pane, you’ll see all of the different animations that have been applied to objects on your slide, with their numbers marked as pictured above.
Note: To see examples of PowerPoint animations that can use in PowerPoint, see our list of PowerPoint animation tutorials here .
D. How to add transitions to your PowerPoint presentation
PowerPoint has an incredibly robust transition engine so that you can dictate how your slides change from one to the other. It is also extremely easy to add transitions to your slides.
In PowerPoint, transitions are the movements (or effects) you see as you move between two slides.

To add a transition to a PowerPoint slide, simply:
- Select the slide
- Go to the Transitions tab in the Ribbon
- In the Transitions to This Slide area, click on the dropdown arrow to view your options
- Select the transition you want
To adjust the settings of the transition, explore the options in the Timing area of the Transitions tab.
You can also add the same transition to multiple slides. To do that, select them in the Slides Pane and apply the transition.
E. How to preview a transition in PowerPoint

There are three ways to preview your PowerPoint transitions (just like your animations):
- Click on the Preview button in the Transitions tab
- Click on the little star beneath the slide number in the thumbnail view
Note: In 2016, PowerPoint added a cool new transition, called Morph. It operates a bit differently from other transitions. For a detailed tutorial on how to use the cool Morph transition, see our step-by-step article here .
Save Your PowerPoint Presentation
After you’ve built your presentation and made all the adjustments to your slides, you’ll want to save your presentation. YOu can do this several different ways.

To save a PowerPoint presentation using your Ribbon, simply:
- Navigate to the File tab
- Select Save As on the left
- Choose where you want to save your presentation
- Name your presentation and/or adjust your file type settings
- Click Save
You can alternatively use the Ctrl+S keyboard shortcut to save your presentation. I recommend using this shortcut frequently as you build your presentation to make sure you don’t lose any of your work.

This is the standard way to save a presentation. However, there may be a situation where you want to save your presentation as a different file type.
To learn how to save your presentation as a PDF, see our guide on converting PowerPoint to a PDF .
How to save your PowerPoint presentation as a template
Once you’ve created a presentation that you like, you may want to turn it into a template. The easiest – but not technically correct – way, is to simply create a copy of your current presentation and then change the content.
But be careful! A PowerPoint template is a special type of document and it has its own parameters and behaviors.
If you’re interested in learning about how to create your own PowerPoint template from scratch, see our guide on how to create a PowerPoint template .
Printing Your PowerPoint Presentation
After finishing your PowerPoint presentation, you may want to print it out on paper. Printing your slides is relatively easy.

To open the Print dialog box, you can either:
- Hit Ctrl+P on your keyboard
- Or go to the Ribbon and click on File and then Print

Inside the Print dialog box, you can choose from the various printing settings:
- Printer: Select a printer to use (or print to PDF or OneNote)
- Slides: Choose which slides you want to print
- Layout: Determine how many slides you want per page (this is where you can print the notes, outline, and handouts)
- Collated or uncollated (learn what collated printing means here )
- Color: Choose to print in color, grayscale or black & white
There are many more options for printing your PowerPoint presentations. Here are links to more in-depth articles:
- How to print multiple slides per page
- How to print your speaker notes in PowerPoint
- How to save PowerPoint as a picture presentation
So that’s how to create a PowerPoint presentation if you are brand new to it. We’ve also included a ton of links to helpful resources to boost your PowerPoint skills further.
When you are creating your presentation, it is critical to first focus on the content (what you are trying to say) before getting lost inserting and playing with elements. The clearer you are on what you want to present, the easier it will be to build it out in PowerPoint.
If you enjoyed this article, you can learn more about our PowerPoint training courses and other presentation resources by visiting us here .
🔒 Unlock the PowerPoint Shortcuts Trusted by Industry Leaders KKR, American Express, HSBC, and More!
Join over 114,880 professionals from diverse fields including consulting, investment banking, advertising, marketing, sales, and business development who have supercharged their PowerPoint game with our proven methods.
✅ Customize compelling presentations effortlessly.
✅ Master time-saving techniques for faster deck creation.
✅ Boost your career prospects with top-notch PowerPoint skills.
Get FREE access to the Critical PowerPoint Shortcuts module of our premium training course by entering your name and email below.
DISCLAIMER: PC Users Only!
We respect your privacy and will keep your info safe and confidential.
About The Author

Popular Tutorials
- How to Strikethrough Text (l̶i̶k̶e̶ ̶t̶h̶i̶s̶) in Word, Excel & PowerPoint
- How to Make Animated Fireworks in PowerPoint (Step-by-Step)
- Strikethrough Shortcut (l̶i̶k̶e̶ ̶t̶h̶i̶s̶) for Word, Excel & PowerPoint
- How to Create a Flash Card Memory Game in PowerPoint (Like Jeopardy)
- Keyboard Shortcuts Not Working: Solved
PowerPoint Tutorial Categories
- Strategies & Opinions
- Shortcuts & Hacks
- Pictures, Icons, Videos, Etc.
- New Features
- Miscellaneous
- Charts & Data Viz
We help busy professionals save hours and gain peace of mind, with corporate workshops, self-paced courses and tutorials for PowerPoint and Word.
Work With Us
- Corporate Training
- Presentation & Template Design
- Courses & Downloads
- PowerPoint Articles
- Word Articles
- Productivity Resources
Find a Tutorial
- Free Training
- For Businesses
We help busy office workers save hours and gain peace of mind, with tips, training and tutorials for Microsoft PowerPoint and Word.
Master Critical PowerPoint Shortcuts – Secure Your FREE Training Module and Save Valuable Time!
⌛ Master time-saving expert techniques.
🔥 Create powerful presentations.
🚀 Propel your career to new heights.
We value your privacy – we keep your info safe.
Discover PowerPoint Hacks Loved by Industry Giants - KKR, AmEx, HSBC!
Over 114,880 professionals in finance, marketing and sales have revolutionized their PPT skills with our proven methods.
Gain FREE access to a full module of our premium PowerPoint training program – Get started today!
We hate spam too and promise to keep your information safe.
You are currently viewing a placeholder content from Facebook . To access the actual content, click the button below. Please note that doing so will share data with third-party providers.
Get Free Product Samples: Go Now!
- Request Quote
- Request Sample
- Upload Artwork
- All Products
- Discount Folders
- Legal Size Folders
- Letter Size Folders
- Small Folders
- One Pocket Folders
- 2 Pocket Folders
- 3 Pocket Folders
- Expandable Folders
- Tri-Fold Folders
- Reinforced Folders
- Tab Folders
- Paper Folders
- Plastic Folders
- All Folders
- Standard File Folders
- Legal File Folders
- Pocket File Folders
- Expandable File Folders
- Portrait Photo Folders
- Landscape Photo Folders
- Certificate Folders
- Document Folders
- Document Sleeves
- Card Folders
- Card Sleeves
- Gift Card Holders
- Key Card Holders
- Letter Size Report Covers
- Legal Size Report Covers
- Paper Report Covers
- Plastic Report Covers
- Fastened Report Covers
- Stitched Report Covers
- Folded Report Covers
- Clear View Binders
- Easel Binders
- Entrapment Binders
- Leather Like Binders
- Paper Binders
- Poly Binders
- Turned Edge Binders
- Vinyl Binders
- CD/DVD Packaging
- Presentation Boxes
- Belly Bands
- Business Cards
- Greeting & Note Cards
- Sell Sheets
- Statement Stuffers
- Stepped Inserts

Custom Folder Printing
We are the folder experts with over 15 million folders printed.

We Have Been Featured In 500+ Publications
Experience what others are raving about, get free samples shipped to your door.
Best Selling Folders
Popular folder types, we've got you covered.
With the best guarantees in printing, we’ve got you covered from your original concept to the lifetime of the finished product.
Company Folders Warranties
Our products are built to last. Every product is covered either by a 365-Day or an astounding Lifetime Warranty.
365-Day Warranty
Inform us of any defects within 365 days and we’ll replace your products (or, in rare cases, offer a refund).
Lifetime Warranty
If a product has a defect, let us know any time and we’ll replace it (or, in rare cases, offer a refund).
Guaranteed Services
Take advantage of our guarantee services to ensure your product is delivered exactly as you envisioned it.
Meet Our Clients
Over 20 million products printed for over 5,000 clients.
Top Marketing Materials

Quality Folder Printing
We pride ourselves on delivering premium quality folders that our customers can be proud of. All folders will arrive at your doorstep assembled – this means they are pre-folded, glued, and ready to distribute straight out of the box.
Our Materials
Stocks — Durable paper stocks have excellent scoring and folding properties, with low environmental impact.
Inks — Renewable vegetable-soy oil inks dry quickly to produce vibrant, crisp colors.
Coatings — Fast-dry coatings maintain color over time and are recyclable in many cases.
Glue — Products are glued using precise bead length to prevent lifted corners or detached pockets.
Our Process
Pre-Press Reviews — Three printing experts will review your artwork for a flawless final product.
Production Reviews — Your product is painstakingly tested before and during each production phase to ensure precision printing, stamping, die-cutting, folding, and gluing.
No Gang Runs — Your print job runs independently of any other, meaning we give your product the individual attention it deserves.
High-Caliber Equipment — Regular inspections of printing machines and dies guarantee accurate printing and precision cutting, stamping, and folding.
Expertise — Our team members have decades of combined experience in the graphic design and printing industries.
Passion — Our team loves what we do; our excitement, expertise, and eye for detail show in every design.

Company Folders, Inc. was started by Vladimir Gendelman in 2003 with a mission to combine high-end printing and manufacturing with the most folder styles and unlimited printing options. With our expertise and decades of combined experience, you'll receive expert customer service and the best business folders within your budget when you place an order.
Craftsmanship and precision are the hallmarks of our work. We pour meticulous care into every folder, ensuring that each piece is the perfect blend of traditional craftsmanship and modern technology. Our dedicated team of skilled designers and print specialists is committed to delivering products that surpass the highest standards. We do more than sell folders branded with a logo; we enable our clients to leave a lasting impression.
At Company Folders, we understand that each business is unique, and their presentation materials should reflect that. Our vast array of customization options, including a diverse range of coatings, paper stocks, and die-cut design elements, ensures that your presentation folders are functional and an extension of your brand's identity. Whether you need a subtle, elegant finish or a bold, eye-catching design, our team works closely with you to bring your vision to life. This personalized approach, combined with our commitment to quality and detail, makes us a provider and a partner in showcasing your brand's professionalism and values.
Learn About Our Products:
Folder Designs – Find inspiration within our design gallery featuring talented graphic designers.
Folders 101 – Become a more informed consumer of presentation folder printing.
Report Covers 101 – Read helpful resources to get the most out of your report covers.
Binders 101 – Learn the best ways to design and utilize custom 3-ring binders.
- Our Quality
- Reseller Program
- Free Samples
- Shipping Protection
- Our Clients
- Testimonials
- Design Services
- Design Gallery
- Design Freebies
- Design Templates
- Die Cut Templates
- Imprint Methods
- Paper Stocks
- Paper Coatings
- Cool Extras
Sitemap | Terms of Use | Privacy Policy | Replacements & Refunds © 1999-2024 CompanyFolders.com - All Rights Reserved
Acceptable Payment Methods:
Hi, we're Easy Pocket Folders.
We make custom presentation folders
For business professionals, contractors, churches, and more..
Not sure where to start? Let's talk: email , chat , or call: (800) 346-3063
These are the custom folders that businesses and organizations like you are ordering:
We believe that ordering custom presentation folders for your business should be easy..

- No set-up fees or hidden charges
- Low order minimums
- The price you see is the price you pay —no waiting for a quote
- Buy in bulk with quantity volume pricing
- FREE ground shipping on orders $300+
Or let's talk: Chat with a team member or call us: (800) 346-3063
Check out these time-tested customer favorites:

Welcome Folders
Welcome folder designs for churches, HR, and property managers.
Shop Welcome Folders

Low-Cost Budget Folders
Our basic white budget folders are the best value in pocket folder printing.
Shop Budget Folders

Embossed Pocket Folders
See how this subtle personalization technique creates memorable folders with your company logo.
Learn about embossed folders
Are you a small business owner? You might like these:

Small Quantity Pocket Folders
Need low-minimum custom folders? We've got you covered. Our small quantity pocket folders come in 11 paper stock colors (including 5 recycled paper options).
- Low order minimum—just 50 folders
- Your logo is foil stamped on the front cover
- 9" x 12" folder with two 4" pockets—business card slits included for free
Pictured: Ivory Gloss with Black Foil imprint (left), Black Gloss with Metallic Gold Foil imprint (right)
We make more than folders. Check out these notepad & document pouch solutions:
Experience the easy pocket folders difference.

“We want to thank Easy Pocket Folders for creating a great presentation and notepad folder for us. Our marketing workshop participants now have a place to take down all the fantastic marketing tips we give them!” – Leah H., Vision Force Marketing
What they ordered: Custom Printed Mini Padfolio
“Very professional company, excellent service, and great product. We own a dealership in Jupiter and use them to give our customers their car buying documents.” –Natalie G., Classic Cars of Palm Beach
What they ordered: Printed Mini 6" x 9" Pocket Folder

Most Popular Products

Custom Printed Document Pouch – 3 Sizes

9" x 12" Printed Presentation Folder – White Paper

Automotive Document Pouch

6" x 8-¾" Presentation Folder – Printed
Learn more about Easy Pocket Folders
Pocket Folder Notes From the Blog
Get custom folder design ideas, foil stamped folder tips, and branding advice from your favorite pocket folder printer.

How to Tell Custom Folder Paper Finishes Apart
Do you know the difference between laid, linen, and felt paper? If not, you're not alone.

Church Folders: A Great Addition to Your Welcome Ministry
Why do so many churches want to add welcome folders to their visitor package?

5 Practical Ways Your Brand Can Use Info Packets for Kits
If you're sending kits to clients or event guests, share your brand story in an info pack.

What's More Eco-Friendly: Recycled or Non-Recycled Paper?
Are recycled pocket folders really "green"? Find out in this take on recycled vs. non-recycled paper.
From small community churches to Fortune 500 companies, we make custom pocket folders for groups and businesses of all sizes. We make ordering printed or foil stamped folders hassle-free with our user-friendly online checkout process, free proofs, and quick turnaround on custom folders.
See how we can make custom folders work for your business.
New Products

Custom Printed Document Sleeve
EPF Running Charges

Embossed 9" x 12" Pocket Folders

Splash Curved Pocket Folders
Newsletter signup.

Error: Can't read file, or Presentation cannot be opened
If you've arrived at this article because you got an error message that PowerPoint can't read a file or that the presentation cannot be opened, it's likely that Microsoft 365 has blocked the file for security reasons. You can unblock the file so it can be opened:
Open Windows File Explorer (Open Start in Windows and type File Explorer .)
Locate the problematic file on your computer.
Right-click the file and select Properties .
In the Properties dialog box, look for an Unblock button near the bottom right. If it exists, click Unblock , then click Apply , and then click OK to dismiss the dialog box.

Now, attempt to open the presentation again. Right-click the file in File Explorer and select Open .
Still having trouble?
If you're having a problem with PowerPoint that's not resolved here, please contact us for technical support.
For a discussion about why Microsoft 365 blocks files, read Block or unblock external content in Microsoft 365 documents .

Need more help?
Want more options.
Explore subscription benefits, browse training courses, learn how to secure your device, and more.

Microsoft 365 subscription benefits

Microsoft 365 training

Microsoft security

Accessibility center
Communities help you ask and answer questions, give feedback, and hear from experts with rich knowledge.

Ask the Microsoft Community

Microsoft Tech Community

Windows Insiders
Microsoft 365 Insiders
Find solutions to common problems or get help from a support agent.

Online support
Was this information helpful?
Thank you for your feedback.
IMAGES
VIDEO
COMMENTS
Make adjustments in their sizes and cropping too. You can also change the background color or add textures to your presentation folder sample, as well as add borders or frames. You can repeat the whole DIY process for any number of customized folders using a variety of presentation folder design examples.
The Importance of Presentation Folder Design. In the professional landscape, a presentation folder is more than a document holder — it's a branding powerhouse. With a creative design, presentation folders can make a great first impression, which is crucial in how your brand is perceived. Whether meeting potential clients, investors, or ...
Letter-Size (9×12) Presentation Folders - Starting at $0.41, letter-size presentation folders are sized at 9×12 inches so that they can comfortably hold paper of any size up to 8.5" x 11". Legal-Size (9×14) Presentation Folders - Starting at $0.59, legal size presentation folders are 9.5 x 14.5 inches in dimension and are made to fit ...
Designing and printing your presentation folders can be a bit tricky sometimes. In this video you'll learn the ins and outs of the Primoprint Presentation Fo...
Selecting Your Folder. Once you've decided what to put in your folder, then it's time to pick the right one. The right folder accommodates the materials you want to put in it and the messaging ...
Plus, this will make it easier to apply your design to a mockup template and incorporate it into your portfolio. 4-Color Process Letter Size Two Pocket Folder. Specifically designed for a folder printed with four-color process, this template is a great choice for colorful, cost-effective designs. 6×9 2 Pocket Small Presentation Folder
6. Make use of visual texture. You don't necessarily have to use textured stock or embossing to give your presentation folder some visual texture. Notice how The Libre Initiative used a printed pattern to create the illusion of a snakeskin texture (even though the folder itself is actually smooth). Texture gives your design some visual ...
Make sure your design meets the printer's specifications for file type, resolution, and color mode. Select your options. Choose the size, paper stock, and printing options you want for your presentation folders. Some common printing options include full-color printing, spot UV, foil stamping, and embossing.
Blind embossing is when you use embossing alone to create your design, which gives your folder an elegant, sophisticated look. 8. Debossing. Debossing is like the identical twin cousin of embossing - it's the same process, but in reverse. Instead of the imprint popping out at you, it's depressed directly into the page.
Printing Recommendation: Presentation Folder Printing - Select from over 100 styles of custom printed folders starting as low as 19¢ each, including free shipping and a lifetime warranty. Each is fully customizable with a variety of stocks, coatings, foils, imprint methods and more.
Step 2: Edit and format a presentation. You can add, edit, or format text, images, or videos in a presentation. Insert and arrange text, shapes, and lines; Add, delete & organize slides; Add animations to a slide; Step 3: Share & work with others. You can share files and folders with people and choose whether they can view, edit, or comment on ...
Free Google Slides theme, PowerPoint template, and Canva presentation template. Folders are very useful when it comes to organizing classes, whether you are a student or a teacher. Today we bring you a digital and interactive version of them. You will love its colorful design, full of illustrations that will bring joy to your notes. In the ...
Add a section. Right-click between slides and select Add Section. An Untitled Section is added in the thumbnail pane, and the Rename Section dialog box opens. Type a name in the Section name box. Select Rename. To collapse a section, click the triangle next to the section name. The numeral by the section name shows the number of slides in that ...
This tutorial covers how set up a presentation folder in Adobe Illustrator for offset printing.View this tutorial and see examples at Clubcard.tv here: http:...
When you create a presentation and then save it as a PowerPoint template (.potx) file, you can share it with your colleagues and reuse it again. To create a template, you'll need to modify a slide master and a set of slide layouts. Choose from thousands of free templates to download at Microsoft templates. Windows Web.
Design and print custom presentation folders at 1800businesscards.com. In our online design center you can add your own company logos or images, or choose im...
Make It Your Own. When ordering folders, you will have a few customization options. You can select only to have one pocket, which you have the opportunity to include on the left or the right side. You can also choose to have business card slits on both pockets or just one. When asked if you want them on the left or right side, think about how ...
To do that, simply go up to the Home tab and click on New Slide. This inserts a new slide in your presentation right after the one you were on. You can alternatively hit Ctrl+M on your keyboard to insert a new blank slide in PowerPoint. To learn more about this shortcut, see my guide on using Ctrl+M in PowerPoint.
Keep it organized and professional with custom presentation folders. 3 size options. Multiple paper stock options. Foil accent upgrade available. Customizable pockets. Included business card slot. Quantities from 100 to 10,000+. Sleek, cohesive branding Uniquely crafted with your logo and look, our custom folders offer a seamless blend of style ...
Our vast array of customization options, including a diverse range of coatings, paper stocks, and die-cut design elements, ensures that your presentation folders are functional and an extension of your brand's identity. Whether you need a subtle, elegant finish or a bold, eye-catching design, our team works closely with you to bring your vision ...
Start by organizing all the content for the presentation into a folder on your desktop. Include all the graphics, photos, video clips, audio bites and any brand assets. Create a document with all the written content and make notes on what the audio will be. For a voiceover, draft a script.
#Folder #Presentation_Folder #Folder _Design #A4_Folder #Print_Folder#illustrator #Folder_Illustrator #DesignitinstituteToday Illustrator Tutorial, I will s...
These are the custom folders that businesses and organizations like you are ordering: 9" x 12" Printed Presentation Folder - White Paper. $3.41. Recycled Kraft 9" x 12" Folders - Printed. $4.32. Uncoated Smooth Recycled Paper - 9" x 12" Foil Stamped Presentation Folder. $3.37. 6" x 8-¾" Presentation Folder - Printed. $2.75.
Open Windows File Explorer (Open Start in Windows and type File Explorer .) Locate the problematic file on your computer. Right-click the file and select Properties. In the Properties dialog box, look for an Unblock button near the bottom right. If it exists, click Unblock, then click Apply, and then click OK to dismiss the dialog box.
Presentation folders, documents folders, pocket folders are the perfect choice if you want to use something stylish to present information.Our standard range...